DEUTSCH ESPAÑOL ENGLISH PORTUGUÊS FRANÇAIS NORSK NEDERLANDS DAB200
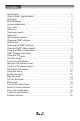
Contents Introduction .. . . . . . . . . . . . . . . . . . . . . . . . . . . . . . . . . . . . . . . . . . . . . . . . . . . . . . . . . . 2 What is DAB+ Digital Radio?. . . . . . . . . . . . . . . . . . . . . . . . . . . . . . . . . . . . . . . . . . 2 Setting up.. . . . . . . . . . . . . . . . . . . . . . . . . . . . . . . . . . . . . . . . . . . . . . . . . . . . . . . . . . . . . 3 Backlit display. . . . . . . . . . . . . . . . . . . . . . . . . . . . . . . . . . . . . . . . . . . . . . . . . . . . . .
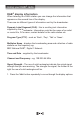
Welcome Introduction Thank for purchasing DAB + & FM stereo radio. With the characteristic of quick and easy setup and information display, our product also has the following features: * Backlit inverse display * 2 x 1.
Product set up Where to put your radio It is important that you note and follow the tips on where the radio should be situated. * On a flat and stable surface * Within 1.
Product set up note the ‘+’ and ‘-’ markings are in the correct way. Replace the battery cover, making sure it ‘clicks’ shut. If used continuously on battery power, your radio has an approximate 15 hours of working life when using good quality batteries. When the battery power is low, an icon will appear in the top right of the display. Please switch off the radio and replace the batteries.
Your radio Power Vol. + Vol. Info. Scroll up Enter Scroll down Press and release to power on Press and release to power off Mode Press to switch between DAB+ and FM modes DAB+/FM presets Backlit display Stereo speakers Telescopic aerial Mains power socket Power on/off switch Headphone socket Battery compartment (underneath) Requires 4 x 1.
Using your DAB+ radio Switch on Slide the power switch to ‘On’, the display will switch on and ‘Welcome to Digital Radio’ will be displayed. Your radio will automatically scans for DAB+ radio stations. A progress bar will show the progress of the scan and the number of stations found will also be displayed. When the scan ends, your radio will select the first available station and begin to play. Stations are listed in numerical and then alphabetical order by default.
Using your DAB+ radio Changing DAB+ stations 1. If the system is not set in DAB+ mode, press the ‘Mode’ button to go to DAB+ mode. 2. Press the or key to scroll through the stations. The stations are listed in numerical and then alphabetical order. 3. When the station that you would like to listen to is displayed, press the ‘Enter’ button. “Tuning...” will be displayed whilst your DAB+ radio tunes to your selected station.
Using your DAB+ radio 3. Press the ‘Enter’ button to start a local search for stations. The display will change to ‘Scan Services, Quick Scan’. A progress bar will show the progress of the scan and the number of stations found during the scan will also be displayed. A local scan takes approximately 10 seconds. 4. If you are using your DAB+ radio outside of Germany, then press and hold the ‘Enter’ button for 2 seconds (at Step 3) to begin a wider, national and local scan (Full Scan).
Using your DAB+ radio DAB+ display information When listening to a DAB+ station you can change the information that appears on the second line of the display. There are six different types of information sent by the broadcaster. Dynamic Label Segment (DLS) - this is scrolling text information supplied by the broadcaster. Information could be the name of an artist or music title, DJ’s name, contact details for the radio station etc. Program Type (PTY) - such as ‘Rock’, ‘Pop’, ‘Talk’ or ‘News’ .
Using the FM radio FM Radio Mode In FM mode, you will see ‘FM’ to the far right of line 1 of the display together with a radio frequency eg: 89.60MHz. When your radio is in FM mode it can receive Radio Data System or ‘RDS’ information if this is being transmitted by the broadcaster. RDS information includes the station name, detail about the programme and the current time.
Using the FM radio 1. Tune your radio to the station that you want to preset (see Tuning to a FM station above). 2. Press ‘Preset’. The bottom line of the display, showing the number of the preset location will flash. 3. Press the or button to scroll through the numbered preset locations (1-10). Press and hold ‘Preset’ for 2 seconds to store the station to a preset location. ‘PXX Saved’ where ‘XX’ is the number of the preset location is displayed.
Using the Alarm Setting the alarm Note: Ensure that your radio has picked up the correct time and date from the radio signal before you set an Alarm. Repeatedly press the ‘Info’ button until the time and date is displayed. There are 2 alarm settings available. 1. In DAB+ press and hold "Info" button until "Station Sort" appears; In FM, press and hold "Info" until "Alarm Set" displays. 2. In DAB+ repeatedly press the ‘Info’ button until ‘Alarm Set’ is displayed. Press ‘Enter’ to select. 3.
Using the Alarm Tune off the alarm Follow steps 1 to 4 and scroll to ‘OFF’. Press ‘Enter’ to select. Sleep timer You can set your radio to turn off automatically using the Sleep timer. You can select from between 15 to 90 minutes for the sleep time. 1. Press and hold the ‘Info’ button until ‘Station Sort’ is displayed. 2. Repeatedly press the ‘Info’ button until ‘Sleep Set’ is displayed. Press ‘Enter’ to select. 3. Press the or button to scroll to ‘ON’ and press ‘Enter’ to select. 4.
Simple solutions If you are experiencing problems with your radio, there are some quick and easy checks that you can do, which may help to solve the problem. Radio reception is poor - Please check that the aerial is FULLY extended for the maximum signal strength and improved reception. - Try moving your radio to an alternative location to see if the reception improves. Please remember to scan for DAB+ stations again once you have moved your radio. See page 8.
General information Care and Maintenance Your radio is of superior design and manufacture and should be treated with care. The suggestions below will help you to enjoy this product and the benefits it brings for many years. - Keep the product and all its parts out of reach of children. - Keep it dry. Avoid exposure to precipitation, humidity and liquids which could all affect the product circuity. - Do not leave it in high temperatures as electronic devices and plastic parts may warp in heat.
Technical specification Technical specification Power adaptor: Batteries: Frequency range: Output 6V. Input 100-240V 50/60Hz 4 x LR14 (Size C) batteries or equivalent (not included). DAB FM Band lll, 174 MHz to 240 MHz 87.5 MHz to 108 MHz Headphone: Stereo socket 3.5mm diameter Software version If you call the helpdesk, they may ask you for the software version of your radio. To check the software version: 1. Press and hold ‘Info’ until ‘Station Sort’ is displayed. 2.