
Owners Manual

Note:
1. Make sure the ignition is turned off,
and disconnect the cable from the
vehicle batteryʼs negative (-)
terminal.
You never want electricity running
when you install this 2-DIN car
receiver.
2. Before installation, disconnect the
wire harness and the antenna.
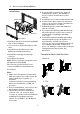
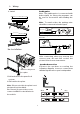
3. Attach the brackets on the both
sides of the car receiver with
screws as shown as the installation
drawing. Please buy from your
dealer according to the drilling of
holes size.
4. Consult with your nearest dealer if
installation requires the drilling of
holes or other modification of the
vehicle.
5. Install the car receiver in the dashboard.
6. Connect the wire harness & antenna
to the car receiver being carefully not
to pinch any wires or cables.
7. Install the plastic outer trim ring onto
the car receiver.
8. Reconnect the battery and run through
all of the options on this car receiver to
ensure that everything is working
correctly.
9. Particulars will vary widely depending
upon the kind of your car and the car
you intend to install it in. Please
choose the correct installation method
according to the actual situation of
your car. Always contact the car dealer
or manufacturer if you have any
questions.
4
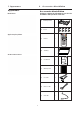
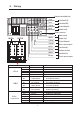
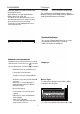
2. Accessories & Installation
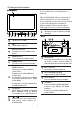
Dashboard
Installation
Trim Ring
Faceplate
Bracket
1.Put the 2 brackets to the left and right
side of the headunit.
2.Use screws to fix the brackets to the
unit.
3.Install the body chassis into the
dashboard via the 2 brackets.
4.Install the trim ring to the body
chassis.
5.Install the faceplate.
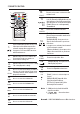
Note: Please note this faceplate is not
designed for detachable.
Disconnect / Connect the screen
connector ONLY for installation in
the vehicle.
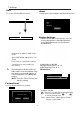
Faceplate Adjustable Position
1.Vertical
2. Tilt