Model/ Modèle/ Modelo ENGLISH ASSEMBLY INSTRUCTIONS INSTRUCTIONS D’ASSEMBLAGE INSTRUCCIONES DE ENSAMBLAJE -3516- N.B.: It is important to carefully read the instructions before beginning the assembly. Identify all the parts and hardware. We recommend that you assemble the unit on a carpeted floor to avoid scratches. To facilitate assembly 2 people are required. Keep the assembly instructions for future use and for warranty purposes.
WARNING Serious or fatal crushing injuries can occur from furniture tip-over. To help prevent tip-over: • Place heaviest items in the lowest drawers. • Do not set TVs or other heavy objects on the top of this product. Never allow children to climb or hang on drawers, doors, or shelves. • Never open more than one drawer at a time. Use of tip-over restraints only reduce, but not eliminate, the risk of tip-over.
CUSTOMERS SERVICE/ SERVICE À LA CLIENTÈLE/ SERVICIO A LA CLIENTELA If you have any difficulty assembling this unit, or to order replacement parts, do not hesitate to contact us. Do not return any parts to the store, find the number(s) of the part(s) in the “Exploded view” or the “Hardware list”, and CALL our customer service ! Si vous éprouvez des difficultés à assembler les pièces, ou pour commander des pièces de remplacement, n’hésitez pas à communiquer avec nous.
HOW TO USE THE DOWEL(-144-) AND THE ECCENTRIC NUT(-158-) EXEMPLE D'UTILISATION (GOUJON(-144-) ET ECROU(-158-)) EJEMPLO DE UTILIZACIÓN (CLAVIJA(-144-) Y TUERCA EXCÉNTRICA(-158-) FRANÇAIS ENGLISH A. Fully insert the “quick fit dowel -144-” B. To withdraw the “quick fit dowel -144-", do not use any tool, unscrew it with the hand. A. Introduzca el “clavija -144-” hasta el fondo A. Insérer jusqu’au fond le «goujon à B. Pour retirer le «goujon à enfoncer -144-», D.
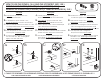
-EXPLODED VIEW (Piece numbers for reference)FACING THE UNIT -VUE EXPLOSÉE (Numéros des pièces pour références)FACE AU MEUBLE -VISIÓN DE CONJUNTO (Número de las piezas para referencia)FRENTE AL MUEBLE A P1 RIGHT SIDE CÔTÉ DROIT LADO DERECHO F S(5) T(5) N F1 C1 U(5) R1 S(5) C R(4) LEFT SIDE CÔTÉ GAUCHE LADO IZQUIERDO F1 P - All parts, except for U(5) are marked out or labelled on one side.
CODE QTY HARDWARE DESCRIPTION CODE QTE DESCRIPTION DE LA QUINCAILLERIE CODIGO CANTIDAD DESCRIPCION DE LA FERRETERÍA CODE QTY HARDWARE DESCRIPTION CODE QTE DESCRIPTION DE LA QUINCAILLERIE CODIGO CANTIDAD DESCRIPCION DE LA FERRETERÍA -6- 4 FELT FEUTRE FIELTRO -176- 2 DECORATIVE WASHER RONDELLE DÉCORATIVE DECORACION PARA MANIJA -26- 2 KNOCKING HANDLE POIGNÉE À BATTANT MANIJA ALDABA -177- 4 HANDLE POIGNÉE MANIJA -90- 22 3/4” COMMON NAIL CLOU À TÊTE 3/4” CLAVO DE 3/4” CON CABEZA -199- 1 SECURI
* TOOLS REQUIRED/OUTILS REQUIS/HERRAMIENTAS REQUERIDOS: 1 Required/Requis/Requerido -231X8 - STANDARD/PLAT/PLANO - PHILLIPS/ÉTOILE/ESTRELLA F1(2) OR/OU/O - ROBERTSON/CARRÉ/CUADRADO N P - Insert -231- into P, F1 and N. - Insérer -231- dans P, F1 et N. - Insertar -231- en P, F1 y N.
2 Required/Requis/Requerido -92- -92- -92- X20 (CL)-207- -92- -92- -92- -92-92- -207(CL) -92- -207- -92- -207-207(CL) (CL) (CL) (CL) -207C Pares -92- -92-92- -207- Pairs X5 Paires -92-92- -92-92- -207- -92- -207-92- -207- (CR) (CR) (CR) -207(CR) C1 -207(CR) - With -92-, screw -207-(CL) on C and -207-(CR) on C1. - Avec -92-, visser -207-(CL) sur C et -207-(CR) sur C1. - Con -92-, atornillar -207-(CL) sobre C y -207-(CR) sobre C1.
3 Required/Requis/Requerido -144X12 4 Required/Requis/Requerido X3 -299- -299- A -299-299- C A C1 - Insert -144- into A, C and C1. - Screw P1 to A with -299-. - Insérer -144- dans A, C et C1. - Visser P1à A avec -299-. - Insertar -144- en A, C y C1. - Atornillar P1 en A con -299-.
-158- H HA U O -158- X12 /FL VERS LE TREC O/OW TOWARD S R HE ACIA EL HU E AR C 5 Required/Requis/Requerido E HOLE/FLÈC TH F1(2) C N C1 P - With thumb, insert -158- into C, C1, P, F1 and N. (Make sure the little arrow is towards the insertion hole.) - Avec le pouce, insérer -158- dans C, C1, P, F1 et N. (Assurez-vous que la flèche pointe vers le trou d'insertion.) - Con el pulgar, insertar -158- en C, C1, P, F1 y N. (Asegurarse que la flecha esté orientada hacia el hueco de inserción.
6 7 -158correct/ correcto incorrect/ incorrecto -158incorrect/ incorrecto correct/ correcto C C P N F1 F1 - Insert F1 into C. - Tighten right -158- little more than a half turn on F1 to lock them together. - Insert P and N into C. - Tighten right -158- little more than a half turn on P and N to lock them together. - Insérer F1 dans C. - Tourner -158- un peu plus qu'un demi tour à droite sur F1 pour les barrer ensemble. - Insérer P et N dans C.
8 -158correct/ correcto P N F1 F1 C1 - Insert C1 into P, F1 and N. - Tighten right -158- little more than a half turn on P, F1 and N to lock them together. - Insérer C1 dans P, F1 et N. - Tourner -158- un peu plus qu'un demi tour à droite sur P, F1 et N pour les barrer ensemble. - Insertar C1 en P, F1 y N. - Girar -158- un poco màs que una media vuelta hacia la derecha sobre P, F1 y N para trancarlos juntos.
9 -158correct/ correcto incorrect/ incorrecto A C C1 - Insert A into C and C1. - Tighten right -158- little more than a half turn on C and C1 to lock them together. - Insérer A dans C et C1. - Tourner -158- un peu plus qu'un demi tour à droite sur C et C1 pour les barrer ensemble. - Insertar A en C y C1. - Girar -158- un poco màs que una media vuelta hacia la derecha sobre C y C1 para trancarlos juntos.
10 Required/Requis/Requerido X4 X2 X2 -160- -160-151P -6- -151- -6-6- -6Pull the paper off. Enlever le papier. Quitar el papel. - Screw -160- through P into -151-. - Stick -6- under C, C1 and -151-. -6- - Visser -160- à travers P dans -151-. - Coller -6- sous C, C1 et -151-. - Atornillar -160- a través P en -151-. - Pegar -6- debajo C, C1 y -151-.
11 Required/Requis/Requerido -90X22 F -90- -90- -99X2 -99- -99- -90C1 F1 A C - Make sure the unit is level (squared). - In beginning by the corners, nail F to A, C and C1 with -90-. - Screw -99- through F1 into F. - Assurez vous que l'unité soit au niveau (à l'équerre). - En commençant par les coins, clouer F à A, C et C1 avec -90-. - Visser -99- à travers F1 dans F. - Cerciorarse de que la unidad se encuentre a nivel. - Comenzando por las esquinas, clavar F a A, C y C1 con -90-.
O/OW TOWARD S R -533- /FL VERS LE TREC ACIA EL HU E AR C -516- C HE 12 TH Required/Requis/Requerido -229- X8 -533- X4 H HA U O HARDWARE / QUINCAILLERIE / FERRETERÍA E HOLE/FLÈ -533-229- -533- S Each contain Chacun contient Cada uno contiene -229- -533-229-533- S #535 #533 4X 4X -229#229 8X 5x - Insert -229- and -533- into S. - Insérer -229- et -533- dans S. - Insertar -229- y -533- en S.
13 Required/Requis/Requerido -535X4 5x -535- Drawers Tiroirs Cajones 14 -533correct/ correcto incorrect/ incorrecto 5x Drawers Tiroirs Cajones -535- T S -535- S -535- R / R1(x4) R / R1(x4) - Insert -535- into R, R1 and T. - Insert S(2) into R, R1. - Insérer -535- dans R, R1 et T. - Insérer S(2) dans R, R1. - Insertar -535- en R, R1 y T. - Insertar S(2) en R, R1.
15 5x 16 Drawers Tiroirs Cajones 5x Drawers Tiroirs Cajones -533correct/ correcto incorrect/ incorrecto T U S S S U R / R1(x4) S - Slide U (not printed) into the grooves of S(2), R, R1. - Insert T into S(2). - Glisser U (non inscrit) dans les rainures de S(2), R, R1. - Insérer T dans S(2). - Deslizar U (no escrito) en las ranuras de S(2), R, R1. - Insertar T en S(2).
17 Required/Requis/Requerido -92X4 -92- -92- -208- (DL) Pairs 1 Paires Pares -208- -92- S -92- -92- -129X2 4x Drawers Tiroirs Cajones -109- R S -129- -92- -129-109- 5x -177- X1 -177- -208- (DL) -208- (DR) -109- X2 -208- -92- (DR) 18 Required/Requis/Requerido Drawers Tiroirs Cajones - With -92-, screw -208-(DL) on S. - With -92-, screw -208-(DR) on S. - Screw -177- to R with -129-. - Stick -109- on R. - Avec -92-, visser -208-(DL) sur S.
19 Required/Requis/Requerido -26X2 20 -Safety bracket installation -Installation de l’équerre de sécurité -Instalacion del escuadra de seguridad -109- X2 Wall/ Mur/ Muro -129X2 -176X2 -26-26- -176-109- -116- -176- R1 -199- -129- -129-109- - Screw -26- and -176- to R1 with -129-. - Stick -109- on R1. - Visser -26- et -176- à R1 avec -129-. - Coller -109- sur R1. - Atornillar -26- y -176- en R1 con -129-. - Pegar -109- sobre R1.
- Insert the drawers. - Insérer les tiroirs. - Insertar los cajones.
5 YEAR LIMITED WARRANTY GARANTIE LIMITÉE DE 5 ANS 1. South ShoreTM Furniture provides the original buyer with a warranty covering “defects” on furniture parts and workmanship for a period of 5 years from the date of purchase. 2. The word “defect” as used in this warranty is defined as any imperfection that may impair the intended use of the product. 3.