
Guide


Page 45
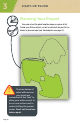
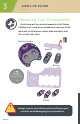
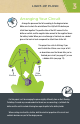
LIGHT-UP PLUSH
3
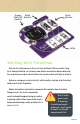
LIGHT-UP PLUSH
OFF
ON
Off On
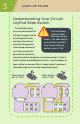
+
+
+
+
+
+
+
+
+
–
+
–
+
–
+
–
Slide
Switch
Button
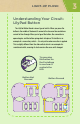
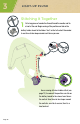
Arranging Your Circuit
Arrange the pieces on the felt according to the diagram below.
Make sure to check the orientation of the LilyPad LEDs before you
stitch them together. The positive tabs of the LED connect to the
button or switch, and the negative tabs connect to the negative tab on
the battery holder. When your circuit design is finalized, use a dab of
glue on the back of each component to attach them to the felt.
This project has a lot of stitching. If you
want to hide the stitches, use a layer of felt
or decorations over the thread after you’ve
finished your circuit (see page 51), or use
a hidden stitch (see page 13).
For this project, we’ll be arranging the pieces slightly differently from on the E-Sewing
ProtoSnap. To avoid any crossed conductive thread, we are connecting (+) with both the
button and the switch instead of having two separate paths to the battery holder.
When creating circuits with e-textiles, both the electrical properties of the circuit and
aesthetic decisions are part of the design process.