
User's Manual


7
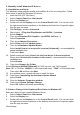
5. Manually install Windows XP drivers
5.1 Installation and Setup
The Windows setup program installs and modifies all of the necessary files. Follow
these steps to install the Windows XP drivers.
1. Insert the DISC (CD Title Driver).
2. Select Control Panel from Start menu
3. Select the Display icon
4. Double-click on the Display icon in the Control Panel folder. You can also click
the right mouse button anywhere on the desktop and select the Properties option
form the pop-out menu.
5. Click Settings, and then Advanced
6. Now show s [Plug And Play Monitor and NVIDIA…] window
Select Adapter
7. Then show Standard PCI Graphics… (or NVIDIA GeForce… )
Select Properties
8. Then show Adapter Properties …
Select Driver and click Update driver…
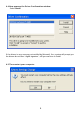
9. Then show Hardware Update Wizard
Select Install from a list or specific location (Advanced) – recommended for
saving installation time
Then select Next.
10. Default setting will select Search for the best driver in these locations
Please check Include this location in the search – recommended for saving
installation time
Select Browse
11. Then show Browse for Folder
Select E:\drivers\ NVIDIA\7200\winXP (If 7200 not exist, use 7X00 instead)
Note: “E:”-> CD Drive, “NVIDIA”-> VGA chip brand name, “7200”-> VGA model name
Then select OK and then click Next
12. If no problem occur, system will start to install the driver
13. Then show Completing the Hardware Update Wizard
Select Finish
14. Close the Adapter Properties window
15. Then show System Settings Change
Select OK, System will restart automatically.
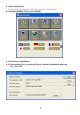
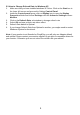
5.2 How to Change Color Depth and Resolution in Windows XP
Make sure that you have installed Windows Driver.
1. Select Control Panel from Start menu
2. Select the Display icon
3. Double-click on the Display icon in the Control Panel folder. You can also click
the right mouse button anywhere on the desktop and select the Properties option
form the pop-out menu.
Click Settings