
Installation


8 of 17
04/09 92-2692-R9
Step 3: Solenoid Wall Mount Instructions-
a. After hoses are connected, and the wall bracket is in place, securely tighten the screws on the wall in a
convenient place.
b. The IR Sensor comes standard with Battery powered operation. The product can be purchased also with an
option that has AC/DC transformer and an Adapter that goes into Sensor in place of batteries.
Step 4: Unit Flushing-
a. After the assembly is complete, turn the hot and cold water
supplies on and check for leaks.
b. Activate the faucet to flush both the hot and cold sides of fixture.
Check all connections for leaks.
c. Install the aerator into the faucet outlet.
d. Activate faucet and then activate the eyewash by pulling
the handle and assure proper spray formation and no leaks.
OPERATION
Faucet- Place hands in IR sensor zone (Item 10) to activate
the faucet. The sensor housing, located to the left of the faucet,
contains a sensor module. The sensor utilizes a 6 – 8 inch long
invisible infrared sensing beam. For optimal use of the faucet,
angle the sensor housing window between 15º and 25º toward
the faucet stream from the center location.
Temp. Control - To achieve the desired temperature, rotate
the above counter mixer to desired comfort zone.
Eyewash- The eyewash is activated by pulling its handle out.
Once the eyewash is activated, the eyewash caps will flip off
and water will come out of the aerated spray heads. The eyewash
will continually discharge water until the handle is manually pushed
back into the off position. The flow of spray heads is controlled by
built-in flow controls. Each spray assembly is tested and aligned in the factory.
NOTE:
On the rubber washer under the Sensor Unit there are 2 marks ( ) at 20° apart.
Use them to orient the Sensor Lenses at 20° inclination as a start median suggested point.
From that point you can further adjust the lenses inclination according to your specific needs.
TESTING PROGRAM
ANSI Z358.1 requires that all emergency equipment shall be tested weekly to verify proper operation and
inspected annually to assure conformance with ANSI Z358.1 requirement.
MAINTENANCE (CARE and CLEANING)
Valves are washer-less and require no routine maintenance. The gleaming finish of your SPEAKMAN
Eyesaver
®
faucet can be cleaned by using mild soap and warm water. Rinse thoroughly and dry immediately
with a soft, clean cloth for best results.
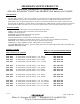
TOP view of SENSOR
6”- 8”
Focal distance
15°- 25°
IR Senso
r