
Owner's Manual
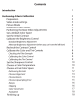
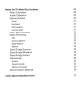


Table Of Contents
- Users Guide
- Table of Contents
- Introduction
- Performing a Basic Calibration
- Preparation
- Video Mode Settings
- Picture Mode
- Advanced Video Modes
- Performing the Basic Video Adjustments
- Set a Default Color Space
- Set Initial Contrast
- Calibrate the Brightness Control
- Recheck the Contrast Control
- Calibrate the Color and Tint Controls
- Set the Sharpness Control
- Choose a Color Temperature
- Choose a Final Color Space
- Finishing Up
- Notes On the Main Disc Sections
- Color Space Evaluation Form
- Scan of Disc Storage Case
- Scans of Discs
- Scan of Filter

Performing A Basic Calibration
Using the tests
on
the Spears
and
Munsil
High
Definition Benchmark to adjust
your display
is
not
difficult
and
performing the basic calibration should take
30
minutes
or
less. It's
important
to be methodical
and
careful while performing the
adjustments,
and
to understand
what
to look for in each test. Before beginning you
may
want
to review the detailed background articles
about
the basic adjustments
found
on
the Spears
and
Munsil web site. Reading these
is
not
required to get
a good picture,
but
it's helpful for understanding the theory behind each test
pattern.
Preparation
Perform
the calibration
under
the same lighting conditions you generally use
to
watch quality material like movies. In general, video looks best when the room
is
as
dark
as
possible,
but
it's most
important
to
duplicate the real lighting conditions
you will be watching under.
If
there are windows in the room
that
let in sunlight
and
you
tend
to
watch movies at night,
then
the calibration should also be
performed at night.
If
your display has multiple picture memories
and
you watch
the display
under
multiple lighting conditions, it may be worthwhile
to
perform
the calibration separately for each
of
the lighting conditions
and
assign each one to
a different picture memory.
When
you're ready to perform the calibration, first
turn
on
your display
and
Blu-
ray player
and
let the system warm
up
for 15 minutes
or
so, preferably playing
some real material. The
demo
footage
on
the Spears
and
Munsil disc
is
a good
choice,
but
most movies work fine
as
well.
While
it's warming up, gather the following materials:
• Pen
and
paper
•
The Spears
and
Munsil disc (if it's
not
already
in
the player),
and
the booklet
•
The original remote for the Blu-ray player (we recommend
not
using a universal
2