
4-CHANNEL TRIPLEX NETWORK DVR DVR-T4IP USER MANUAL
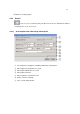
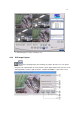
Table Of Contents
- 1. SYSTEM OVERVIEWS
- 1.1 Packing list
- 1.2 Features & specifications
- 1.3 Name, function & connections
- 1.4 INSTALLATION
- 2. Basic operation procedures
- 3. Main Setup screen
- 3.1 Camera Setup menu
- 3.2 Record Setup menu
- 3.3 Event Setup Menu
- 3.4 Playback Setup
- 3.5 Display Setup screen
- 3.6 Network Setup screen
- 3.7 System Setup screen
- 3.8 Backup
- 3.9 System Information
- 3.10 Search Menu
- 3.11 PLAYBACK
- 3.12 Miscellaneous Menu
- 4. DVR-T4IP Client program
- 4.1 Overview of DVR-T4IP
- 4.2 Installation & execution of program
- 4.3 RAMS (Remote Access & Monitoring System)
- 4.3.1 Screen and button
- 4.3.2 Connecting to DVR
- 4.3.3 Channel On/Off
- 4.3.4 UniPlayer link
- 4.3.5 Full-screen display
- 4.3.6 Program setup
- 4.3.7 DVR recording
- 4.3.8 DVR playback search
- 4.3.9 DVR playback search
- 4.3.10 DVR backup
- 4.3.11 DVR Setting
- 4.3.12 Still image Capture
- 4.3.13 Watermark insertion
- 4.3.14 Printing still image
- 4.3.15 Motion picture recording
- 4.3.16 D-Zoom
- 4.3.17 PAN/TILT, ZOOM/FOCUS
- 4.3.18 HDD Information
- 4.3.19 Check the program version
- 4.3.20 S/W upgrade of DVR
- 4.3.21 Close program
- 4.4 UniPlayer
- 4.4.1 Screen and button
- 4.4.2 Search
- 4.4.3 Searching by directory
- 4.4.4 Still Image Capture
- 4.4.5 Input water mark
- 4.4.6 Printing still image
- 4.4.7 D-Zoom Function
- 4.4.8 Moving picture file playback, playing, pause, temporarily pause, move by interval of frame, fast forward Playing
- 4.4.9 Water mark drawing
- 4.4.10 Panorama
- 4.4.11 Check the program version.
- 4.4.12 Close Program
- 4.5 MultiViewer
- 4.6 Quick Installer
- 5. Appendix
98
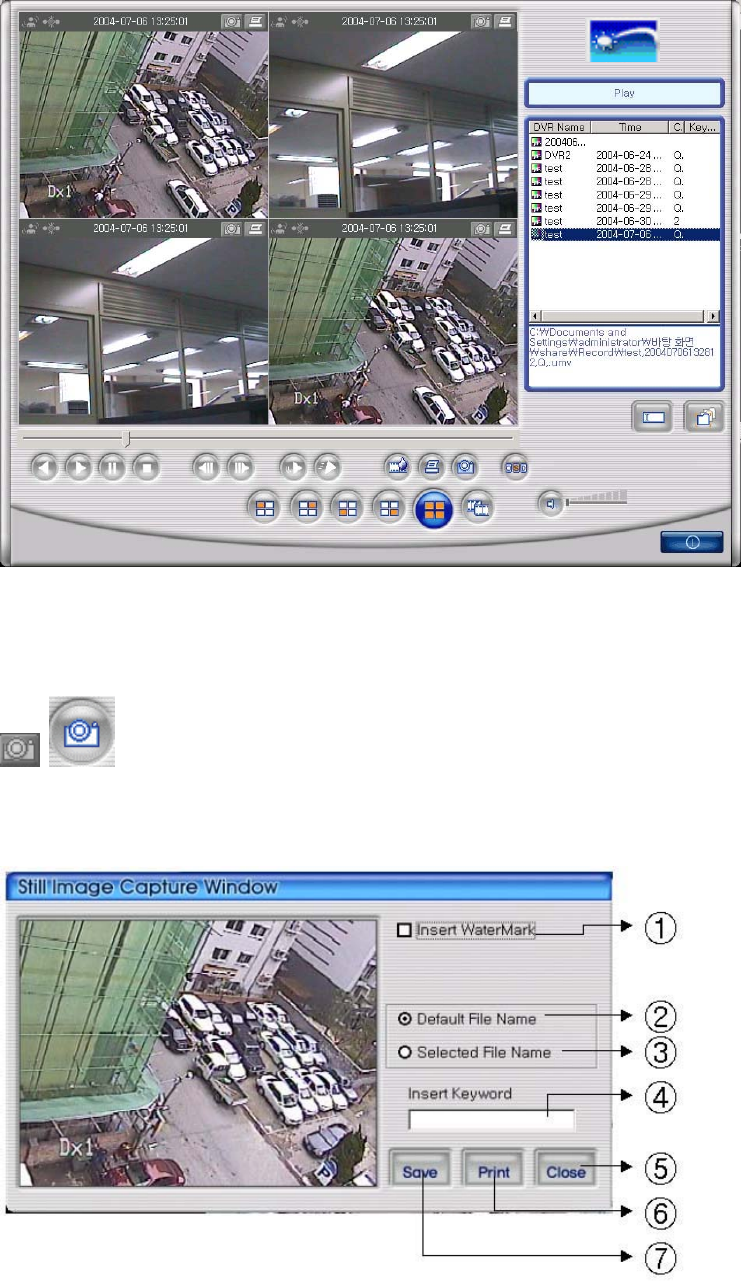
=> AVI file Playing screen by searching scene
4.4.4 Still Image Capture
Save replaying images into still image by capture. Besides users can capture
image by push capture button for each channel or push capture button at the foot of a screen.
Still image will be saved in a path of which is established in RAMS’s setup section screen