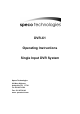
DVR-X1 Operating Instructions Single Input DVR System Speco Technologies 200 New Highway Amityville. NY 11701 Tel. 631-957-8700 Fax. 631-957-9142 www. specotech.
DVR-X1 User Manual Contents 1. Features………………………………………………………. 2 2. Specification…………………………………………………...3 3. Rear Panel Description……………………………………… 4 4. Function Key Description……………………………………. 5 5. Playback Mode……………………………………………….. 6 5.1 Play Mode……………………………………................6 5.2 Search……………………………………..................... 7 6. Recording Mode………………………………………………8 7. Menu Set Up………………………………………………….. 9 7.1 Enter Main Menu……………………………………..... 9 7.2 System Status…………………………………….......... 9 7.
DVR-X1 User Manual 1. Features Automatically detects NTSC/PAL. (Please connect the video source before powering the DVR-X1.) Digital recording replaces conventional time-lapse recorder. Video compression MJPEG. Motion detection recording. Various recording modes - continuous, schedule, motion detection and external sensor modes. One external alarm input and one output. Automatic recording after alarm is triggered. 1 channel audio recording. Quick and easy search for events by time, date or alarm.
DVR-X1 User Manual 2.
DVR-X1 User Manual 3. Installation Rear panel Power Supply: 12V DC,4A. VIDEO IN: Image signal input, connected to the video source. VIDEO OUT:“VIDEO OUT” is connected to monitor ”VIDEO IN”. VCR OUT:“VCR OUT” can be connected to the ”VIDEO IN” of a VCR. AUDIO IN:For a MIC connection. AUDIO OUT:Line Level for live and Audio playback. SENSOR/ALARM: There is a DB9 connector on the right side of the rear panel, which is connected to any external sensors and alarm output (Relay).
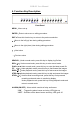
DVR-X1 User Manual 4. Function Key Description Front Panel MENU:Menu set up ENTER:Enter to sub-menu or editing procedure. EXIT:Press this function key to return to the previous selection. ←:Move to the left (up) item during editing procedure. →:Move to the right (down) item during editing procedure. +:Next value. -:Previous value. SEARCH:Under normal mode, press this key to display log file lists. REC< >:Under normal mode, press this key to enter record mode.
DVR-X1 User Manual 6
DVR-X1 User Manual 5. Playback Mode 5.1 Play Mode In normal or sequence mode, press key to enter the playback mode, or press key to enter the log files list (including: date, time), then press key or key to display image. Quick Image Search: Press key, for quick fast forward search image (x2, x4). Press key, for quick fast reverse image (x1, x2, x4). Press key once again to return to normal speed. Skip Search: Press key, to skip and pause images.
DVR-X1 User Manual 5.2 SEARCH According to date and time to perform searching function, press key to display the image below: Use <←>、<→> key to move the cursor (Highlight) up and down to the area to be modified, press <+>、<-> key to make changes. Year、Month: Enter the year / month by pressing <+> or <-> key to select the year / month. Day、Hour、Minute: Enter the above setting by pressing <+> and <-> key or <``> and <__> key.
DVR-X1 User Manual 9
DVR-X1 User Manual 6. Recording Mode Manual Recording:Under Normal mode, pressing the key will start recording and pressing the key will stop manual recording. Note: It takes 5 seconds to stop manual recording. For other functions including: Schedule Recording, Motion Detection Recording, Sensor Input Recording, please refer to Menu Setup. During recording, all items under the Main Menu may not be accessed to make adjustments, except System Status and the Recording Mode.
DVR-X1 User Manual 7. Menu Set Up 7.1 Enter Main Menu Press the
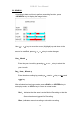
DVR-X1 User Manual 7.3 Date / Time When entering the main menu select Date / Time and press the key: Press <←>、<→> key to move the cursor DATE / TIME DATE FORMAT DATE Press <+>、<-> key to make changes ON TIME YY/MM/DD 02/01/01 ON 20:30:00 Press key to return to the previous menu. LOCATION RIGHT BOTTOM Press key to skip over the main menu (Image display). Time and date for the on-screen calendar and clock is set from this menu.
DVR-X1 User Manual a. b. c. d. e. f. LEFT TOP RIGHT TOP LEFT BOTTOM RIGHT BOTTOM TOP BOTTOM When recording, date / time will be stored together with the image. Please try and prevent the constant changing of date / time setup. Thus, to prevent any unnecessary error to occur.
DVR-X1 User Manual 7.4 Record Setting When entering the main menu, select Record Setting and press the key to enter the menu: Press <←>、<→> key to move the cursor Press <+>、<-> key to make changes Press key to return to the previous page. Press key to skip over the main menu (Image display).
DVR-X1 User Manual Stop : When the disk is full it stops recording (screen display disk full message warning). Audio In: ON :Audio recording “ON”. OFF:Audio recording ”OFF”. Record Time: Total Time:According to resolution, the HDD Capacity and the recording rate reflects the total available recording time. Remaining Time:According to resolution, the HDD Capacity and the recording rate reflects the remaining recoding time.
DVR-X1 User Manual 7.5 Record Mode In the Main Menu move the cursor toward Record Mode, press key to enter the recording mode display: RECORD MODE SCHEDULE RECORDING REC BEGIN / END OFF 20:00 / 08:00 MOTION DETECTION RECORDING REC BEGIN / END OFF 20:00 / 08:00 SEN GRID 3 SET SEN TYPE 3 NC SENSOR INPUT RECORDING REC OFF POST ALARM TIME BEGIN / END 20:00 / 08:00 : 10 SEC Press <←>、<→> key to move the cursor. Press <+>、<-> key to make changes.
DVR-X1 User Manual End : Ending time for recording. * Example: For 24H recording, the settings of the begin time must be the same as the ending time (enter 06:00 am – 06:00am) For other time settings, recording time from 08:00 am to 21:00 pm (enter 08:00 – 21:00). b. Motion Detection Recording: According to the schedule time you can set the camera for motion detection recording. REC: ON : For Motion Detection Recording “ON”. OFF: For Motion Detection Recording “OFF”.
DVR-X1 User Manual Press <←>、<→> key to move the cursor Press <+>、<-> key to switch ON/OFF the motion detection area. Press key to return to the previous page. Press key to skip over the main menu. c. Sensor Input Recording: According to the schedule time, to set the camera for sensor input recording. REC: ON : For Sensor Input Recording “ON”. OFF: For Sensor Input Recording “OFF”. * key does not work during Sensor Input Recording. BEGIN / END: Begin: Starting time for recording.
DVR-X1 User Manual (Sensor triggers the alarm and starts recording after 0.2 second) 2: 0.5 Sec. (Sensor triggers the alarm and starts recording after 0.5 second) 3: 1 Sec. (Sensor triggers the alarm and starts recording after 1 second) 4: 2 Sec. (Sensor triggers the alarm and starts recording after 2 second) 5: 5 Sec. (Sensor triggers the alarm and starts recording after 5 second) Sensor Type: NC → Normal-close sensor ( TTL level input ) Set to NC, to trigger the recording when the sensor has been opened.
DVR-X1 User Manual 7.6 Alarm Output In the main menu select Alarm Output, and press the key to enter the menu: ALARM OUTPUT SETUP BUZZER : OFF PERIOD : 01 MIN RELAY : ON PERIOD : 02 MIN Press <←>、<→> key to move the cursor Press <+>、<-> key to change the settings. Press key to return to previous page. Buzzer:Set “ON” to turn the internal buzzer on if a valid event occurs. Set “OFF” to mute the buzzer. Relay:Set “ON” to turn the relay on if a valid event occurs.
DVR-X1 User Manual 7.7 Video Loss Alarm In main menu, move the cursor to Video Loss Alarm and press the key to enter the Video Loss VIDEO LOSS ALARM ALARM ON Setup menu: Press <←>、<→> key to move the cursor Press <+>、<-> key to change the value Press key to return to the previous page Detection︰ Video loss display function exists on both Alarm trigger function ON/OFF. ON︰ Alarm trigger function “ON”. OFF︰ Alarm trigger function “OFF”. 7.
DVR-X1 User Manual 7.8.1 Set Password Move the cursor to Set Passwords. CHECK PASSWORD **** Press the key to enter the menu. Press <←>、<→> key to move the cursor. Press <+>、<-> key to change the SET PASSWORD password. Press the key again and the system will request the old password, and then the new password. After the ENTER NEW PASSWORD **** CONFIRM PASSWORD **** change press the key once more to confirm. 7.8.
DVR-X1 User Manual OFF : To hide the camera title 7.8.3 Video Quality Adjust camera brightness, contrast, color and chroma. BRIGHT 18 CONTRAST 46 CHROMA 32 SHARP 20 7.8.
DVR-X1 User Manual the hard disk. Press the key to return to the previous page. 7.8.5 Color Bar Color Bar is helpful to user in monitor settings. 7.8.6 Load Factory Default To load the factory defaults, please press “YES”, than press the key to complete the setup procedure. Press the key to return to the previous page.
DVR-X1 User Manual 8.