
Quick Start Guide
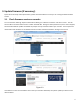

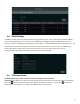
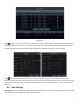
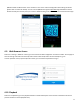
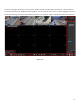
Table Of Contents
- 1.1 Check Unit and Accessories
- 1.2 Connections
- 2.1 Enter a password
- Note: You will be prompted to set a Password and security questions upon initial bootup. see Fig 2-1
- 2.2 Enter answers for two security questions.
- 3.1 Check firmware version on recorder
- 3.2 Updating Firmware
- 4. EZ Setup
- 4.1 General Settings – Date & Time
- 4.2 EZ Network Setup
- 4.3 UPnP Configuration
- 4.4 DDNS Settings
- 4.5 EZ Camera Setup
- 4.6 Disk Settings
- 4.7 Record Settings
- 4.8 QRCode for Remote App Viewing
- 4.9 Web Browser Access
- 4.10 Playback
- 5. EZ Search 2.0

11
QRCode. Enable the NAT function in the interface or set it in the network configuration after exiting the wizard
(please refer to manual for details). You can scan the QRCode through the Speco Blue App available for iOS and
Android to easily and securely view your cameras. Mobile viewing is also available on our SecureGuard client app.
4.9 Web Browser Access
Click Start→Settings→Network→NAT to go to the interface for NAT configuration and check “Enable”. Click “Apply” to
save the settings and make note of the QR code number under the QR code. Via Internet Explorer, go to
connect.specotech.cloud, input the QR code number, your username and password to login.
4.10 Playback
Click Start→Playback to go to the playback interface as shown below (click on the tool bar at the bottom of the live
preview interface to set the playback time).