
User Manual


tuned for the band to be tested.
¯ Connect Exciter to working Micro Controller via 16-way ribbon cable.
¯ Disconnect Exciter RF drive output CN 1 from PA.
Procedure:
1. Switch DC power on and check that the output voltage on pin 1 of IC5 is 5V +/- 0.2V
and that the output voltage on pin 1 of IC3 and IC8 is 8V +/-0.2V. Assert PTT and
check that the 8V is switched through to SKU-3.
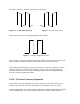
2. Check reference oscillator signal on center pin pad of CN3 is > 3V pk-pk.
3. Select mid channel. Connect comms test set RF input port to CN 1. Assert PTT and
check that Lock Detect (LD) on SKD-16 goes high indicating that the loop is locked.
Check that the power control volts on SKD-4 is > 10V ancl that the RF output on CN 1
is >300roW. In the channel screen on MXTOOLS adjust the power digipotentiometer
slider to 0 and check that the power control volts on SKD-4 goes to 0 and that the RF
power out drops to <lmW. Set digipotentiometer slider back to mid position.
4. Select lowest channel. Assert PTT, check that LD goes high and check that the VCO
tuning volts on SKD-14 is > 2V. Select highest channel. Assert PTT, check that LD
goes high and check that the VCO tuning volts on SKD-14 is <18V. Check that RF
output is >300mW in both cases.
5. Select mid channel. Assert PTT, note RF output carrier frequency and check that by
adjusting the Reference Oscillator Frequency digipotentiometer slider on the
MXTOOLS channel screen that the carrier frequency can be adjusted + and - 3ppm of
the nominal frequency.
6. Select mid channel. Assert PTT carry out steps 4.2.1.1 and 4.2.1.2 of the TX VF
alignment procedure below to check the function of the VCO and Reference oscillator
modulation inputs.
5.2.2. Receiver Module
Test Equipment:
§ Tested MX800 with Receiver removed
§ Tested RX VCO board (in wanted band)
§ PC with MXTOOLS software
§ RF Communications test set
§ Spectrum analyser with tracking generator
§ Multimeter
§ High frequency (89.545MHz) pick up loop.