
Instruction Manual

29
• Unless already done, please follow all the steps described
in section General Parameters on page 16 before
proceeding with the steps below.
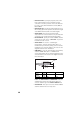
• Still on the Rover Setup page, in the Serial Port x pane
corresponding to the port you want the receiver to use (A,
B or F), set the following parameters:
– Connection: Choose the name of the corrections
receiver device connected to the port. As a general
rule, choose “None/Cable” for any external corrections
receiver connected to that port. But if the device used
is a license-free radio, type ARF7474B EU or
ARF7474A NA, choose specifically this type of radio.
– Port settings (Baud Rate, Mode, RTS/CTS): Set the serial
port to match the external device connected to it.
Setting these fields will update the corresponding
fields on the Serial Ports sub-menu page
• At the bottom of the page, in the Differential Port pane,
select the Automatic option to let the receiver detect the
incoming differential stream automatically.
NOTE: Automatic is the recommended choice for the
Differential Port setting because in this case, you don’t
need to define the ports receiving the two possible
differential streams.
• Click on the Configure button to let the Web Server load all
your new parameters to the receiver.
• If the external radio used is a standalone, non-identified
radio receiver, skip this step. But if an ARF7474x license-
free radio is used, click on the Connections> Radio
submenu and from the Type field located in the External
Radio pane, select the type of license free radio used.
Then click on the Configure button.
• If port A is used for the connection to the external radio,
you just have now to define the output messages (see
Defining Output Messages on page 30). But if port B or F
is used, there is an additional step needed (see below)
before you define the output messages.
• If port B or F is used for the connection to the external
radio, click on the Connections> Serial Ports submenu,
enable the Power ON option for serial ports B & F (bottom
of the page) and click on the Configure button. You can
switch to the output message definition.