
Software Instruction Manual

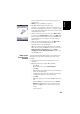
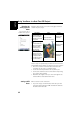
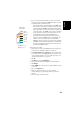
Table Of Contents
- Table of Contents
- Introduction to ProMark Field
- Installing ProMark Field
- Getting Started With ProMark Field
- Creating a New Job
- Importing/Exporting Jobs
- Running a Post-Processed Project
- Using Your Rover in a Real-Time RTK Project
- Changing the Storage Medium for Raw Data Collection
- Initialization
- Logging with Offsets
- Setting an RTK Base
- Installing Geoids
- Adding Background Maps
- E-Compass & External Device
- Index

English
25
– File: Name of the file in which raw data are being
saved.
– Folder: Name of the folder where the raw data file can
be found.
– Location: Hardware location of the folder and file.
• When you estimate that enough data have been recorded,
taking into account the value of the Range Achieved, tap
Stop.
NOTE: You may tap on the Log button again and resume
data logging for the same Site ID name (or for a different
name). This will create a new raw data file (G file), which
by default will be the only one to be seen as a static
observation when imported in GNSS Solutions. In the job
file (csv file), this will result in two points collected.
• Select Menu, Exit to close the job and quit ProMark Field.
Rover Collecting
Raw Data in Stop &
Go Kinematic
In Stop & Go kinematic, the rover antenna is placed
successively over several points and each time, a static
occupation takes place for a preset time. Raw data are
collected continuously in the background.
• Set up the rover as explained in Typical Setups on
page 21.
• Turn on the receiver, run ProMark Field and create a job
as explained in Creating a New Job on page 11.
•On the Options menu, select “Stop & Go Kinematic” and
“Post-processing” on the Survey tab, then tap OK.
• Think about which initialization method you will be using
at the beginning of the project and take the corresponding
steps:
– From Known Point: Go to the known point and place
the rover antenna exactly over this point.
– From Bar: Go to the base (fitted with the initializer bar)
and place the rover antenna at the free end of the
initializer bar.
• Tap Menu and select Configuration...
• Select “Rover” from the Configuration drop-down list.
• Tap Settings.
•On the GNSS tab, make sure the “Internal” GNSS receiver
is selected.
• Tap on the Antenna tab,
• Select “Vertical” and enter the antenna height, which in
this case corresponds to the pole or bipod length.