
Software Instruction Manual


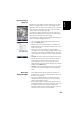
Table Of Contents
- Table of Contents
- Introduction to ProMark Field
- Installing ProMark Field
- Getting Started With ProMark Field
- Creating a New Job
- Importing/Exporting Jobs
- Running a Post-Processed Project
- Using Your Rover in a Real-Time RTK Project
- Changing the Storage Medium for Raw Data Collection
- Initialization
- Logging with Offsets
- Setting an RTK Base
- Installing Geoids
- Adding Background Maps
- E-Compass & External Device
- Index
English
58
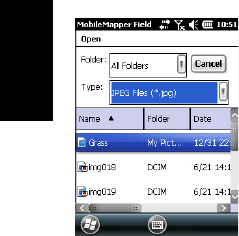
• Tap in the Type field and select the format of the file
containing the background map:
– ECW Enhanced Compression Wavelet (ecw)
– Bitmap (bmp)
–GIF (gif)
– GeoTIFF (tif)
–JPEG (jpg)
– JPEG2000 (jp2)
– Open StreetMap (osm)
MobileMapper Field then browses all the folders in search
of all the image files stored in the receiver meeting the
current Type selection.
• Tap on the name of the image file you want to add. This
automatically adds the file to the list of background maps.
A message will warn you if you are attempting to add an
already georeferenced background map that uses a
coordinate system different from the one used in the open
job. If the image file needs georeferencing, MobileMapper
Field will first invite you to make this georeferencing (see
the procedure explained below).
In contrast, adding a background map in OSM format will
never raise a warning message because, although
originally in WGS84, the OSM file will be transformed to
be always matching the coordinate system of the open job.
Like layers, each of the added background maps can be
shown or hidden on the map screen. Set accordingly each
of the check boxes placed before the names of the
background maps (cleared= hidden, ticked= shown).
• Tap OK to return to the map screen. Note that the map
screen will show the background map(s) only after the
receiver can compute a position. Remember you may also
have to press the ESC button (MobileMapper 100 or 120)
so that the map screen can show the location of the first
logged feature.