
User Manual


78
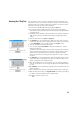
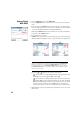
Staking Points
With GNSS
• Go to the Stakeout menu and tap Stake Points
•Use the Design Point field to enter the name of the first point you want to
stake.
• Enter an integer in Increment. This will allow Survey Pro to automatically
select the next design point to stake once the current one has been staked.
e.g. “ST101” first staked and Increment= 2, then next point will be “ST103”.
(Tapping the Next Point button will instantly select the next point from the
list, based on the Increment value.)
• Set the rover antenna height.
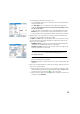
• Tap Stake. This opens the screen that will guide you to the point. Survey Pro
offers two different navigation modes to help you walk to the design point.
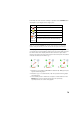
NOTE: In the example above, the direction to follow is provided as Go North / Go East
instructions. Survey Pro can instead provide Azimuth / Distance to the point if it’s
more convenient for you. Go to Job > Settings > Stakeout tab to change the setting of
the Display Directions As field. Point tolerance (different from acceptance criteria)
can also be set on this tab.
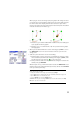
Tap on the / button to select one of these modes:
– : The top of the screen will always show the selected reference point
or azimuth you select through the Ref... button ([1]).
– : The top of the screen will always show the direction in which you
are walking ([2]). A large red arrow will appear as you walk. The North
(N) and South (S) directions will be shown as well. You can also define
a reference point or azimuth using the Ref... button. The resulting
direction will appear as a blue line starting from your current position.
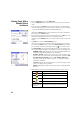
• Walk toward the design point following the instructions on the screen (see
table below).
[1] [2]