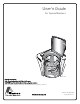
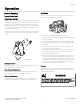
User's Guide for Topload Washers TLW22C_SVG Original Instructions Keep These Instructions for Future Reference. CAUTION: Read the instructions before using the machine. (If this machine changes ownership, this manual must accompany machine.) www.alliancelaundry.com Part No.
WARNING Failure to install, maintain, and/or operate this machine according to the manufacturer's instructions may result in conditions which can produce bodily injury and/or property damage. W030 WARNING For your safety and to reduce the risk of fire or an explosion, do not store or use gasoline or other flammable vapors and liquids in the vicinity of this or any other appliance.
Table of Contents Safety Information............................................................................. 5 Explanation of Safety Messages................................................................. 5 Important Safety Instructions....................................................................5 Operation......................................................................................... 7 Before Washing...................................................................................
Safety Information Safety Information Explanation of Safety Messages Important Safety Instructions Precautionary statements (“DANGER,” “WARNING,” and “CAUTION”), followed by specific instructions, are found in this manual and on machine decals. These precautions are intended for the personal safety of the operator, user, servicer, and those maintaining the machine.
Safety Information • • • • • • • • • • • • Do not reach into the washer if the washtub or agitator, if applicable, is moving. Never operate the washer with any guards, panels and/or parts removed or broken. DO NOT tamper with the controls or bypass any safety devices. Use your washer only for its intended purpose, washing clothes. Always follow the fabric care instructions supplied by the garment manufacturer.
Operation Operation Before Washing Sort Items Prepare Wash Load Different items use different wash cycles and temperatures. Always follow the manufacturer’s care label. Empty Pockets and Cuffs Make sure all pockets are empty and turn them inside out. One bobby pin, metal or plastic toy, nail or sharp object in a load can catch laundry, cause tears and plug the pump. Facial tissue left in a pocket will produce extreme “lint”. A crayon or lipstick in a wash load may cause stains that cannot be removed.
Operation Loading the Washer Wash Temperature Guide Load Articles Water NOTE: Always add detergent first. Temperature • • Load items by the amount of space they take up, not by their weight. Mix large and small items in a load to get the best washing results. Drop items loosely into the washtub. The bulk of the clothes rather than the weight will determine load size. Do not pack items in or wrap them around the agitator. Overloading can cause poor cleaning, excessive wrinkling and tears.
Control Panel Control Panel Preset Cycles Power Cancel Heavy Duty Normal Eco Perm Press Delicate Rinse & Spin Spin Warm Hot Soil Level Light Medium Pause PreWash Temp Cold Start Soak Heavy Second Rinse Wash Rinse Spin TLW2315N_SVG Digital Display Use the Prewash setting for extra heavily soiled items. During the PREWASH setting, the washtub will fill with water, agitate for a reduced period of time and spin out. The two-digit display is used to show the time remaining in a cycle.
Control Panel Selections To Wash Clothes The following selections can be used to modify the currently chosen cycle. The default selections will be lit after choosing a cycle. IMPORTANT: Before using your new washer, make sure the washer cord is connected to an appropriate electrical outlet that is properly installed and connected to a protective earth/ground. Make sure the washer hoses are connected to the hot and cold water faucets, and that the faucets are turned on.
Control Panel TLW1996N_SVG 4. Close the lid. The washer will not fill, agitate or spin with the lid open. TLW1997N_SVG WARNING To reduce the risk of serious injury, do not by-pass the lid switch to permit the washer to agitate or spin with the lid open. W898 5. If not already on (control lights will be lit), turn on the washer. Press the Power button to turn on the washer. NOTE: You will not be able to press the Start/ Pause button to start a cycle until five seconds after turning on the washer.
Cycle Operation Cycle Operation The cycles of your washer include several different stages. Refer to the tables below for what can be expected during the cycles that you select. The cycle stages are dependent on the cycle, selections and options chosen. Cycle stages that are Options must be selected on the keypad to be included in the cycle. NOTE: The rinse water temperature will be cold, including when optional rinses are selected. The times listed are the default times.
Cycle Operation All Other Wash Cycles Cycle Stage Wash Activity Fill/Agitate/Spin-Spray Rinse Fill/Agitate/Spin Time (minutes) Speed Heavy Duty = 15:45 Agitate = High Perm Press = 13:45 Spin = Low 10:10 Comments Agitate = High Spin = Low (Perm Press); High (all others) Second Rinse Fill/Agitate/Spin 10:10 Agitate = High Option Spin = Low (Perm Press); High (all others) Final Spin Spin 5:00 Total (without Options) Low (Perm Press); High (all others) Heavy Duty = 30:55 Perm Press = 28:
Cycle Operation The fabric softener will remain in the dispenser during the wash fill, agitation and spin. At the end of the wash spin, the liquid fabric softener will be dispensed into the washtub through the slots in the agitator and will be mixed with the incoming rinse water. To prevent softener buildup, the dispenser can be filled with clean water for automatic cleaning. This can be done in washing cycles other than when softener is used. To Clean the Dispenser 1.
Maintenance Maintenance Cold Weather Care Vacations and Extended Non-Use If the unit is delivered on a cold day (below freezing), or is stored in an unheated room or area during the cold months, do not attempt to operate the washer until it has had a chance to warm up. Water from the previous cycle may remain. IMPORTANT: To avoid possible property damage due to flooding, turn off the water supply to the washer whenever there will be an extended period of non-use.
Maintenance Shipping Plug The plastic shipping plug should be saved and reinstalled any time the washer is moved. The plug fits into two openings: The base opening and the shipping plug opening on the bottom of the movable pivot dome. The plug MUST be inserted into both openings to prevent damage to the washer. In order to accomplish this, the shipping plug opening must be directly lined up with the base opening. Refer to illustration below. 1 2 3 4 1. 2. 3. 4.
Troubleshooting Troubleshooting Try these troubleshooting tips before making a service call. They may save you time and money. Washer Symptom Won't Fill Possible Cause/Solution • • • • • • • • • • • Won't Start • • • • • • • Won't Agitate • • • • • • Won't Spin • • • • • • Make sure power cord is plugged all the way into the electrical outlet. Make sure hot and cold water faucets are turned on. Make sure lid is closed. Make sure that the fill hoses are not kinked or twisted.
Troubleshooting Washer Symptom Stops/Pauses During Cycle Possible Cause/Solution • • • Pauses are part of the washer’s normal operation. The washer will stop (pause) shortly before the wash and rinse spins. Check the laundry room fuse or circuit breaker. The motor overload protector may have stopped the cycle. It will reset itself and the display will show tp, St. Press the Start/Pause button to resume cycle. Won't Drain • • • • Make sure drain hose is not kinked or twisted.
Troubleshooting Washer Symptom Er, FL on digital display Possible Cause/Solution • • • • • OF, St on digital display • • • Er, dr on digital display Er, PS on digital display Other Er Codes © Copyright, Alliance Laundry Systems LLC - DO NOT COPY or TRANSMIT • • This code will appear if the washer has not reached the fill level after 30 minutes during a wash or rinse fill. Make sure hot and cold water faucets are turned on. Make sure that the fill hoses are not kinked or twisted.
Troubleshooting Contact Information If service is required, contact the nearest Factory Authorized Service Center. If you are unable to locate an authorized service center or are unsatisfied with the service performed on your unit, contact: Alliance Laundry Systems Shepard Street P.O. Box 990 Ripon, Wisconsin 54971-0990 www.alliancelaundry.com Phone: +1 (920)748-3121 Date Purchased Model Number Serial Number 1 TLW2003N_SVG 1.