Z100 / Z300 Z500 XE 100 Elliptical Z700 XE 200 Elliptical XE 300 Elliptical OWNER’S MANUAL PLEASE CAREFULLY READ THIS ENTIRE MANUAL BEFORE OPERATING YOUR NEW ELLIPTICAL!
Table of Contents Product Registration . .2 Important Safety Instructions 3 Important Electrical Information 4 Important Operation Instructions ..4 Assembly Instructions .5 Features .. 21 Operation of Your New Elliptical ..22 Maintenance 43 Manufacturer s Limited Warranty .44 ATTENTION-THIS ELLIPTICAL IS INTENDED FOR RESIDENTIAL USE ONLY AND IS WARRANTED FOR THAT APPLICATION. ANY OTHER APPLICATION VOIDS THIS WARRANTY IN ITS ENTIRETY.
CONGRATULATIONS ON YOUR NEW ELLIPTICAL AND WELCOME TO THE SPIRIT FAMILY! Thank you for your purchase of this quality elliptical trainer from Spirit Manufacturing, Inc. Your new elliptical was manufactured by one of the leading fitness manufacturers in the world and is backed by one of the most comprehensive warranties available. Through your dealer, Spirit will do all we can to make your ownership experience as pleasant as possible for many years to come.
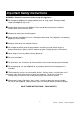
Important Safety Instructions WARNING - Read all instructions before using this appliance. Do not operate elliptical on deeply padded, plush or shag carpet. Damage to both carpet and elliptical may result. Keep children away from the elliptical. There are obvious pinch points and other caution areas that can cause harm. Keep hands away from all moving parts. Never operate the elliptical if it has a damaged cord or plug. If the elliptical is not working properly, call your dealer.
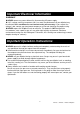
Important Electrical Information WARNING! NEVER remove any cover without first disconnecting AC power supply. If A.C. voltage varies by ten percent (10%) or more, the performance of your elliptical may be affected. Such conditions are not covered under your warranty. If you suspect the voltage is low, contact your local power company or a licensed electrician for proper testing. NEVER expose this elliptical to rain or moisture.
Assembly Pack Check List (XE100) Step 1 #96. 3/8" x 2T Split Washer (1pc) #84. 3/8" x 23 x 1.5T Curved Washer (2pcs) #103. 3/8" x 3/4" Hex Head Bolt (2pcs) #66. M5 x 10m/m Phillips Head Screw (4pcs) #60. 3/8" x 2-1/4" Hex Head Bolt (1pc) Step 2 #79.5/16"x23x1.5T Flat Washer (2pcs) #83. 17 Wave Washer (2 pcs) #80. 5/16" x 20x 1.5T Flat Washer (2 pcs) #104. 5/16 x 1-1/4 Hex Head Bolt (2 pcs) #59. 5/16"x15m/m Hex Head Bolt (2 pcs) Step 3 5 #71.
Step 4 #87. 3.5x12m/m Self Tapping Screw (10pcs) #105.M5 x 15m/m Phillips Head Screw (17pcs) Tools #108. Phillips Head Screw Driver (1 pc) #107. Short Phillips Head Screw Driver (1 pc) #109. 12m/m Wrench (1pc) #106.
Assembly Pack Check List (XE200) Step 1 #96. 3/8" x 2T Split Washer (1pc) #84. 3/8" x 23 x 1.5T Curved Washer (2pcs) #103. 3/8" x 3/4" Hex Head Bolt (2pcs) #66. M5 x 10m/m Phillips Head Screw (4pcs) #60. 3/8" x 2-1/4" Hex Head Bolt (1pc) Step 2 #97.3/8"x30x2T Flat Washer (2pcs) #81. 25 Wave Washer (2 pcs) #103. 3/8"x3/4" Hex Head Bolt (2 pcs) Step 3 #80. 5/16" x 20 x 1.5T Flat Washer (2 pcs) #104. 5/16 x 1-1/4 Hex Head Bolt (2 pcs) 7 #71.
Step 4 #87. 3.5x12m/m Self Tapping Screw (18pcs) #105.M5 x 15m/m Phillips Head Screw (21pcs) Tools #108. Phillips Head Screw Driver (1 pc) #107. Short Phillips Head Screw Driver (1 pc) #109. 12m/m Wrench (1pc) #106.
Assembly Instructions( XE100 / XE200) UNPACKING THE UNIT 1. Using a razor knife (Box Cutter) cut the outside, bottom, edge of box along the dotted Line. Lift Box over the unit and unpack. 2. Carefully remove all parts from carton and inspect for any damage or missing parts. If damaged parts are found, or parts are missing, contact your dealer immediately. 3. Locate the hardware package. The hardware is separated into steps. Remove the tools first.
*STEP 2: XE100 ONLY: HANDLE BAR ASSEMBLY 1. Install the two 17m/m Wave Washers (83) onto the Left and Right side of the Handle Bar axle. 2. Slide the Left (10) and Right (11) Handle Bars onto the appropriate side of the axle. The handlebars have a small sticker on them indicating L (left) and R (right). 3. Put the two 5/16" x 23mm Flat Washers onto the two 5/16" x 15m/m Hex Head Bolts and install, and tighten, in the threaded holes in the ends of the axle. *STEP 2: XE200 ONLY: HANDLE BAR ASSEMBLY 1.
2. Install the connecting arm covers (57,57-1 & 58,58-1) over the connection of the rod end and handle bars (10 & 11) with eight M5 x 15m/m Phillips Head Screws (105) and eight 3.5x12m/m self tapping screws (87) by using the Phillips head screw driver. 3. Install the two Wheel Covers (52) using the four M5x15m/m Phillips Head Screws (105). 4. Locate the two Rear Stabilizer Covers (19,20) and two Middle Stabilizer Covers (19,20) for the Rear Rail Assembly and install with four M5 x 15m/m Screws (105).
Assembly Drawing (XE100) 12 XE100 / XE200 / XE300 Elliptical
Assembly Drawing (XE200) 13 XE100 / XE200 / XE300 Elliptical
Assembly Pack Check List (XE300) Step 1 #96. 3/8" x 2T Split Washer (1pc) #84. 3/8" x 23 x 1.5T Curved Washer (2pcs) #103. 3/8" x 3/4" Hex Head Bolt (2pcs) #66. M5 x 10m/m Phillips Head Screw (4pcs) #60. 3/8" x 2-1/4" Hex Head Bolt (1pc) Step 2 #97.3/8"x30x2T Flat Washer (2pcs) #81. 25 Wave Washer (2 pcs) #87. 3.5x12m/m Self Tapping Screw (8pcs) #103.
Step3 #80. 5/16" x 20x 1.5T Flat Washer (2 pcs) #104. 5/16 x 1-1/4 Hex Head Bolt (2 pcs) #87. 3.5x12m/m Self Tapping Screw (10pcs) #71. 5/16" x 7T Nylon Nut (2 pcs) #105.M5 x 15m/m Phillips Head Screw (11pcs) Step 4 #91. 5/16"x 3/4 Hex Head Bolt (4 pcs) #105.
Tools #108. Phillips Head Screw Driver (1 pc) #107. Short Phillips Head Screw Driver (1 pc) #109. 12m/m Wrench (1pc) #106.
Assembly Instructions (XE300) UNPACKING THE UNIT 1. Using a razor knife (Box Cutter) cut the outside, bottom, edge of box along the dotted Line. Lift Box over the unit and unpack. 2. Carefully remove all parts from carton and inspect for any damage or missing parts. If damaged parts are found, or parts are missing, contact your dealer immediately. 3. Locate the hardware package. The hardware is separated into steps. Remove the tools first. Remove the hardware for each step as needed to avoid confusion.
STEP 2: HANDLE BAR ASSEMBLY 1. Install the two 28m/m Wave Washers (81) onto the Left and Right side of the Handle Bar axle. 2. Slide the Left (10) and Right (11) Handle Bars onto the appropriate side of the axle. The handlebars have a small sticker on them indicating L (left) and R (right). 3. Put the two 3/8 X 30mm Flat Washers (97) onto the two 3/8 X 3/4 Hex Head Bolts (103) and install, and tighten, in the threaded holes in the ends of the axle. 4.
7. Install the center support brace by sliding the front tab between the plastic side case and stabilizer tube. Secure in the rear with two 5/16 x3/4 Hex Head Bolt (91). PLEASE ENSURE ALL FASTENERS ARE TIGHT AFTER THE COMPONENTS HAVE BEEN ASSEMBLED. POWER CONNECTOR LOCATED ON FRONT, LEFT HAND SIDE OF UNIT.
Assembly Drawing (XE300) 20 XE100 / XE200 / XE300 Elliptical
Features Adjustable foot pedals, and orthopedically correct footpads Through research performed with a leading sports scientist and physical rehabilitation expert, Spirit engineering has developed a breakthrough in pedal design. No other elliptical, at any price, offers these unique features. The history of elliptical use over the past few years tells us that many users suffer from numb toes while working out on elliptical trainers. Many other users complain of ankle, Achilles tendon, knee and/or hip pain.
Operation of Your Elliptical Getting familiar with the control panel XE100 & XE200 Console Power up The Elliptical is supplied with an external power supply. When power is connected to the Elliptical, the console will automatically power up. If there is no input to the console for 20 minutes the console will go to stand-by mode. In stand-by mode the console display will turn off. To turn the console on press any key. When initially powered on the console will perform an internal self test.
Console Operation Quick Start This is the quickest way to start a workout. After the console powers up you just press the Start key to begin, this will initiate the Quick Start mode. In Quick Start the Time will count up from zero and the workload may be adjusted manually by pressing the Up or Down buttons. The dot matrix display will have only the bottom row lit at first. As you increase the work load more rows will light indicating a harder workout.
Programming the console Each of the programs can be customized with your personal information and changed to suit your needs. Some of the information asked for is necessary to ensure the readouts are correct. You will be asked for your Age and Weight. Entering your Age is necessary during the Heart Rate control programs to ensure the correct settings are in the program for your Age. Otherwise the work settings could be too high or low for you.
4. Next is Time. You may adjust the Time and press enter to continue. 5. Now you are finished editing the settings and can begin your workout by pressing the Start key. You can also go back and modify your settings by pressing the Enter key. NOTE: At any time during the editing of Data you can press the Stop key to go back one level, or screen. 6. Once the program starts you will be at level one. This is the easiest level and it is a good idea to stay at level one for a while to warm up.
9. When the program ends you may press Start to begin the same program again or Stop to exit the program or you can save the program you just completed as a custom user program by pressing a User key and following the instructions in the message window. Fat Burn The Fat Burn program is designed, as the name implies, to maximize the burning of fat. There are many schools of thought on the best way to burn fat but most experts agree that a lower exertion level that stays steady is the best.
2. The message window will ask you to enter your Age. You may enter your Age, using the Up and Down keys or the numeric key pad, then press the Enter key to accept the new number and proceed on to the next screen. 3. You are now asked to enter your Weight. You may adjust the Weight number using the Up and Down keys or the numeric key pad, then press enter to continue. 4. Next is Time. You may adjust the Time and press enter to continue. 5. Now you are asked to adjust the Max Level.
Interval The Interval program takes you through high levels of intensity followed by periods of low intensity. This program increases your endurance by depleting your oxygen level followed by periods of recovery to replenish oxygen. Your cardio vascular system gets programmed to use oxygen more efficiently this way. To start the Interval program follow the instructions below or just press the Interval button then the Enter button and follow the directions in the message window. 1.
3. The message window will ask you to enter your Age. You may enter your Age, using the Up and Down keys or the numeric key pad, then press the Enter key to accept the new number and proceed on to the next screen. 4. You are now asked to enter your Weight. You may adjust the Weight number using the Up and Down keys or the numeric key pad, then press enter to continue. 5. Next is Time. You may adjust the Time and press enter to continue. 6. Now you are asked to adjust the Max Level.
Heart Rate programs Before we get started, a word about Heart Rate: The old motto, no pain, no gain , is a myth that has been overpowered by the benefits of exercising comfortably. A great deal of this success has been promoted by the use of heart rate monitors. With the proper use of a heart rate monitor, many people find that their usual choice of exercise intensity was either too high or too low and exercise is much more enjoyable by maintaining their heart rate in the desired benefit range.
Rate of Perceived Exertion Heart rate is important but listening to your body also has a lot of advantages. There are more variables involved in how hard you should workout than just heart rate. Your stress level, physical health, emotional health, temperature, humidity, the time of day, the last time you ate and what you ate, all contribute to the intensity at which you should workout. If you listen to your body, it will tell you all of these things.
Using a Heart Rate Transmitter How to wear your wireless chest strap transmitter: 1. Attach the transmitter to the elastic strap using the locking parts. 2. Adjust the strap as tightly as possible as long as the strap is not too tight to remain comfortable. 3. Position the transmitter with the POLAR logo centered in the middle of your body facing away from your chest (some people must position the transmitter slightly left of center).
Heart Rate Control Program 1 & 2 (HR 1, HR 2) operation Both programs operate the same, the only difference is that HR 1 is set to 60% and HR 2 is set to 80% of maximum heart rate. They both are programmed the same way. To start the HR 1 or HR 2 programs follow the instructions below or just press the HR 1 or HR 2 button then the Enter button and follow the directions in the message window. 10. Press the HR 1 or HR 2 key then press the Enter key. 11. The message window will ask you to enter your Age.
Getting familiar with the control panel XE300 Console Power up The XE Series Elliptical is supplied with an external power supply. When power is connected to the XE Series Elliptical, the console will automatically power up. If there is no input to the console for 20 minutes the console will go to stand-by mode. In stand-by mode the console display will turn off. To turn the console on press any key When initially powered on the console will perform an internal self-test.
Quick Start This is the quickest way to start a workout. After the console powers up you just press the Start key to begin, this will initiate the Quick Start mode. In Quick Start the Time will count up from zero and the workload may be adjusted manually by pressing the Up or Down buttons. The dot matrix display will have only the bottom row lit at first. As you increase the work load more rows will light indicating a harder workout. The elliptical will get harder to pedal as the rows increase.
each program key is a number. If you are setting new data, such as Age, weight etc., you can use these keys to enter the numbers quickly. The XE series consoles include a built-in fan to help keep you cool. To turn the fan on, flip the switch on the right side of the console case. Programming the console Each of the programs can be customized with your personal information and changed to suit your needs. Some of the information asked for is necessary to ensure the readouts are correct.
9. Press the Manual key then press the Enter key. 10. The message window will ask you to enter your Age. You may enter your Age, using the Up and Down keys or the numeric key pad, then press the Enter key to accept the new number and proceed on to the next screen. 11. You are now asked to enter your Weight. You may adjust the Weight number using the Up and Down keys or the numeric key pad, then press enter to continue. 12. Next is Time. You may adjust the Time and press enter to continue. 13.
the level and then press enter. 15. Now you are finished editing the settings and can begin your workout by pressing the Start key. You can also go back and modify your settings by pressing the Enter key. NOTE: At any time during the editing of Data you can press the Stop key to go back one level, or screen. 16. If you want to increase or decrease the workload at any time during the program press the Up or Down key. This will only affect the workload for the present position in the profile.
the program or you can save the program you just completed as a custom user program by pressing a User key and following the instructions in the message window. Cardio The Cardio program is designed to increase your Cardio vascular function. This is, simply said, exercise for your heart and lungs. It will build up your heart muscle and increase blood flow and lung capacity. This is achieved by incorporating a higher level of exertion with slight fluctuations in work.
13. Next is Time. You may adjust the Time and press enter to continue. 14. Now you are asked to adjust the Max Level. This is the peak exertion level you will experience during the program. The factory setting is level eight. Adjust the level and then press enter. 15. Now you are finished editing the settings and can begin your workout by pressing the Start key. You can also go back and modify your settings by pressing the Enter key.
pressing a User key and following the instructions in the message window. Custom User Defined Programs There are two customizable User programs that allow you to build and save your own workout. The two programs, User 1 and User 2, operate exactly the same way so there is no reason to describe them separately. You can build your own custom program by following the instructions below or you can save any other preset program you complete as a custom program.
SEE PAGE 30 FOR MORE INFORMATION ABOUT HEART RATE Heart Rate Control Program 1 & 2 (HR 1, HR 2) operation Both programs operate the same, the only difference is that HR 1 is set to 60% and HR 2 is set to 80% of maximum heart rate. They both are programmed the same way. To start the HR 1 or HR 2 programs follow the instructions below or just press the HR 1 or HR 2 button then the Enter button and follow the directions in the message window. 27. Press the HR 1 or HR 2 key then press the Enter key. 28.
Maintenance: 1. Wipe down all areas in the sweat path with a damp cloth after each workout. 2. If a squeak, thump, clicking or rough feeling develops the main cause is most likely one of two reasons: i. The hardware was not sufficiently tightened during assembly. All bolts that were installed during assembly need to be tightened as much as possible. It may be necessary to use a larger wrench than the one provided if you cannot tighten the bolts sufficiently.
Manufacturer’s Limited Warranty Effective October 15, 2007 ELLIPTICAL WARRANTY Spirit Manufacturing Inc. warrants all its elliptical parts, for a period of time listed below from the date of retail sale, as determined by sale receipt, or in the absence of a sales receipt eighteen (18) months from the original factory shipping date, whichever comes first.