
- Sprint PCS Connection Card User's Guide 550
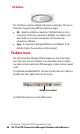


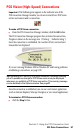
Table Of Contents
- Table of Contents
- Welcome to Sprint
- Introduction to this User’s Guide
- PCS Connection Card Basics
- Installing the PCS Connection Card
- Using the PCS Connection Card
- The PCS Connection ManagerSM Window and Indicators
- Data Connections
- Voice Connections
- Menu Options
- The Network Adapter Manager (Notebooks Only)
- Troubleshooting Tips (Notebook PC)
- Troubleshooting Tips (Handheld / Pocket PC)
- PCS Vision
- Technical Specifications and Regulatory Information
- Safety Information and Terms & Conditions
- Index
Section 3: Using the PCS Connection Card
3B: Data Connections 51
PCS Vision (High-Speed) Connections
Important
: If the following icon appears in the indicator area of the
PCS Connection Manager window, you do not currently have PCS Vision
service and cannot make a connection:
To make a PCS Vision connection:
䊳
From the PCS Connection Manager window, click the
GO
button.
The PCS Connection Manager program then initiates the connection.
Progress is shown in the message area (“Dialing”, “Authenticating”).
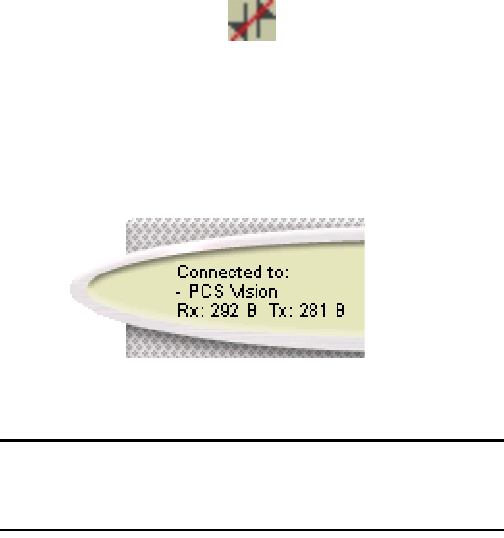
Once the connection is established, the number of bytes received and
transmitted are displayed:
If you are running Windows 2000 or Windows XP and having problems
establishing a connection, see page 100.
Tip: Depending on a setting in the Options window, a message warning
you of a possible surcharge for PCS Vision service may be displayed
whenever you establish a PCS Vision connection. This warning message
can be disabled in the Options window. See page 87.
Once the connection is established, you can use any Internet application
(such as Internet Explorer, Netscape Navigator, or your email application).
To terminate a PCS Vision connection:
䊳
Click the
Stop
button.