
Telephone User Manual


Table Of Contents
- Section 1: Getting Started 1
- Section 2: Your Sprint PCS Phone 11
- 2A. Your Sprint PCS Phone: The Basics 13
- 2B. Controlling Your Phone’s Settings 51
- 2C. Setting Your Phone’s Security 75
- 2D. Controlling Your Roaming Experience 87
- 2E. Navigating Through Menus 93
- 2F. Managing Call History 113
- 2G. Using Contacts 121
- 2H. Using the Phone’s Scheduler and Tools 133
- 2I. Using Your Phone’s Voice Services 153
- 2J. Using the Built-in Camera and Camcorder 169
- 2K. Using Your Phone’s Built-in Media Player 209
- Section 3: Sprint PCS Service Features 219
- Section 4: Safety Guidelines and Warranty Information 283
- Setting Up Service
- Your Sprint PCS Phone: The Basics
- Front View of Your Phone
- Viewing the Display Screen
- Features of Your Sprint PCS Phone
- Turning Your Phone On and Off
- Using Your Phone’s Battery and Charger
- Displaying Your Phone Number
- Making and Answering Calls
- Making Calls
- Dialing Options
- Answering Calls
- Missed Call Notification
- Calling Emergency Numbers
- In-Call Options
- End-of-Call Options
- Saving a Phone Number
- Finding a Phone Number
- Dialing and Saving Phone Numbers With Pauses
- Abbreviated Dialing
- Dialing From Contacts
- Using One-Touch/Two-Touch Speed Dialing
- Using Plus (+) Code Dialing
- Entering Text
- Controlling Your Phone’s Settings
- Setting Your Phone’s Security
- Controlling Your Roaming Experience
- Navigating Through Menus
- Managing Call History
- Using Contacts
- Using the Phone’s Scheduler and Tools
- Using Your Phone’s Voice Services
- Using the Built-in Camera and Camcorder
- Using Your Phone’s Built-in Media Player
- Sprint PCS Service Features: The Basics
- Sprint PCS VisionSM
- Sprint PCS Voice CommandSM
- Safety
- Manufacturer’s Warranty
Section 2B: Controlling Your Phone’s Settings 67
Your Phone’s Settings
Deleting Old Messages
You can have old messages deleted automatically when
your inbox becomes full.
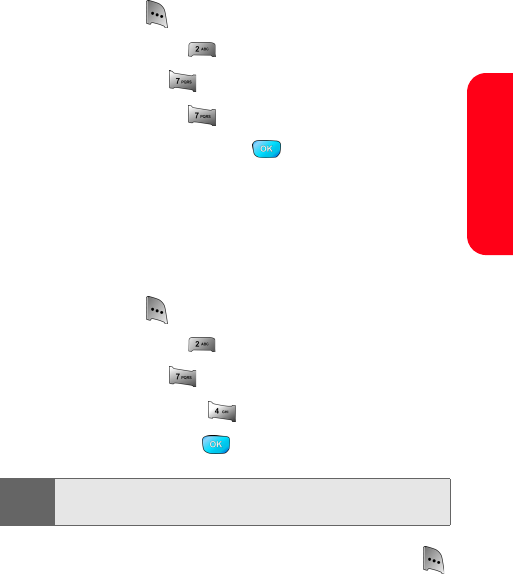
1. Press Menu ( ) to access the main menu.
2. Select Messaging ().
3. Select Settings ().
4. Select Auto-Erase ().
5. Select Yes or No and press .
Adding a Customized Signature
Each message you send can have a customized signature to
reflect your personality.
To add a customized signature to each sent message:
1. Press Menu ( ) to access the main menu.
2. Select Messaging ().
3. Select Settings ().
4. Select Edit Signature (
).
5. Select On and press .
6. Enter your signature using the keypad and press
for Done. (See “Entering Text” on page 43.)
Note:
If you do not wish to attach a signature to your outgoing
messages, select Off.