
Manual


5
SETTINGS
Picture Quality, Date and Time
Turn off your camera, set the mode switch to “Set/Test” and set
the power switch to “ON”. Press “MENU” once. The default
setting “H” (4MP) icon will flash. Use “DOWN” if you want to
change to “L” resolution (3MP). Press “MENU” button to set
date and time. Use “UP” and “DOWN” to change the blinking
number. Press “MENU” to set next option. Press “OK” and
turn off the system to record the changes. The camera’s internal
memory (32MB) can store approximately 65 pictures in 3MP
mode (low resolution) and 39 pictures in 4MP mode (high
resolution). The SD slot accepts optional SD card to record
more pictures.
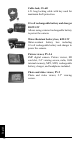
MODE
When you select “Photo” or “Video”, the test
light on the front of the unit will light up for 60
seconds while the motion detector charges up.
When you select “Set/Test” you can set your
system or test the distance setting. The test light on the front of
the unit will light when the camera detects motion. When you
notice how the camera reacts to your motion, you may want to
adjust the distance setting, change the direction or height of the
camera. The camera doesn’t take pictures while in “Set/Test”
mode. When “MODE” switch is set to “View”, you can review
the recorded pictures or videos.
DELAY
Selects the time the camera will wait before
recording another photo or video. This option
prevents taking too many photos or videos of
the same object should it remain in front of the
camera for a lengthy period of time.
MULTI-SHOT
Allows for a 15 second interval between
4 consecutive photos. This option shows a
different view of all 4 photos.
English