
Quick start Owner manual

Mit den und Tasten können Sie sich durch das Menü navigieren,
um z.B. Einstellungen zu ändern. Verwenden Sie die OK-Taste zum
bestätigen von Eingaben und die Taste um zum vorherigen Menü-
punkt zurückzukehren.
1. KONFIGURIEREN DER ALLGEMEINEN EINSTELLUNGEN
A. Schalten Sie die Kamera durch der Power-Taste, ein.
B. Im Hauptmenü wählen Sie EINSTELLUNGEN und dann
ALLGEMEIN, um zu den Allgemeinen-Einstellungen zu gelangen.
C. Einstellen des Datums (MM/TT/JJ oder TT/MM/JJ).
D. Einstellen der Uhrzeit (Stunde/Minute).
E. Einstellen der Ablaufplan-Option. Hierunter kann die
Betriebszeit für jeden einzelnen Wochentag festgelegt werden.
Für einen 24-Stunden-Betrieb muss die gleiche Start- und
Stoppzeit eingestellt werden (z.B. 00 :00/00 :00).
F. Einstellen der LIT-09 Ladegerät-Option, in Abhängigkeit der
verwendeten Stromquelle (siehe nächste Tabelle).
Einstellungen
Con i tasti o puoi navigare nel menu, per cambiare le impostazioni.
Utilizza il tast OK per confermare e il tasto per arretrare di una
posizione.
1. CONFIGURAZIONE DELLE IMPOSTAZIONI GENERALI
A. Accendere la videocamera mediante pressione del tasto di
accensione.
B. Nel menù principale scegliere IMPOSTAZIONI e in seguito
GENERALE per accedere alle impostazioni generali.
C. Impostare la data (MM/GG/AA o GG/MM/AA).
D. Impostare l'ora (ora/minuti).
E. Impostare l'opzione Programmazione. In questa sezione è
possibiledenireilperiododiesercizioperognisingologiorno
della settimana. Per un funzionamento di 24 ore è necessario
impostare lo stesso tempo di avvio e di arresto (p.es. 00 :00/00 :00).
F. Impostare l'opzione dell'alimentatore LIT-09, in dipendenza
della fonte d'energia impiegata (cfr. tabella riportata in basso)
Impostazioni
Con las teclas y podrá navegar por el menú, por ejemplo, para
modicarajustes.UtilicelateclaOKparaconrmarentradas,ylatecla
para volver al punto del menú anterior.
1. CONFIGURACIÓN DE LOS AJUSTES GENERALES
A. Encienda la cámara mediante la tecla POWER.
B. En el menú principal, seleccione CONFIGURACIÓN y, después,
GENERAL, para acceder a los ajustes generales.
C.Congurela fecha (MM/DD/AA o DD/MM/AA).
D.Congurelahora (hora/minuto).
E.Congurela opcióndel plan de desarrollo. Aquí se puede
determinar también el tiempo de operación para cada día de la
semana. Para una operación las 24 horas, debe seleccionarse la
misma hora de inicio y de parada (p. ej. 00 :00/00 :00).
F.Congurelaopcióndelcargador LIT-09 dependiendo de la
fuente de corriente que emplee (véase la siguiente tabla).
Ajustes
2. KONFIGURIEREN DER DRAHTLOS EINSTELLUNGEN
A. Im Hauptmenü wählen Sie EINSTELLUNGEN und dann
DRAHTLOS, um zu den Drahtlos-Einstellungen zu gelangen.
B. Einstellen der Mobilfunk-Option. Durch aktivieren dieser
Option, sendet die Kamera Bilder über das Mobilfunknetz.
Sie unter spypoint.com/activation oder www.spy-
point.info im SUPPORT-Bereich.
Für Mini-LIVE-4GV Kamera, Gehen Sie direkt zu Schritt F.
C. Einstellen der Land-Option. Wählen Sie das Land aus in dem
die Kamera verwendet wird.
D. Einstellen der Provider-Option. Der ausgewählte Provider muss
mit Ihrer SIM-Karte übereinstimmen.
Für Mini-LIVE-4G Kamera, Gehen Sie direkt zu Schritt F.
Energiequelle LIT-09 Ladegerät option
• 6 AA
• 12V
• 12V + 6 AA
AUS
• LIT-09*
• 12V + LIT-09*
• Solar panel + LIT-09*
AN
*Wiederauadbarer Lithium-Akku-Pack (LIT-09) oder mit
Ladegerät (LIT-C-8), separat erhältlich.
2. CONFIGURAZIONE DELLE IMPOSTAZIONI WIRELESS
A. Scegliere IMPOSTAZIONI nel menù principale e in seguito
WIRELESS per accedere alle impostazioni wireless.
B. Impostare l'opzione Cellulare. Attivando questa opzione la
videocamera invia le immagini attraverso la rete cellulare.
Una descrizione dettagliata della procedura di attivazi-
one è disponibile al sito spypoint.com/activation o
www.spypoint.info nell’area supporto.
Per fotocamera Mini-LIVE-4GV, passare direttamente al
punto F.
C. Impostare l'opzione Paese. Scegliere il paese in cui viene
impiegata la videocamera.
D. Impostare l'opzione Provider. Il provider scelto deve essere
compatibile con la scheda SIM.
Per fotocamera Mini-LIVE-4G, passare direttamente al
punto F.
Fonte d’energia Opzione dell'alimentatore
LIT-09
• 6 AA
• 12V
• 12V + 6 AA
SPENTO
• LIT-09*
• 12V + LIT-09*
• Solar panel + LIT-09*
ACCESO
* Pacco batteria ricaricabile al litio (LIT-09) o con caricabatteria
(LIT-C-8), ottenibili separatamente.
2. CONFIGURACIÓN DE LOS AJUSTES INALÁMBRICOS
A. En el menú principal, seleccione CONFIGURACIÓN y, después,
INALÁMBRICO, para acceder a los ajustes inalámbricos.
B.Congurelaopcióndetelefonía móvil. Activando esta opción,
la cámara envía imágenes a través de la red de telefonía móvil.
Encontrará una descripción más detallada del proceso de
activación en spypoint.com/activation o www.spypoint.
info, en la sección de ASISTENCIA.
Para cámara mini-LIVE-4GV, pase directamente al paso F.
C.Congure la opción País. Seleccione el país en el que se
utilizará la cámara.
D.CongurelaopciónProveedor. El proveedor seleccionado debe
estar en consonancia con la tarjeta SIM.
Para cámara mini-LIVE-4G, pase directamente al paso F.
Fuente de energía Cargador LIT-09
• 6 AA
• 12V
• 12V + 6 AA
APAGADO
• LIT-09*
• 12V + LIT-09*
• Solar panel + LIT-09*
ENCENDIDO
* Batería de litio recargable (LIT-09) o mediante cargador
(LIT-C-8),disponibles por separado.
E. Einstellen der Übertragungs-Modus-Option (nur mini-LIVE).
• MySPYPOINT: Die Kamera kommuniziert mit dem
mySPYPOINT-Server, um Status zu aktualisieren oder um
Bilder zu Ihrem Benutzer zu versenden.
MySPYPOINT-Abonnoment erforderlich. Eine genauere
Beschreibung des Aktivierungsvorganges nden Sie
unter support.spypoint.com/activation oder www.spypoint.
info im SUPPORT-Bereich.
• MMS: Die Kamera kommuniziert per MMS, um den Status zu
aktualisieren oder Bilder zu übermitteln. Es können bis zu
5 verschiedene Telefonnummern angegeben werden, an
welche eine MMS versendet wird. Der Ländercode muss
unbedingt mit eingegeben werden (für Deutschland, 0049).
Für jeden Empfänger wird eine MMS berechnet.
Ein MMS-Tarif ist zu empfehlen, verfügbar bei Ihrem
Mobilfunkanbieter. Sie unter support.spypoint.com
/activation oder www.spypoint.info im SUPPORT-Bereich.
• E-mail: Die Kamera comunica via E-Mail, per attualizzare lo
stato o trasmissione immagini. Es können bis zu 5
verschiedene E-Mail-Adressen angegeben werden, an
welche eine Benachrichtung versendet wird.
Ein Datentarif eines Mobilfunkanbieters wird benötigt.
Sie unter support.spypoint.com/activation oder
www.spypoint.info im SUPPORT-Bereich.
F. Einstellen der Frequenz-Option. Wählen Sie die Anzahl der
Synchronisationen pro Tag.
G. Einstellen der Erste Synch-Zeit-Option. Wählen Sie die
Uhrzeit, zu der die Kamera die erste Synchronisation durchführt.
Bsp.: Wenn die Option "Frequenz" auf 6/ Tag und "Erste
Synch-Zeit" auf 04:00 Uhr gestellt ist, führt die Kamera 6
Synchronisationen pro Tag aus und beginnt diese um 4 Uhr, 8
Uhr, 12 Uhr, 16 Uhr, 20 Uhr und 24 Uhr.
E. Impostare l'opzione Modalità di riproduzione (solo mini-LIVE).
• MySPYPOINT: La fotocamera comunica con il server
mySPYPOINT per attualizzare lo stato o per trasmettere le
immagini.
Abbonamento mySPYPOINT richiesto. Una descrizione
dettagliata della procedura di attivazione è disponibile
al sito support.spypoint.com/activation.
• MMS: La fotocamera comunica via MMS, per attualizzare lo
statootrasmettereimmagini.Èpossibileindicarenoa5
numeri di telefono diversi ai quali possono essere inviati
degliMMS.Atalescopoèindispensabileindicareilpresso
del Paese (per Germania 0049). Per ogni destinatario si
addebita un MMS.
Una tariffa MMS è consigliabile, disponibile dal suo
gestore di telefonia. Una descrizione dettagliata della
procedura di attivazione è disponibile al sito
support.spypoint.com/activation.
• Email: La fotocamera comunica via email, per attualizzare lo
stato o trasmettere immagini. È possibile indicare no a 5
indirizzi e-mail diversi ai quali è possibile inviare un messaggio.
Una tariffa dati del gestore di telefonia è necessario.
Una descrizione dettagliata della procedura di
attivazione è disponibile al sito support.spypoint.com/
activation.
F. Impostare l'opzione Frequenza. Denire il numero di
sincronizzazioni al giorno.
G. Impostare l'opzione Tempo di prima sincronizzazione.
Scegliere l'ora in cui la videocamera deve eseguire la prima
sincronizzazione.
Esempio: se l’opzione "Frequency" è impostata su 6/giorno
e "Tempo di prima sincronizzazione" è impostato su 04:00, la
fotocamera effettuerà 6 sincronizzazione a partire dalle ore 4,
poi alle ore 8, 12, 16, 20 e 24.
E. CongurelaopciónModo de transferencia (solo mini-LIVE).
• MySPYPOINT: La cámara se comunica con el servidor
mySPYPOINT para actualizar el estado o para enviar fotos al
usuario.
Es necesario contar con una subscripción a mySPYPOINT.
Encontrará una descripción más detallada del proceso de
activación en support.spypoint.com/activation.
• MMS: La cámarase comunica por MMS para actualizar el
estado o para transferir fotos. Pueden indicarse hasta 5
números de teléfono diferentes a los que enviar un MMS.
Esimprescinidibleindicartambiénelprejodelpaís(para
Alemania, 0049). Para cada destinatario se calcula un MMS.
Se recomienda una tarifa de MMS, disponible en su
proveedor de telefonía móvil. Encontrará una descrip
ción más detallada del proceso de activación en
support.spypoint.com/activation.
• Correo electrónico: La cámara se comunica por correo
electrónico para actualizar el estado o para transferir fotos.
Pueden indicarse hasta 5 direcciones de correo electrónico
diferentesalasqueenviarunanoticación.
Será necesario contar con una tarifa de datos de un
proveedor de telefonía. Encontrará una descripción
más detallada del proceso de activación en
support.spypoint.com/activation.
F. Congure la opción Frecuencia. Seleccione el número de
sincronizaciones diarias.
G.CongurelaopciónPrimera hora sinc. Seleccione la hora a la
que la cámara llevará a cabo la primera sincronización.
Ej.: si en la opción "Frecuencia" se ha seleccionado 6/día y en
la opción " Primera hora sinc" se ha seleccionado 04:00, el
controlador lleva a cabo 6 sincronizaciones al día (a las 4, a las
8, a las 12, a las 16, a las 20 y a las 24 horas).
3. KONFIGURIEREN DER 3 BETRIEBSARTEN
Im Hauptmenü wählen Sie EINSTELLUNGEN und dann FOTO,
ZEITRAFFER oder VIDEO, um den jeweiligen Betriebs-Modus
aufzurufen.
FOTO
Verzögerungszeit: Hier stellen Sie die Verzögerungszeit
zwischen den einzelnen Aufnahmen ein.
Mehrfachaufnahme: Mit einer Erfassung bis zu 6 aufeinander
folgende Bilder in einem Abstand von 10 Sekunden.
ZEITRAFFER
Interval: In dieser Option nimmt die Kamera in voreingestellten
regulären Intervallen und ohne Erfassung einer Bewegung Bilder auf.
VIDEO
Verzögerungszeit: Hier stellen Sie die Verzögerungszeit
zwischen den einzelnen Aufnahmen ein.
Videolänge: Hier stellen Sie die Dauer einer Aufnahme ein.
Zusätzliche Bild:Zusätzliches Bild : Wenn diese Option aktiviert
ist, nimmt die Kamera unmittelbar vor jedem Video ein Foto auf.
3. CONFIGURARE LE IMPOSTAZIONI DELLE 3 MODALITÀ
OPERATIVE
Nel menù principale scegliere IMPOSTAZIONI e in seguito FOTO,
RALLENTATORE o VIDEO per accedere alle rispettive modalità di
funzionamento.
FOTO
Ritardo: Qui si imposta il ritardo tra le single immagini.
Immagine multipla:Perscattarenoa6immaginiconsecutive
a distanza di 10 secondi.
RALLENTAMENTO
Intervallo: Con questa opzione la videocamera riprende delle
immaginiadintervalliregolaripredenitiesenzarilevamentodi
un movimento.
VIDEO
Ritardo: In questa sezione è possibile impostare il tempo di
ritardo tra le singole riprese.
Durata video: Qui è possibile impostare la durata di una ripresa.
Immagine supplementare: se questa opzione è attivata, la
videocamera scatta una foto immediatamente prima dell'avvio di
ciascun video.
3. CONFIGURACIÓN DE LOS AJUSTES DE LOS TRES MODOS
OPERATIVOS
En el menú principal, seleccione CONFIGURACIÓN y, después,
FOTO, TIME-LAPSE o VIDEO para activar el modo de operación
correspondiente.
FOTO
Tiempo de retraso: Le permite establecer el intervalo de
tiempo entre la toma de distintas fotografías.
Disparo múltiple: Para tomar hasta 6 fotografías seguidas por
cada detección, con un intervalo de tiempo entre cada fotografía
de 10 segundos.
CÁMARA RÁPIDA
Intervalo: En esta opción, la cámara toma imágenes a
intervalos regulares predeterminados y sin registrar movimientos.
VÍDEO
Tiempo de retraso: Aquí podrá ajustar el tiempo de retardo
entre cada toma.
Longitud del vídeo:Aquí podrá ajustar la duración de las tomas.
Foto adicional: Cuando está activada esta opción, la cámara toma
una foto inmediatamente antes de cada vídeo.
FÜHREN SIE DIE SCHRITTE 4 BIS 6 WÄHREND DER
ENDMONTAGE DER KAMERA AUS.
4. DIE ERFASSUNG DER KAMERA TESTEN
Ermöglicht es dem Anwender, die
Erfassung der Kamera zu testen.
Wenn der TEST Modus ausgewählt
ist, wird kein Foto oder Video auf-
gezeichnet. Laufen Sie vor der Ka-
mera von links nach rechts. Wenn
die Kamera die Bewegung erkennt,
blinkt die Testlampe auf, um an-
zuzeigen, dass normalerweise ein
Foto oder Video augenommen
wurde. Wenn das System eine Bewegung nicht erkennt, erhöhen
Sie die Erfassung mit der Option EMPFINDLICHKEIT. Sie können
die Kamera aber auch neu ausrichten. Im TEST-Modus ist es
möglich, ein Bild durch drücken der OK-Taste aufzunehmen.
Dieses Foto wird gespeichert und erscheint nun auch im
BETRACHTEN-Modus.
5. DIE MOBILFUNKNETZSTÄRKE ÜBERPRÜFEN
Noch im Testmodus können Sie sicherstellen, dass
eine ausreichende Mobilfunknetzstärke vorhanden
ist. Das Signal wird mittels Balken im oberen Teil des
Bildschirms angezeigt.
6. STARTEN DER CAMERA
Wählen Sie die gewünschten
Betriebs-Modus (Foto, Zeitraffer
oder Video) im Hauptmenü durch
drücken der OK-Taste. Wenn der
Modus ausgewählt wurde, blinkt
die Testlampe an der Vorderseite
der Kamera für 60 Sekunden auf.
Dies erlaubt Ihnen den Aufnahme-
bereich zu verlassen, ohne selbst
aufgenommen zu werden.
FACEBOOK.COM/SPYPOINT TWITTER.COM/SPYPOINTCAMERA YOUTUBE.COM/SPYPOINTTRAILCAM
ESEGUIRE LE OPERAZIONI DA 4 A 6 DURANTE IL
MONTAGGIO FINALE DELLA VIDEOCAMERA.
4. TESTARE IL RILEVAMENTO DELLA VIDEOCAMERA
Permette di testare l’area di
rilevamento della telecamera. In
modalità TEST non vengono regis-
trati immagini o video. Muovetevi
davanti alla telecamera verso sinis-
tra e verso destra. Se la telecam-
era rileva il movimento, il TEST
LED lampeggia per mostrare che
in questo case verrebbe scattata
una foto e registrato un video. Se
il sistema non riconosce nessun movimento, aumenti la
sensibilità del sensore (SENSIBILITÀ opzioni). Oppure riposizioni
l’apparecchio. In modalità TEST è possible registrare un
immaginie premendo il tasto Ok. Questa imagine viene
memorizzata ed è visualizzabile nella modalità VISIONARE.
5. VERIFICARE LA POTENZA DELLA RETE CELLULARE
Se ci si trova ancora nella modalità test, è possibile
assicurarsi che la potenza della rete cellulare sia
sufciente. Il segnale è segnalato mediante delle
tacche nella parte superiore del display.
6. AVVIARE LA VIDEOCAMERA
Scegliere la modalità di funzion-
amento desiderata (foto, rallentatore
o video) nel menù principale medi-
ante pressione del tasto OK. Una
volta selezionata la modalità, la spia
test disposta sulla parte anteriore
della videocamera lampeggia per
60 secondi. Durante questo tempo
l'utilizzatore può abbandonare l'area
di ripresa senza essere fotografato
personalmente.
FACEBOOK.COM/SPYPOINT TWITTER.COM/SPYPOINTCAMERA YOUTUBE.COM/SPYPOINTTRAILCAM
LLEVE A CABO LOS PASOS 4 - 6 DURANTE EL
MONTAJE FINAL DE LA CÁMARA.
4. PROBAR LA TOMA DE IMÁGENES DE LA CÁMARA
Permite al usuario comprobar el
sistema de detección de la cámara.
Cuando se selecciona el modo
PRUEBA no se graba o toma ningún
vídeo ni fotografía. Pase frente a la
cámara de izquierda a derecha.
Cuando la cámara reconozca el
movimiento, la luz de prueba parpa-
dea para indicar que en otro modo
la cámara habría tomado una
fotografía o un vídeo. En caso de que el sistema no reconozca
un movimiento, podrá aumentar el registro con la opción
SENSIBILIDAD. No obstante, también podrá reajustar la cámara.
En el modo TEST es posible tomar una imagen pulsando la tecla
OK. Esta fotografía se guardará y aparecerá entonces también en
el modo VISTA.
5. COMPROBAR LA INTENSIDAD DE LA RED DE
TELEFONÍA MÓVIL
Aún en el modo de prueba, puede asegurarse de
que la intensidad de la red de telefonía móvil sea
suciente.Laseñalseindicapormediodebarrasen
la parte superior de la pantalla.
6. INICIAR LA CÁMARA
Seleccione el modo de operación
que desee, (Foto, Time-Lapse
o Video) en el menú principal
pulsando la tecla OK. Una vez selec-
cionado el modo, la luz de prueba
parpadea en la parte delantera de
la cámara durante 60 segundos.
Esto le permite abandonar la zona
desde la que se realiza la fotografía
sin aparecer en esta.
FACEBOOK.COM/SPYPOINT TWITTER.COM/SPYPOINTCAMERA YOUTUBE.COM/SPYPOINTTRAILCAM
E. Set the Transmission mode option (mini-LIVE only)
• MySPYPOINT: The camera communicates with the
mySPYPOINT server to update its status or to send photos
to the user account.
MySPYPOINT subscription is required. Activation
procedure available at support.spypoint.com/
activation.
• MMS: The camera communicates by MMS to
update its status or to send photos. Enter up to 5 different
phone numbers to which the MMS will be sent. The country
code and area code must be entered. One MMS is charged
for each recipient.
A MMS plan is required, available from a compatible
cellular service provider. Activation procedure
available at support.spypoint.com/activation.
• Email: The camera communicates by email to
update its status or to send photos. Enter up to 5 different
emailaddressestowhichnoticationswillbesent.
A data plan is required, available from a cellular
service provider. Activation procedure available at
support.spypoint.com/activation.
F. Set the Frequency option. Allows the user to choose the
number of synchronizations that the camera performs in a
day.
G. Set the First synch time option. Allows the user to choose at
whattimeofthedaythecameracommunicatesfortherst
time.
E.g.: If the "Frequency" option is set to 6/day and "First synch
time" at 04:00, the camera performs 6 synchronizations per
dayandrststartssendingat4h,8h,12h,16h,20hand
24 h.
2. CONFIGURE THE WIRELESS SETTINGS
A. In the main menu, select SETTINGS and then, WIRELESS to
access the Wireless settings menu.
B. Set the Cellular option. Activate this option to send photos by
cellular transmission.
Activation procedure available at
support.spypoint.com/activation
For mini-LIVE-4GV camera, go directly to F step.
C. Set the Country option. The country where the camera is
used must be selected.
D. Set the Provider option. The provider selected must
correspond with the SIM card used in the camera.
For mini-LIVE-4G camera, go directly to F step.
Power source LIT-09 charger option
• 6 AA
• 12V
• 12V + 6 AA
OFF
• LIT-09*
• 12V + LIT-09*
• Solar panel + LIT-09*
ON
* Rechargeable lithium battery pack, sold separately (LIT-09)
or with a charger (LIT-C-8).
Use the h and buttons to navigate in the interface and to change
options.UsetheOKbuttontoconrmandthe button to return to
the previous menu.
1. CONFIGURE THE GENERAL SETTINGS
A. Turn on the camera by pressing the power button.
B. In the main menu, select SETTINGS and then GENERAL to
access to the General settings menu.
C. Set the Date (MM/DD/YY or DD/MM/YY).
D. Set the Time (Hour/Minute).
E. Set the Schedule option. This option allows the user to set
the period of operation of the camera for each day of the
week. For a 24 hour operation, the same start and stop times
must be entered as followed (e.g.: 00:00/00:00).
F. Set the LIT-09 charger option depending on the power
source (see next table).
Settings
PERFORM THE STEPS 4 TO 6 DURING THE FINAL
INSTALLATION OF THE CAMERA.
4. TEST THE DETECTION OF THE CAMERA
When the TEST mode is selected,
no photo or video is recorded. Pass
in front of the camera from left to
right. When the camera detects
motion, the test light blinks to
indicate that the camera would
normally have saved a photo or
video. If the system does not
detect the movement, increase
the detection sensitivity using the
SENSITIVITY option in the GENERAL SETTINGS menu or realign
the system differently. In TEST mode, it is possible to take a
photo by pressing the OK button. The photo is saved and appears
in the VIEW mode.
5. VERIFY THE CELLULAR SIGNAL
Still in the TEST mode, make sure to have a cellular
signal. The signal bars are displayed at the top of
the screen.
6. START THE CAMERA
Select the desired operating mode
(photo, time lapse or video) on the
main menu by pressing OK. When
the mode is selected, the test light
in front of the camera will ash
for 60 seconds to allow the user
to leave the area without being
photographed or recorded.
FACEBOOK.COM/SPYPOINT TWITTER.COM/SPYPOINTCAMERA YOUTUBE.COM/SPYPOINTTRAILCAM
Utiliser les boutons h et pour naviguer sur l’interface et changer
d’option, le bouton OK pour sélectionner et le bouton pour retourner
au menu précédent.
1. CONFIGURER LES PARAMÈTRES GÉNÉRAUX
A. Allumer la caméra en appuyant sur le bouton de mise sous
tension.
B. Dans le menu principal, sélectionner CONFIGURATION puis,
GÉNÉRALpouraccéderaumenudecongurationgénéral.
C. Régler l'option Date (MM/JJ/AA ou JJ/MM/AA).
D. Régler l'option Heure (Heure/Minute).
E. Régler l'option Période. Cette option permet de congurer
la période de fonctionnement de la caméra pour chaque
journée de la semaine. Pour un fonctionnement en tout temps
(période d’opération de 24 heures), les mêmes heures de
début et d’arrêt doivent être programmées (ex.: 00:00/00:00).
F. Régler l'option Chargement LIT-09 en fonction de la source
d'alimentation (voir tableau suivant).
Conguration
2. CONFIGURER LES PARAMÈTRES SANS FIL
A. Dans le menu principal, sélectionner CONFIGURATION puis,
SANSFILpouraccéderaumenudecongurationsansl.
B. Régler l'option Cellulaire. Activer cette option pour que les
photos soient envoyées par transmission cellulaire.
Procédure d'activation disponible à
spypoint.com/activation.
Pour la caméra mini-LIVE-4GV, passer directement à
l'étape F.
C. Régler l'option Pays. Le pays où la caméra est utilisée doit
être sélectionné.
D. Régler l'option Fournisseur. Le fournisseur sélectionné doit
correspondre à la carte SIM utilisée dans la caméra.
Pour la caméra mini-LIVE-4G, passer directement à
l'étape F.
Source d'alimentation Option Chargement LIT-09
• 6 AA
• 12V
• 12V + 6 AA
Arrêt
• LIT-09*
• 12V + LIT-09*
• Panneau solaire + LIT-09*
Marche
* Bloc pile lithium rechargeable, vendu séparément (LIT-09) ou
avec un chargeur (LIT-C-8).
E. Régler l'option Mode transmission (mini-LIVE seulement).
• MySPYPOINT: La caméra communique avec le serveur
mySPYPOINT pour mettre à jour son état ou pour envoyer
des photos sur le compte de l’utilisateur.
Abonnement au service mySPYPOINT requis. Procé-
dure d'activation disponible à support.spypoint.com
/activation.
• MMS: La caméra communique par MMS pour mettre à jour
son état ou pour envoyer des photos. Entrer jusqu'à 5
numéros de téléphone différents vers lesquels les MMS
seront envoyés. Le code de pays ainsi que l'indicatif régional
doivent être entrés. Un MMS est facturé pour chaque
destinataire.
Un forfait MMS est nécessaire, disponible auprès
d'un fournisseur cellulaire compatible. Procédure
d'activation disponible à support.spypoint.com/activation.
• Email: La caméra communique par courriel pour mettre à
jour son état ou pour envoyer des photos. Entrer jusqu'à 5
adressescourrieldifférentesverslesquelleslesnotications
seront envoyés.
Un plan data est nécessaire, disponible auprès d'un
fournisseur cellulaire. Procédure d'activation disponible
à support.spypoint.com/activation.
F. Régler l'option Fréquence. Permet de choisir le nombre de
synchronisations que la caméra effectue par jour.
G. Régler l'option Première synch à. Permet de choisir à quel
moment de la journée que la caméra communique pour la
première fois.
Ex. : Si l’option «Fréquence» est réglée à 6/Jour et «Première
synch à» à 04:00, le contrôleur effectue 6 synchronisations
par jour et commence son premier envoi à 4 h, puis à 8 h, 12 h,
16 h, 20 h et 24 h.
3. CONFIGURER LES PARAMÈTRES DES 3 MODES
D'OPÉRATION
Dans le menu principal, sélectionner CONFIGURATION puis,
PHOTO,TIMELAPSEouVIDÉOpouraccéderaumenudecongu-
ration du mode respectif.
PHOTO
Délai : Permet de choisir l’intervalle de temps avant que la
caméra ne détecte à nouveau et puisse enregistrer la prochaine
photo.
Multi-photos : Permet de prendre jusqu’à 6 photos consécutives
à chaque détection, avec un délai de 10 secondes entre chaque
photo.
TIME LAPSE
Intervalle : Permet la prise de photos à intervalles réguliers
prédénis sans qu’il y ait pour autant, une détection de
mouvement.
VIDÉO
Délai : Permet de choisir l’intervalle de temps avant que la
caméra ne détecte à nouveau et puisse enregistrer la prochaine
vidéo.
Durée vidéo:Permetdecongurerladuréed’enregistrement
des séquences vidéo.
Photo prévidéo : Lorsque cette option est activée, une photo
est prise immédiatement avant chaque vidéo.
EFFECTUER LES ÉTAPES 4 À 6 PENDANT
L'INSTALLATION FINALE DE LA CAMÉRA.
4. TESTER LA DÉTECTION DE LA CAMÉRA
Lorsque le mode TEST est sélec-
tionné, aucune photo ou vidéo n’est
enregistrée. Passer devant la ca-
méra de façon perpendiculaire.
Lorsque la caméra détecte un
mouvement, la lumière de test
clignote pour indiquer que la ca-
méra aurait normalement en-
registré une photo ou une vidéo.
Si le système ne détecte pas
les mouvements, augmenter la
sensibilité de détection à l’aide de l’option «Sensibilité» située
dans le menu de CONFIGURATION GÉNÉRALE. Réaligner le
système peut aussi être nécessaire. En mode TEST, il est possible
de prendre une photo en appuyant sur le bouton OK. La photo est
enregistrée et apparaît dans le mode VISIONNEMENT.
5. VÉRIFIER LE SIGNAL CELLULAIRE
Toujours dans le mode TEST, s'assurer d'avoir un
signalcellulaire.Lesbarresdesignalsontafchées
en haut de l'écran.
6. DÉMARRER LA CAMÉRA
Sélectionner le mode d'opération
désiré (photo, time lapse ou vidéo)
dans le menu principal en appuy-
ant sur OK. Lorsque le mode est
sélectionné, la lumière de test sur
le devant de l’appareil clignote du-
rant 60 secondes pour permettre à
l’utilisateur de quitter les lieux sans
êtrephotographiéoulmé.
FACEBOOK.COM/SPYPOINT TWITTER.COM/SPYPOINTCAMERA YOUTUBE.COM/SPYPOINTTRAILCAM
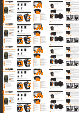
Photo
Time lapse
Video
Test
View
Settings
(Conguration)
Photo
(Conguration)
Time lapse
(Conguration)
Vidéo
HOME
(Conguration)
Photo
(Conguration)
Time lapse
(Conguration)
Vidéo
(Conguration)
Sans l
(Conguration)
Général
SETTINGS
Photo
Time lapse
Video
Wireless
General
Photo
Time lapse
Video
Test
View
Settings
(Conguration)
Photo
(Conguration)
Time lapse
(Conguration)
Vidéo
HOME
Photo
Time lapse
Video
Test
View
Settings
(Conguration)
Photo
(Conguration)
Time lapse
(Conguration)
Vidéo
(Conguration)
Photo
(Conguration)
Time lapse
(Conguration)
Vidéo
(Conguration)
Sans l
(Conguration)
Général
HOME
SETTINGS
Photo
Time lapse
Video
Wireless
General
HOME
Photo
Time lapse
Video
Test
View
Settings
(Conguration)
Photo
(Conguration)
Time lapse
(Conguration)
Vidéo
(Conguration)
Photo
(Conguration)
Time lapse
(Conguration)
Vidéo
(Conguration)
Sans l
(Conguration)
Général
CONFIGURATION
Photo
Time lapse
Vidéo
Sansl
Général
Photo
Time lapse
Vidéo
Test
Visionnement
Conguration
(Conguration)
Photo
(Conguration)
Time lapse
(Conguration)
Vidéo
ACCUEIL
Photo
Time lapse
Vidéo
Test
Visionnement
Conguration
(Conguration)
Photo
(Conguration)
Time lapse
(Conguration)
Vidéo
ACCUEIL
ACCUEIL
Photo
Time lapse
Vidéo
Test
Visionnement
Conguration
(Conguration)
Photo
(Conguration)
Time lapse
(Conguration)
Vidéo
(Conguration)
Photo
(Conguration)
Time lapse
(Conguration)
Vidéo
(Conguration)
Sans l
(Conguration)
Général
EINSTELLUNGEN
Foto
Zeitraffer
Video
Drahtlos
Allgemein
Foto
Zeitraffer
Video
Test
Betrachten
Einstellungen
(Conguration)
Photo
(Conguration)
Time lapse
(Conguration)
Vidéo
HOME
(Conguration)
Photo
(Conguration)
Time lapse
(Conguration)
Vidéo
(Conguration)
Sans l
(Conguration)
Général
EINSTELLUNGEN
Foto
Zeitraffer
Video
Drahtlos
Allgemein
Foto
Zeitraffer
Video
Test
Betrachten
Einstellungen
(Conguration)
Photo
(Conguration)
Time lapse
(Conguration)
Vidéo
HOME
(Conguration)
Photo
(Conguration)
Time lapse
(Conguration)
Vidéo
(Conguration)
Sans l
(Conguration)
Général
EINSTELLUNGEN
Foto
Zeitraffer
Video
Drahtlos
Allgemein
Foto
Zeitraffer
Video
Test
Betrachten
Einstellungen
(Conguration)
Photo
(Conguration)
Time lapse
(Conguration)
Vidéo
HOME
Foto
Zeitraffer
Video
Test
Betrachten
Einstellungen
(Conguration)
Photo
(Conguration)
Time lapse
(Conguration)
Vidéo
HOME
HOME
(Conguration)
Photo
(Conguration)
Time lapse
(Conguration)
Vidéo
Foto
Zeitraffer
Video
Test
Betrachten
Einstellungen
(Conguration)
Photo
(Conguration)
Time lapse
(Conguration)
Vidéo
(Conguration)
Sans l
(Conguration)
Général
IMPOSTAZIONI
Foto
Rallentamento
Video
Wireless
Generale
Foto
Rallentamento
Video
Test
Visionare
Impostazioni
(Conguration)
Photo
(Conguration)
Time lapse
(Conguration)
Vidéo
HOME
(Conguration)
Photo
(Conguration)
Time lapse
(Conguration)
Vidéo
(Conguration)
Sans l
(Conguration)
Général
IMPOSTAZIONI
Foto
Rallentamento
Video
Wireless
Generale
Foto
Rallentamento
Video
Test
Visionare
Impostazioni
(Conguration)
Photo
(Conguration)
Time lapse
(Conguration)
Vidéo
HOME
Foto
Rallentamento
Video
Test
Visionare
Impostazioni
(Conguration)
Photo
(Conguration)
Time lapse
(Conguration)
Vidéo
HOME
(Conguration)
Photo
(Conguration)
Time lapse
(Conguration)
Vidéo
HOME
Foto
Rallentamento
Video
Test
Visionare
Impostazioni
(Conguration)
Photo
(Conguration)
Time lapse
(Conguration)
Vidéo
(Conguration)
Sans l
(Conguration)
Général
AJUSTES
Foto
Cámara rápida
Vídeo
Inalámbrico
Generalidades
Foto
Cámara rápida
Video
Prueba
Vista
Ajustes
(Conguration)
Photo
(Conguration)
Time lapse
(Conguration)
Vidéo
INICIO
Foto
Cámara rápida
Video
Prueba
Vista
Ajustes
(Conguration)
Photo
(Conguration)
Time lapse
(Conguration)
Vidéo
INICIO
(Conguration)
Photo
(Conguration)
Time lapse
(Conguration)
Vidéo
(Conguration)
Sans l
(Conguration)
Général
AJUSTES
Foto
Cámara rápida
Vídeo
Inalámbrico
Generalidades
Foto
Cámara rápida
Video
Prueba
Vista
Ajustes
(Conguration)
Photo
(Conguration)
Time lapse
(Conguration)
Vidéo
INICIO
(Conguration)
Photo
(Conguration)
Time lapse
(Conguration)
Vidéo
INICIO
Foto
Cámara rápida
Vídeo
Prueba
Vista
Ajustes
3. CONFIGURE THE SETTINGS OF THE 3 OPERATING MODES
In the main menu, select SETTINGS and then, PHOTO, TIME
LAPSE or VIDEO to access to the respective operating mode
menu.
PHOTO
Delay: Allows the user to choose the time interval between each
detection before the camera can record the next photo.
Multi-shot: Takes up to 6 consecutive shots at each detection,
with a 10 second delay between each photo.
TIME LAPSE
Interval: This option allows the camera to take photos at regular
preset intervals without detection.
VIDEO
Delay: Allows the user to choose the time interval between each
detection before the camera can record the next video.
Video lenght: Allows the user to select the duration of the
recording.
Photo rst: When this option is enabled, a photo is taken
immediately before each video.
(Conguration)
Photo
(Conguration)
Time lapse
(Conguration)
Vidéo
(Conguration)
Sans l
(Conguration)
Général
SETTINGS
Photo
Time lapse
Video
Wireless
General
Photo
Time lapse
Video
Test
View
Settings
(Conguration)
Photo
(Conguration)
Time lapse
(Conguration)
Vidéo
HOME
(Conguration)
Photo
(Conguration)
Time lapse
(Conguration)
Vidéo
(Conguration)
Sans l
(Conguration)
Général
CONFIGURATION
Photo
Time lapse
Vidéo
Sansl
Général
Photo
Time lapse
Vidéo
Test
Visionnement
Conguration
(Conguration)
Photo
(Conguration)
Time lapse
(Conguration)
Vidéo
ACCUEIL
(Conguration)
Photo
(Conguration)
Time lapse
(Conguration)
Vidéo
(Conguration)
Sans l
(Conguration)
Général
CONFIGURATION
Photo
Time lapse
Vidéo
Sansl
Général
Photo
Time lapse
Vidéo
Test
Visionnement
Conguration
(Conguration)
Photo
(Conguration)
Time lapse
(Conguration)
Vidéo
ACCUEIL
(Conguration)
Photo
(Conguration)
Time lapse
(Conguration)
Vidéo
(Conguration)
Sans l
(Conguration)
Général
IMPOSTAZIONI
Foto
Rallentamento
Video
Wireless
Generale
Foto
Rallentamento
Video
Test
Visionare
Impostazioni
(Conguration)
Photo
(Conguration)
Time lapse
(Conguration)
Vidéo
HOME
(Conguration)
Photo
(Conguration)
Time lapse
(Conguration)
Vidéo
(Conguration)
Sans l
(Conguration)
Général
AJUSTES
Foto
Cámara rápida
Vídeo
Inalámbrico
Generalidades
Foto
Cámara rápida
Video
Prueba
Vista
Ajustes
(Conguration)
Photo
(Conguration)
Time lapse
(Conguration)
Vidéo
INICIO