
Owner's manual


-3-
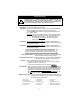
All standard lightbar models are designed for 12VDC negative ground vehicles
only. Reverse polarity will cause serious damage to the lightbar and/or vehicle.
Contact the automotive dealer if there are any doubts about the polarity of your vehicle.
Please review the separate Mounting Bracket manual that
is also enclosed with your bar for mounting instructions.
1. Determine the number of wires that you will need to run. Your lightbar may not use all of
the wires in the harness that was shipped with the lightbar. Please note which functions
your bar has, then review the lists on pages 1-2 to determine which wires you will need
to connect. The bare drain wire in our harness is optional (but recommended) and is
only necessary if you are experiencing RFI problems.
2. Locate the end of the lightbar into which the wire harness runs.
The black terminal block(s), which you will be
making your wire terminations to, should also be
located at this same end.
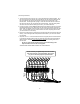
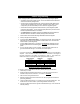
3. Remove the dome lens at this end of the
lightbar:
Step A: Loosen the four screws holding
each dome on.
Step B: Lift the dome off of the base
exposing the interior components.
Step C: When all work is completed,
reverse the steps to reinstall the
dome, taking care that the gasket
is properly aligned.
PLEASE NOTE: If you are using the existing wire harness supplied with the lightbar,
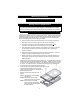
Mounting Instructions
Wiring Harness Replacement
Standard Razor lightbars come with a 15-foot wiring harness. If the harness supplied with
the lightbar is not long enough for your application, Star recommends ordering the proper
cable of the desired length from the factory. Completely remove the pre-installed wire
harness and replace it with one that is the correct length.
• Star recommends direct wiring to the terminal block on the inside of the lightbar,
rather than making connections to the end of the wire that is supplied.
• This lightbar is designed so that when replacing the wire harness, no wire
connectors are needed and only a few common tools are necessary.
• Direct wiring allows the wire connections to the lightbar to be made in a clean and
dry environment, avoiding any problems that may arise due to weathering on
external connections.
• Wiring directly inside the lightbar reduces the number of connections. There is an
increase in voltage loss with the addition of each connection.
• Making connections to the wires already provided is an acceptable alternative, as
long as these connections are good electrical connections and are resistant from
weathering effects.