
Owner's manual


-6-
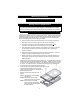
Wire Functions
WIRE COLORS AND FUNCTIONS WILL VARY FROM HARNESS TO HARNESS.
PLEASE BE SURE TO CORRECTLY IDENTIFY YOUR HARNESS AND USE THE
CORRESPONDING TABLE IN THE WIRING GUIDE ON PAGES 1-2. IN ADDITION,
ALL LIGHTBARS ARE SHIPPED WITH A WORKSHEET THAT IDENTIFIES THE
FUNCTION FOR EACH WIRE COLOR IN THAT SPECIFIC LIGHTBAR.
!
Ground - Connect to the negative side of the battery.
Bare/Shield - Connect to the negative side of the battery.
Power (Red) - Connect to +12-24 VDC through your switch. Be sure to use a 10 amp fuse
when connecting the switch to the positive side of the power supply.
The Red wire MUST be connected to +12VDC for the front and rear M-Tech
Plus™ LEDs to operate.
Please note: When the red POWER wire is connected to constant power the
light will draw a small current (20 mA). If your vehicle will be sitting
for extended periods of time (i.e. more than a few days), it is
recommended all power wires be routed through an ignition
switched power source.
Front Enable - When the red POWER wire has power to it, applying +12VDC to the Front
Enable wire will switch the front M-Tech Plus™ lights on independently from the
rear M-Tech Plus™ lights.
Rear Enable - When the red POWER wire has power to it, applying +12VDC to the Rear
Enable wire will switch the rear M-Tech Plus™ lights on independently from the
front M-Tech Plus™ lights.
Driver Side Pattern Select - Touch and release to +12-24 VDC to change the flash pattern
on the Driver side M-Tech Plus™ array (see page 7).
Passenger Side Pattern Select - Touch and release to +12-24 VDC to change the flash pattern
on the Passenger side M-Tech Plus™ array (see page 7).
High/Low - Used for switching between High and Low power.
• Leave disconnected for High Power only (cover with wirenut or tape).
• Connect to Ground for Low Power only.
• Connect to Ground through a switch for High/Low switching.
Synchronization - Using this wire, two or more M-Tech Plus™ circuits or lights can
be synchronized with one another. If you will be synchronizing two or more
units together, or synchronizing this light with other approved synchronizable
lights, leave the White/Red wire disconnected for now. Connect the White/
Red wires from all units together ONLY AFTER PROGRAMMING them for
the same pattern (see Pattern Programming on page 7).
Additional components - If your bar contains any additional components including, but not
limited to, those listed below, applying +12VDC to the appropriate
wire will activate those components:
If you do not need independent control of the front and rear M-Tech
Plus™ lights, it is recommended that you connect all THREE wires
(Power, Front Enable, and Rear Enable) together through your switch.
•
Driver Alley
•
Passenger Alley
•
Intersection Clearing Lights
•
Takedown Lights
•
Pursuit Lights
•
Rear Flashers
•
Work Lights
•
Right Stop Lights
•
Left Stop Lights
•
Tail Lights
•
Scene Lights
•
I.D. Lights
•
Additional LED Lights
•
Additional Strobe Lights
•
Additional Rotating Lights