MULTI-FONT 8082 0390 USERS MANUAL
MULTI-FONT LC-15 USERS MANUAL NOTINTENDED FORSALE
Trademark Acknowledgements LC-15, ND-10/15, NR-10/15: Star Micronics Co., Ltd. IBM PC, PC-AT, PC-XT, Proprinter XL, Proprinter II, PC-DOS: International Business Machines Corp. Microsoft BASIC, MS-DOS: Microsoft Corporation FX-1050, EX-1000, FX86e, FX286e: Seiko Epson Corp NOTICE ● All rights reserved. Reproduction of any part of this manual in any form whatsoever without STAR’s express permission is forbidden. ● The contents of this manual are subject to change without notice.
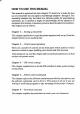
I HOW TO USE THIS MANUAL This manualis organizedintoninechapters.Tolearn how to makethe best use of yourprinteryou areurgedto readthroughchapters1through3. The remainingchaptersmay be treated as a ~fenmce guide for programming operations,etc. It assumesa degree of acknowledgeoff the operationof computm (forinstance,it assumesyouknowabouthexadecimalnumbers). The chaptersare as follows: Chapter 1— Settingup the printer This chapterexplainshow to get theprinterunpackedand setup.
I Chapter 6 — MS-DOSand yourprinter Since the PC or PC-AT family of computersrunningunder MS-DOS is currentlythe most popular conflgmationof microcomputer,we have includeda few hints and tips to help you use yourprinterwith such systems. SincevirtuallyallPCsaresoldwitha MicrosoftBASICinterpreter,wehave also included some hints, and a sample program in this language to demonstratethe capabilitiesof the printer.
FEATURES OF THE PRINTER Thisprinterisaconvenient,monochromeprinterwithoutfrillsbutwitha full complementof features, making it an excellent partner for a personal computer.It supportsthe IBM/Epsonprintercommandsandcharactersets, enablingitto printjust aboutanythingyourcomputercangenerate,bothtext and graphics.Someof its main featwes are the following: ● Extensivesoftwaresupport Sinceit is compatiblewith the Epson and IBM printers,it workswith any softwarethat supportsthoseprintem.
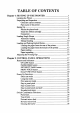
TABLE OF CONTENTS Chapter 1 SETTING UP THE PRINTER ...............................................1 Locatingtheprinter..........................................................................1 UnpackingandInspection................................................................2 Checkthecartoncontents........................................................2 Partsnameof theprinter..........................................................3 SettingUp...........................................................
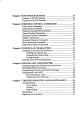
I Chapter 3 DIP SWITCH SETTING ..................................................29 Locationof theDIPSwitches.........................................................29 Functionsof theDIPSwitches.......................................................30 Chapter 4 PRINTER CONTROL COMMANDS ................................33 FontControlCommands................................................................34 CharacterSetCommands...............................................................
Chapter 8 SPECIFICATIONS ..................................................................99 Chapter 9 CHARACTER SETS .............................................................103 StandardCharacterSet................................................................. 104 IBMCharacterSet#2 ................................................................... 106 IBMCharacterSet#1................................................................... 108 IBMSpecialCharacterSet.....................................
chapter 1 SETTING UP THE PRINTER Subjects covered in Chapter 1 include — ● Locatingthe printer ● Unpackingand inspection(namesof parts) . Settingup and connection ● Loadingsinglesheets ● Loadingand parkingfanfoldforms ● Adjustingthe printinggap LOCATING THE PRINTER Beforeyou startunpackingand settingup yourprinter,make sure that you have a suitableplaceon whichto locateit. By “a suitableplace”,we mean: . A firm, level surfacewhichis fairly vibration-free .
UNPACKING AND INSPECTION Check the cartoncontents Nowunpackthecontentsof theprintershippingcarton,andcheckeachitem in the box againstFigure 1-1to make sure that you have everything(there shouldbe five items). If any of these items are missing,contactyour supplier. Figuru I-I. Check to make sure you have all five items: 1) Printer, 2) Peperguide, 3) Platen knob, 4) Ribbon cartridge, and 5) Uaer’s manual.
Theoptionalaccessorieswhichyoumayhaveorderedwithyourprinterare: ● Serial(RS-232)interfaceboard ● Automaticsheet feeder ● Pull tractorunit Parts name of theprinter Makean externalinspectionof theprinter.Notethe locationsof the following parts: 1 1 Entry slot ase lever ! J Figure 1-2 The printer’s external parts opensandclosesthe paperbail whichholdsthe paper againstthe platen. Release lever: releases the platen. This lever must be down for printingon singlesheets,and up for fanfoldforms.
SEITING UP Placethepnnterin thepositionwhereitis goingto bepermanentlysited,and removeallpackingmaterialfrominsidethetopcover.Thispackingmaterial is intendedto preventdarnageto theprinterin transit.You mayliketo keep thispackingwiththeprintercartonif youintendtransportingtheprinterfor use at a differentlocation. Mount theplaten knob The platenknob is packedinto a recessof the whitefoampackingmaterial whichheld yourprinterinsidethe printercarton.Be carefulto removethe knob beforedisposingof the packing.
I F@IIU 1-4. Remoting the top cover 1. Use the tensioningknob on the ribboncartridgeto tightenthe ribbonif it is slack (turn clockwise). 2. Use the grips on the side of the ribbon cartridge to help locate the cartridge(squeezetheminwardsgently),andmakesurethatthespindles on the cartridgeholderfit into the socketson the cartridgeitself. igura 7-5.
3. The ribbonshouldpassbetweenthe printheadandthepnnthead shield (see Figure 1-6). Ffgure 1-6. Pass the ribbon between the print head and print head shield Now,holdthetopcoveruprightandengagethetabsattheback.Thenswing the front edge down untilthe coveris closed. Leavethetopcoverclosedduringnormaloperation.Itkeepsoutdustanddirt and reducesthe printer’soperatingsounds.Openthe coveronly to change the ribbonor make an adjustment. Connection Connectthe printerto yourcomputer,usinga standardparallel-typecable.
Interface cable Connector Figut-o1-7. Connecting the interface cable If youwantto usetheoptionalserialinterface,slideouttheparallelinterface board by grippingthe flips on both sides. Then insert the optionalserial interfaceboard all the way, as shownin Figure 1-8. Figura 1-8.
LOADING SINGLE SHEETS Thissectionwilltake you throughthe proceduresfor loadingsinglesheets of paper. If you are using the optionalautomaticsheet feeder (ASF), read the ASF instructionbooklet. Automaticloading Singlesheetscanbe loadedmanuallywithpoweroff, or automaticallywith poweron. Wewill start the easy way with automaticloading. 1. Placethe paperguidein position,locatingthe lugson the bottomof the assemblyinto the slots on the rear coverof the printer. Figurs 1-9.
3. Adjustthepaperguidesto matchthe sizeof paperyou willbe using(rememberingthatprintingwillstartsomedistancefromtheleft-handedge of the carriage). 4. Place a singlesheetbetweenthe guides,placingthe side on whichyou wanttoprinttowardsthebackof theprinter.Gentlypushthepaperdown in the guidesuntil you feel it stop. lever Figure 1-10. Loading a single sheet 5. Turnon thepowerusingtheswitchatthe frontof theprinter.The printer willbeep,indicatingthatno paperis in positionforprinting.
Manualloading It is alsopossibleto loadpapermanuallywhiletheprinter’spoweris off.The procedureis: 1. Placethe paperguidein position,locatingthe lugson the bottomof the assemblyinto the slots on the rear coverof the printer. 2, Checkthat printerpower is off and the releaselever at the back of the printeris down. 3, Openthetopcover,thenmovethebailleveron topof thepnnterforward to open the paper bail. 4.
LOADING AND PARKING FANFOLD FORMS Fanfold forms have holes along the sides and perforationsbetween the sheets.They are also called sprocketforms, punchedforms, or just plain “computerpaper”.Thisprinteracceptsformsup to 16”wide.Fanfoldforms are loaded,parked,and unparkedas explainednext. Loadingthepaper from the rear of theprinter Youcanloadthefanfoldpapereitherfromtherearor fromthebottomof the printer. If you are going to load the paper from the bottom read the next section. 1.
6. With the sprocketcovers open, thread the paper over the sprockets, aligningholes with the pins on the sprockets. 7. Adjustthe spacingof the sprocketsby slidingthemalongthe bar,using the clamp lever at the back of each sprocketto release and lock the sprocketin positin(whentheleveris down,the sprocketmaybe moved, and when it is up, the sprocketis locked). Smocket cover Clamp lever F/gun?1-12. Thread the fenfold paper over the sprockets. 8.
12.Mountthepaperguidein the horizontalpositionshownin Figure 1-13, so that it will separatethe printedfrom the unprintedpaper. Figurs 1-13. Mounting the paper guide for fanfold forms Loadingthepaper from the bottomof theprinter You can load the fanfoldpaperfrom the bottomof the printerby using the optionalpull tractorunit. 1. Removethe top cover, then move the bail lever on top of the printer forwardto open the paperbail. 2. Mounttheoptionalpulltractorunitontotheprinter.
it Platen ~utw1-14.Mountingthe optionalpulltractor unit cover lever Figure 7-15. Thread the fanfold paper over the sprockets from the bottom of tie printer. 6. Nowclosethesprocketcovers,againmakingsurethatthepapersprocket holesare alignedwith the pins on the sprockets.If they art-not~igned properly,youwillhaveproblemswithpaperfeeding,possiblyresulting in tearingandjammingof the paper. 7. Mountthe new top cover.
Paperparking Afterloadingfanfoldpaperfromthe rear of the printer,you do not have to unloadit when you wantto print on a singlesheet.The printerwill “park” it for you if you followthe procedurebelow. 1. Paper parking starts with power ON, fanfoldpaper loaded in printing position,the releaselever up. 2. Pressthe ( ONLINE) buttonon thecontrolpanelto set theprinteroffline (ONLINE indicatorof~. 3. Tear off the printedform at the last perforation,leavingnot more than abouthalf a page showingabovethe top cover.
ADJUSTING THE PRINTING GAP The distance between the print head and the platen can be adjusted to accommodatedifferentpaperthicknesses.To makethisadjustment,remove thetopcover.The adjustmentleveris locatednearthe rightend of thepaper bail. Pulling the adjustmentlever upwards narrows the gap; pushing it downwardswidensthe gap. There are fivepositions;you can feel the leverclickinginto each position. The secondpositionfromthetop is the onemostcommonlyused for single sheetsofpaper.
chapter2 CONTROL PANEL OPERATIONS The controlpanelbuttonscan be pressedsinglyto performthe operations indicatedby theirnames.Otherfunctionscan be obtainedby holdingthese buttonsdown when you turn the printer’spoweron. Still furtherfunctions can be executedby pressingthe controlpanel buttonsin combination. This chapterexplainsall the buttonand indicatorfunctions.
ONLINE button The ( ON LINE ) button sets the printer on-line and off-line.The state changeseach time you press the button. Intheon-linestatetheprinterreceivesdatafromthecomputerandprintsthe data. In the off-linestatethe printerstopsprintingand sendsthe computer a signalindicatingthat it cannotacceptdata. The printerpowersup in the on-linestateif paper is present.If paperis not present,the printerpowersup off-linewith the POWER indicatorflashing.
PAPERFEED button If youpressthisbuttonin off-line,the paperfeedsforward.If youhold this buttondown,the printerperformsconsecutiveline feeds. Whileyou are feedinglines,if you alsopress the ( ONLINE > button,the paper will feed to the top of the next page.This is explainedlater. SET/EJECTPARKbutton Pressingthis buttoncausesthe printerto executepaperloadingif the paper has not loadedwhilein the off-linestate.
NLQ TYPESTYLEbutton Thisbuttonselectsthe fontstyleto beprinted.Draftstyleis alwaysselected atpower-up.To changeto oneof theNLQ(nearletterquality)styles,setthe printeroff-line,thenpressthe (SfF7E)buttonrepeatedlyuntilthe indicators besidethe desiredselectionilluminate.
POWER-UP FUNCTIONS In additionto their normal functions,all the control panel buttons have specialfunctionsthatoperateif youholdthemdownwhileswitchingpower on. OPOwER MICRO FEED - A — & FF —A ‘ ,byinJu[ p?+f, ,hlte, Printarea test Stay in P&l pitch rgure2-2. Power-up functions of control panel Short test mode If the printeris turnedon whilethe ( ONLINE ) buttonis pressed,the printerwill enterthe shortself-testmode.
Long test mode If the printer is turned on while the (PAPER FEED) button is pressed, the printerwill enter the long self-testmode.The printer will start printingas soon as the CPAPER FEED) button is released,and will print the version numberof the printer’sROM, followedby the wholecharacterset printed in each font stylesand pitch available. The test cyclesendlessly.To stop the test you must switchpower off.
Stay in panel style If held down duringpower-up,the (ST@ buttonpreventssoftwareinterferencewiththe fontstyleselectedfromthe controlpanel.There willbean acknowledgingbeep, after whichyou can set the printer off-line,select a fontstyle,thenreturnto theon-linestateandstartprinting.The selectedfont style will not be changedby any commandssentby software. Stay in panel pitch and style If you wantto protectboth the pitch and font style settingsfrom software changes,pressthe@iTiX!landGF7iT3buttonsduringpower-up.
The followingBASICprogramis a simpletest you can run in hexadecimal mode: 10 20 30 40 50 FOR 1=0 TO 255 LPRINT CHR$ ( 11 J NEXT I LPRINT END If your system passes the codes directlyto the printer withoutchanging them, you will get a printoutlike Figure2-4. 0[:) (:)1 02 1(:) 11 12 0s 1;)4 (:)5 (0.5 (07 1T 14 15 16 17 20 21 22 23 24 25 26 27 :0 :1 32 .
I Whenthe IBM-PCBASICinterpretersendshex codeOD(carnage return) it adds an extra hex OA(line feed). Hex code 1A (end-of-fde)also gets special treatment:the interpreterdoes not send it at all. This can cause problemsthat generategraphicsor downloadcharacterdata, but there is a solution.Try changingline 20 in the precedingprogram and adding the codingshownbelow.
SWITCH COMBINATION FUNCTIONS Severaladditionalfunctionscan be obtainedby pressingthe controlpanel buttonsin combinations. MICRO FEED v A — OPOWER h FF —A --—- Clearing tie buffer Figure 2-6. Switch combination functions of mntrol panel Form feed If you are usingsinglesheets,this operationejectsthe currentpage. If you are using fanfoldforms, it feedsto the top of the next page. 1. Press the ( ONLINE ) buttonto set the printeroff-line. 2. Press the (PAPER FEED) buttonandhold it down.
Topof form Whenyou turn on printerpower,the top-of-formpositionis automatically set to the currentposition.If this is not whereyou wantthe top of the page to be, you can changethe top-of-formpositionas follows. 1. Press the( ONLINE ) buttonto set the printeroff-line. 2.. Move the paper to the desired top-of-formposition by pressing the (PAPER FEED) button,orbyperformingaforwardorreversemicro-feed. 3. Press andhold the ( ONLINE ] button. 4. Press and hold the (PiT5R)button. 5.
Clearingthe buffer When DIP switch 2-1 is ON, the printer stores received data in a large memorybuffer.Thiscreatesaproblemwhenyouwantto abandona printing job and restart:theprintermay beholdingmuchmoredatain its bufferthan it has actuallyprinted,and this unprinteddata must be cleared out before restaffing.Turning power off is one way to clear the buffer, but there is anotherway: 1. Halt the printingprogramon the computer.
The bankof DIP (DualIn-linePackage)switchesinsidethe printeris used for variousfunctions. This chapterexplainswherethe DIP switchesam located,and how to use them. LOCATION OF THE DIP SWITCHES When you removethe printer’scover and look inside,you will see on the greenboardat thebottomof theprintertwo groupsof smallwhiteswitches markedDSW1andDSW2.Thesearetheprinter’sDIPswitches.DSW1has eightswitches,named 1-1to 1-8fromleft to right.DSW2has fourswitches named 2-1 to 2-4. Figure 3-1.
FUNCTIONS OF THE DIP SWITCHES Theprinteris deliveredwithallDIPswitchsetto theONposition.Theseare thestandardsettings.Bychangingthe settings,youcan altervariousprinter functionsto match your requirements.The followingquestionswill help you makethe right settings.
Switch 1-3: Which type of printing area format do you want to use for singlesheets? This printercan use two typesofpnnting areaformatfor singlesheets. By puttingtheswitchON(“Atype”),thetopofthefirstlineof printingwillstart to one inch from the top of the paper, andthe printedarea wiIIend to print one inch from the bottomof the paper. ByputtingtheswitchOFF(”B type”),thetopof thefirstlineof printingwill start 1/6inchfromthetop ofthepaper,andtheprintedareawillend 1/3inch fromthe bottomof the paper.
Switch 1-8: Do you want an automaticline feed? If you leave this switch at the ON position,a separateline-feed code is requiredto obtaina line feed. If you move this switch to the OFF position,the printer performs both a carriagereturn and line feed each time it receivesa carnage-returncode. Mostcomputersystemssend a line feedcode,or both a carriagereturnand line feed, at the end of each line, so this switchshouldbe left ON.
chapter 4 PRINTER CONTROL COMMANDS The printerhas two emulationmodes:Standardmode and IBM mode. In standardmode,theprinteremulatesthe functionsof theEpsonFX-1050. In IBM mode, the printer emulates the IBM Proprinter XL. Additional commandcodesare includedas a supersetof these emulations. Theemulations changedbymeansof DIPswitch1-6.WhenON,theprinter will be in standard mode, and when OFF, the printer will be in IBM emulationmode (see Chapter3).
Many commands have alternativeforms. Some commands use cESC> (charactercode27)in StandardmodeandcFS> (charactercode28)in IBM mode. Other commandshave parametersthat can be specified as either character codes or digit characters,like the parameter 1 in the sample commandabove.
Select NLQ type style Mode ASCII Both Decimal “k” 27107 n n Hexadecimal IB 6B n SelectsanNLQtypestyleaccordingto thevalueof n.Indraftmode, thiscommandremainsdormantandtakeseffectlaterwhenNLQ is selectedby
Select Oratorcharacterswithsmall capitals Mode Decimal ASCII Both “(” “(” “F’ “)” “S’ “2” Hexadecimal 4040 7041 41 50 28 28 46 29 29 32 Changesto the OratorwithsamllcaptitalsNLQfont.Ignoredif the -button was pressedduringpower-up. Select Oratorcharacterswithlower case Mode ASCII Both “((“ ““ Hexadecimal Decimal “F’ “)“ “)” “3” 4040 7041 41 51 28 28 46 29 29 33 Changesto the Orator with lower case NLQ font. Ignoredif the _ buttonwas pressedduring~wer-up.
Cancelemphasizedprinting Mode ASCII Both Hexadecimal Decimal 27 70 “F” IB 46 Cancelsemphasizedprinting. Double-strikeprinting Mode Both ASCII “ ,, ,, “ ( ( Hexadecimal Decimal “B” “)” “)” “l” “G” 40 40 66 41 41 49 28 28 42 29 29 31 27 71 IB 47 Causessubsequentcharactersto be printedin double-strikemode witha slightverticalpapermotionin between,causinga thickening of horizontalstrokes.
stop underlining ‘Mode Both ASCII ,, ,, ‘, 4. ( ( “-” “Y’ “-” “O” “-” Decimal “Y’ “o” Hexadecimal 40 40 45 41 41 48 28 2820 29 29 30 27 45 48 IB 2D 30 27 45 IB 2D 00 0 “Stopsunderlining. Start overlining IMode \ Both Decimal ASCII Hexadecimal .,–‘, t!~.. 27 95 49 IB 5F 31 “ - “ <1> 27 95 IB 5F 01 1 Causessubsequentcharactersto be overlined.Spaces skippedby horizontaltabulationare not overlined. Stop overlining Mode Both ASCII Decimal .1–.
Cancelsuperscriptor subscript Model ASCII I BothI “T” Decimal / Hexadecimal I IB I 27 &l 54 ] I Stops printing superscriptsor subscripts and returns to normal printing. CHARACTER SET COMMANDS Selectstandardcharacterset Mode I Both ASCII I Decimal I Hexadecimal “t” “O” 27116 48 IB 74 30 27116 0 IB 74 00 “t” I Selectsthe standardcharacterset. This is the power-updefault in Standardmode if DIP switch 1-7is ON.
I Selectinternationalcharacterset Mode std. IBM Decimal ASCII “R” n “R” n Hexadecimal 27 82 n IB 52 n 28 82 n IC 52 n Selectsan internationalcharacterset accordingto the value of n. n O 1 2 3 4 5 6 n Characterset 7 SpainI 8 Japan 9 Norway 10 Denmark11 11 Spain II 12 Latin America 13 Denmark/Norway Characterset U.S.A France Germany England DenmarkI Sweden Italy me first eightof thesecharactersets (from U.S.A.to Spain I) can be selectedas power-updefaultsby DIP switches2-2 to 2-4.
I Selectslashzero Mode Borh Hexadecimal Decimal ASCII “ - “ “l” IB 7E 31 IB 7E 01 27126 49 27126 1 “ - “ <1> Causessubsequentzero charactersto be overprintedwith a slash (m. Select normalzero Mode Both Decimal ASCII Hexadecimal IB 7E 30 10 7E 00 27126 48 27126 0 “ - “ “O” “ - “ Causes subsequentzero characters to be printed normally (0), withouta slash. CHARACTER SIZE AND PITCH COMMANDS Pica pitch IMode]I std.
Condensedprinting Mode ASCII Both Decimal 18 Hexadecimal 12 In Standardmode,changesfrom condensedpica to normalpica or fromcondensedeliteto normalelite.
Expandedprintingfor one line Mode Both ASCII Decimal 14 27 14 Hexadecimal OE IB OE Causessubsequentcharactersin the currentlineto be expandedto doublewidth.Charactm returnto normalwidthafterthe nextline feed (cLF>). The ,cVT>, -, and “W” Ocommands also cancelexpandedprinting. Cancelone-lineexpandedprinting Mode ASCII Borh Decimal 2U Hexadecimal 14 Stopsone-lineexpandedprintingset with or . Doesnot cancelcESC> “W” 1.
Selectmasterprint mode Mode ASCII Decimal Both “!” n 27 33 n Hexadecimal IB 21 n Selects a combinedprint mode accordingto the value of n. The valueof n is the sumof thevaluesgivenbelowfor thedesiredcharacteristics. Examples:n = 1 giveselite;n = 9(1 +8) givesemphasizedelite;n = 137(1 + 8 + 128)givesunderlinedemphasizedelite.
of an inch with cESC> “3” <24>, and print the same characters twice,upperhalf on one line, lowerhalf on the next. For accurate alignmentof the two halves, select unidirectionalprinting with “U” <1>.
Returnto normalheight Mode Both ASCII Hexadecimal Decimal “W” “W” “O” 27119 IB 48 27119 77 30 IB 77 00 0 Terminatesdouble-heightprintingandprintssubsequentcharacters at normalheight.Resumessuper/subscriptandcondensedprinting if thesemodeswere in effect beforedoubleheightwas selected.
I VERTICAL POSITION COMMANDS Set line spacingto 1/8inch Mode ASCII Both “O” Decimal 27 48 Hexadecimal IB 30 Setsthe distancethe paper advancesor reversesin subsequentline feeds to 1/8inch. Set line spacingto 7/72inch Mode Decimal ASCII Both “l” 27 49 Hexadecimal IB 31 Setsthe distancethe paperadvancesor reversesin subsequentline feedsto 7/72 inch. Set line spacingto 1/6 inch Mode std.
Set line spacingto n/72 inch Mode ASCII Both “A” n Decimal Hexadecimal 27 65 n IB 41 n In Standardmode,sets the distancethe paperadvancesor reverses in subsequentline feedsto nf72inch,wheren is betweenOand 85. ~If n =0, the line spacingis set to O. In IBMmodethis commanddoesthe sameexceptthat (1) the new line spacing does not take effect until the next “2” command,and (2) if n = O,the “A” commandis ignored.
Performone n/216-inchline feed Mode ASCII Both “J” Decimal n Hexadecimal IB 4A 27 74 n n Feedsthepaperonceby n/216inches,wherenis between1and255. Doesnot movethe printpositionrightor left whenDIP switch 1-2 is OFF. Does not changethe line-spacingsetting. Performone n1216-inchreverse line feed Mode ASCII Both “j” Hexadecimal Decimal n IB 6A n 27 106 n Feedsthepaperonceby n/216inchesin thereversedirection,where n is between1and255.
I Set page length ton lines ModeI Decimal ASCII BothI “C” n 27 67 Hexadecimal IB 43 n n Setsthe pagelengthto n lines in the currentline spacing,where n isbetween1and 127in Standardmodeorbetween1and255inIBM mode. Changingthe line spacinglater does not alter the physical page length.The currentline becomesthe top of the page.
Canceltop and bottommargins Mode Decimal ASCII Both “O” 27 79 Hexadecimal IB 4F Cancelsboth the top marginand the bottommargin. Form feed Mode ASCII Both Decimal 12 Hexadecimal Oc Feedsthe paperto the top of thenextpage accordingto the current pagelength,andmovesthe printpositionto theleft margin.When the automaticsheet feeder (ASF) is selected (DIP switch 1-4 is OFF),this commandejectsthe currentpage.
I Set verticaltab stops Mode ASCII Both “B” Hexadecimal Decimal nl n2 ... <0> I 27 66 nl n2 ... 0 ] IB 42nl n2 ... 00 Cancelsall currentverticaltab stopsandsetsnew verticaltab stops at lines rzZ,n2, etc., wherenl, n2, etc. are numbersbetween 1 and 255. A maximumof 16verticaltab stopscan be set.The tab stops must be specifiedin ascendingorden any violationof ascending orderterminatesthetab stoplist. Standardterminationisby the controlcode.
Verticaltab Mode ASCII Decimal Hexadecimal Both 11 OB Feeds the paper to the next verticaltab stop and moves the print positiontotheleftmargin.Performsalinefeedifnoverticaltabsare set, as at power-up.Feedsto the top of the nextpageif verticaltabs are set but the currentline is at or belowthe last verticaltab stop.
Set right margin Mode std. IBM “Q” Hexadecimal Decimal ASCII “Q” n n IB 51 n IC 51 n 27 81 n 28 81 n Setstherightmarginatcolumnn inthecurrentcharacterpitch(pica ‘pitchif proportional spacing is currently selected). Column n becomesthelastcharacterpositionintheline.Therightmargindoes not move if the characterpitch is changedlater.
Set automaticline feed IModel ASCII I IBMI “5” I <1> Decimal I 27 53 1 I I Hexadecimal IB 35 01 I I Causesthe printerto performboth a carriagereturn and line feed each time it receivesa code. This commandtakes priority over DIP switch 1-8. Cancelautomaticline feed Mode ASCII IBM “5” Decimal 27 53 0 Hexadecimal IB 35 W Causestheprinterto performonlya carriagereturnwhenit receives a
Rightjustify Mode Both Decimal ASCII cESC> “a” “2” “a” <2> 27 97 50 27 97 2 Hexadecimal IB 61 32 IB 61 02 Alignssubsequenttextwiththerightmargin,leavingtheleftmargin ‘ragged. Set horizontaltab stops Mode Decimal ASCII Both “D” nl n2 ... 27 66nl n2 ... 0 Hexadecimal IB 44nl n2 ... 00 Cancelsall currenthorizontaltab stops and sets new tab stops at columnsnl, n2,etc. in thecurrentcharacterpitch(picapitchif proportional spacing is currently selected), where nl, n2, etc.
I Horizontaltab Mode ASCII Both Decimal 9 Hexadecimal 09 Movesthe printpositionto the nexthorizontaltab stop. Ignoredif thereisnonexthorizontaltabstopinthecurrentline.Notethatwhen underliningis selected,spacesskippedby horizontaltabulationare not underlined. Relativehorizontaltab Mode std. IBM Decimal ASCII cESC> ‘Y” rd A“ nl d d 27 92 ni d 28 92 nl d Hexadecimal 16 5C td d IC 5C nl n2 Movestheprintpositionrightorleft a specifieddistance(maximum 13.6inches).
GRAPHICS COMMANDS Print normal-density8-bitgraphics Model ASCII Both cESC>“K” nl n2 ml d ... I Decimal I I 27 75 nl d I ml d ... Hexadecimal IB 4B nl ml I d d ... I Prints bit-image graphics at 60 dots per inch horizontally.The graphicimageis 8dotshighandnl + n2x 256dotswide.Maximum width is 13.6inches(816dots).ml, m2, ... are the dot data,each a l-byte value from Oto 255 representing8 verticaldots, with the most significantbit at the top and the least significantbit at the bottom.
Print quadruple-density8-bitgraphics Mode Decimal ASCII Both “Z” nlml n2 d Hexadecimal IB 5A nl n2 27 90 nl d ... ml d ... ml d ... Prints bit-imagegraphicsat 240 dots per inch horizontally(maximum 3264dots wide),skippingevery seconddot in the horizontal direction.See “K” for otherinformation. Selectgraphicsmode Mode Decimal ASCII Both “*”n2 nOmlnl d ... 27 42 no rd d ml d .. . Hexadecimal IB 2A nO nl d ml d ...
I Print 9-pingraphics Mode Std. ASCII “A” nO nl n2 ml d Hexadecimal Decimal 27 94 no nl ... n2 ml d ... IB 5E nO nl d ml d ... Printsbit-imagegraphicsat 60dotsperinchif nO= Oor 120dotsper ~inch if nO= 1.The graphicsimageis 9 dotshigh and nl + n2 x 256 dots wide. Maximumwidth is 13.6inches.Dots beyondthe right marginare ignored.ml, m2, ... arebytepairsrepresenting9 vertical dots each.
nl is the charactercodeof the first characterdefinedand n2 is the charactercodeof thelast characterdefined.nl and n2 mustbothbe between32 and 127or both be between 160and 255. n] must be equalto or less than n2. Use of charactercodes32 (space)and 127 (deletecode)shouldbe avoidedif possible. Eachcharacters definedby anattributebyte(mO)and 11databytes (ml, m2, ..... roll).
Definedownloadcharacters Mode ASCII Decimal “=” nl n2 IBM aO al a2 ml d ... mll Hexadecimal 27 61 0 nl 20 IB 3D 00 nl 14 aO al d ml aO al d ml d ... mll d ... mll Definesone or morenew draftcharactersand sto~s themin RAM for later use. Draft modemust be selectedbeforethis commandis executed.nl and ti givethe numberof bytesof characterdatathat willfollow.UOisthecharactercodeof thefirstcharacterdefined.al andU2areattributesbytes.ml toml] arethecharacterdata,andare the sameas in d3Sb “&”.
Select draft downloadcharacterset Mode ASCII IBM “I” “I” Decimal “4” <4> 27 73 52 27 73 4 Hexadecimal IB 49 34 IB 49 04 Selectsthe downloadcharacterset anddraftquality.Ignoredif the _ buttonwaspresseddufingpower-upor if D~ switch2-1 iS ON. Select draftelite downloadcharacterset Mode IBM Decimal ASCII ‘T’ “5” “I” <5> 27 73 53 27 73 5 Hexadecimal IB 49 35 IB 49 05 , Selectsthe downloadcharacterset,draftquality,andelitepitch(12 cpi).
MACRO INSTRUCTION COMMANDS Definemacro instruction Decimal Mode ASCII Both “+” ... 27 43 . 30 Hexadecimal IB 2B IE ~Cancels any existing macro instructionand replaces it with the definedinstruction.The definedmacro instructionconsistsof the charactersbetweenthe “+” and cRS>. Thesecan be any printable charactersor controlcharactemexcept,up to a maximumof 16 characters.
Accept MSB as is Mode ASCII Both W“ Decimal 27 35 Hexadecimal IB 23 Cancelsthe precedingcommandsand acceptsthe most significant bit as it is sent to the printer. Delete last charactersent Mode Std. ASCII
I Cancelimmediateprint Mode ASCII Both “i” “O” “i” CO> Decimal Hexadecimal 27105 46 27105 0 IB 69 30 IB 69 @l Cancelsthe immediateprintmode.The printerwaitsfor each line ‘tobe completedbeforeprintingit, and doesnot scrollthe paperup and down.This commandis ignoredwhen frictionfeed is used. Setprinter off-line Mode ASCII Decimal IBM “Q” std. Hexadecimal 19 13 27 81 22 IB 51 16 Sets the printer off-line.
Bidirectionalprinting Decimal Mode ASCII Both “U” “O” “U” 27 85 48 27 85 0 Hexadecimal IB 55 30 IB 55 (KI Causessubsequentprintingto be donein the normalbidirectional mode, whichis fasterthan unidirectionalprinting. Unidirectionalprinting Mode ASCII Both “U” “l” “u” <1> Decimal 27 85 49 27 85 1 Hexadecimal IB 55 31 IB 55 01 Causes subsequentprintingto be done unidirectionally,ensuring maximumverticalalignmentprecision.
I Auto feed Decimal Mode ASCII Both <4> ,,(,, ‘,(,, ,’4,, ,,),, Hexadecimal 27 25 4 IB 19 04 40 40 52 41 41 28 28 34 29 29 ,,),, Selectsthe automaticsheetfeeder.Ignoredif DIPswitch 1-4is ON ,(ASF inactive). Ejectpaper fromASF IModel I ASCII Borh ,,(,, “R” ,,(,, “R” Decimal I Hexadecimal I 27 25 82 “ ))“ “ “ IB 19 52 40 40 82 41 41 28 28 52 29 29 Ejects the current page. Ignored if DIP switch 1-4 is ON (ASF inactive).
I chapter 5 DOWNLOAD CHARACTERS Withthisprinteryoucancreatenewcharacter andsymbols,downloadtheir dotdata,andhavethemprintedin placeof selectedcharactexxin the regular characterset.Charactemthatcanbe generatedin thiswayrangefromsimple but useful symbols like the check mark through complex Chinese or Japanesecharacters. Regular characten are permanently stored in the printer’s ROM, but charactersyou designare downloadedand storedin RAM for use.
. The minimumwidthof a characteris five dots. ● ● ● The user-definedcharactersmay use eightdots vertically. Dotscannotoverlap— that is, you may not have a dot insidea box next to one that is on a line. YoumaydefineanypositionintheASCIItable,excepttheblockgraphics area when you are downloadingin the IBM mode. PhotocopythegridinFigure5-2tohelpdesignyournewcharacters.Wewill use a tiny representationof a car-shapedsymbolfor our example.
mlndm5m7 m9mll m2 m4 m6 m~ ml(l 128 64 ASCII Code: 32 Descender: 16 ? Left space: O Last column: 8 17 mO = Descender x 128 4 + (Left x 16) + Last 2 I 124 66 64 76 76 0 0 4 36 2 72 Figure 5-3. Add the values of the dots in eacA column and write the sum of eaeh column at the bottom Next you must choose whetherto make the car symbolan ascenderor a descender.
Assigningthe characterdata Now,wecalculatetheverticalnumericalvaluesof thecolumnsof dots,and enterthemunderneaththe grid.For example,lookingat Figwe 5-3, we see thatintheleft-mostcolumntherearefivedots,andtheyaresittingin the“64” box,“32’’box,“16”box,“8”box,and“4”box.Thusitsverticalvalueis 124. In the next column,there is no dot straddlingthe verticalline; its value is recordedas O. You will see the lettersml, m2,m3,etc., are aboveyourvalues.
I 1250 1260 1270 1280 1290 1300 1310 1320 1330 1340 1350 1360 1370 1380 1390 1400 1410 1420 1430 1440 1450 1460 1470 1480 1490 LPRINT “CHEMICALS’’;U-IF?$(9) ; FOR 1=.4 TO 8.7 STEP .4 LPRINT CHR$(60) ; NEXT I LPRINT LPRINT “GUNS’’;CHR$(9) ; FOR 1=.4 TO 1.4 STEP .
DEFINING YOUR OWN NLQ CHARACTERS As you probablynoticed,NLQ charactersare printedby two passesof the printhead.Halfofthecharacterisprintedonthefirstpass,andtheremainder onthesecondpass.Thepaperis rolleduphalfa dotheightin betweenpasses to let the print head print dotson the secondpass that overlapthe previous dots, in order to fill in the spacesandproducedensercharacters.Additionally, the print head speed is halved,and the dots are printed at doublethe densityof draft characters.
simultaneoususe of regularand downloadcharactersin the draft character sectionapplyequallyto NLQ characters. t?ll fI124 ( Ist) ,.ni23 .,.,n146 (2nd) ]~~ 128 64 64 32 32 16 16 8 8 4 ASCII Code: Descender: Left space: Right space: mO= Descender x 128 + (Left x 16) + Right 4 2 2 1 I .1St: ?nd: igure 5-4. Use this grid (or one similar to it) to define your own NLO characters ml fli24.. - (Ist) ..m23 ,. ..
chapter 6 MS-DOS AND YOUR PRINTER WhenusingyourprinterwithanIBMPC,PC-XT,or PC-ATor compatible, youwillprobablybe usingPC-DOSor MS-DOSas anoperatingsystem.A numberof softwaretricksmaybe usefidhere.This chapteris not,however, a substitutefor the operatingsystemmanualssuppliedwithyourcomputer. To learn how to print ffles,etc. it is best to read the relevantparts of these manuals.
Numberof columns Pica Elite Condensedpica Condensedelite Proportional CPI 10 12 17.1 20 136 163 233 272 Variable Sometimes the software installation will ask you for an initialization sequenceto returnto the defaultsettings.The commandfor yourprinteris (Q. Makesurethatthe DIP switchesare set for the rightprinteremulation,and that youhaveselectedthe appropriatecharactersetusingthe DIPswitches. If youarein doubtabouttheconfiguration of yourapplicationsoftware,seek expert advice.
I If you want to print a title in double-sizeOrator with small capitals,then changeto regular-sizeCourierforsometextthatincludesitalics,youcanuse these commandsas follows: File as seen on computerscreen: ( (F) ) 2 ( (S) ) 3 Printer Commands ( (F) ) O ( (S) ) O Type style, size, bold print, and ( ( I ) ) 11ta 1i c ( ( I ) ) Ocorrunands can be embedded (( I))lanYwhem ((l)}Oln a document.
The printer supportsvariouscommandsin additionto the above,such as quadruple-sizeprinting. Mostof theseothercommandsconsistof the escapecode followedby one or more lettersor numbers. If yoursoftwareenablesyouto placetheescapecodein yourfiles,or if you were able to define this as a user optionduring installation,you can also embedthese escape sequences. PROGRAMMING THE PRINTER WITH DOS COMMANDS If your system includesthe file PRINT.COMyou can use the main DOS printingcommand.
I COPYandTYPE do not permityou to executeother commandswhilethe file is printing. If youwantaparticularfontstyle,orpnnt pitch,youcanmakethesesettings from the controlpanelbefore you start printing.See Chapter2. IfyouprintfromtheDOScommandlevelveryoften,itwillbe advantageous to createa printersetupfile.Then insteadof settingfontstyleetc. manually each time, you can completethe setup with a singlecommandfrom your computer.
‘V indicatesthat the followingcharacteris a controlcode. *V[ enters the code.has charactercode27, and“[” is the 27thcharacterin ASCII sequencefrom A. Similarly,‘VA enters the controlcode <1>. See your DOS manualif you need t%rtherinformationaboutEDLIN. You can now set up the printerby sendingit the fileNLQELITE.DAT.To avoidunnecessaryloggingof commands,switchhard-copyoutputoff (by pressing(TIllL-PRTSCifhardcopyis on).ToprintthefileREADME.
1090 1100 1110 1120 1130 ‘Pica pitch P$=E$+”P” _.———.— —-. .-——— ‘ Start printing ———————————-————-—..—-.
1640 1650 1660 1670 1680 1690 1700 1710 1720 1730 1740 1750 1760 1770 1780 1790 1800 1810 1820 1830 1840 1850 1860 1870 1880 1890 1900 1910 1920 1930 1940 1950 1960 1970 1980 1990 2000 2010 2020 2030 2040 2050 2060 2070 2080 2090 2100 2110 2120 2130 2140 2150 2160 2170 GOSUB 2100 LPRINT H$;C$;’’Downloadcharacters: “; LPRINT D$;E$;”%l”; ‘Select download character FOR 1=1 TO 5 LPRINT CHR$(60); ‘Print downloaded character NEXT I LPRINT D$;E$;’’%O”; ‘Select normal character GOSUB 2180 LPRINT C$;E$;”%l”; ‘Selec
I 2190 2200 2210 2220 2230 2240 2250 2260 2270 2280 2290 2300 2310 2320 2330 2340 2350 2360 2370 2380 2390 2400 2410 2420 2430 2440 2450 2460 2470 2480 2490 2500 2510 2520 2530 2540 2550 2560 2570 2580 2590 2600 LPRINT C$;E$:’’&’’;CHR$(O) :CHR$(60);CHR$(60); RESTORE 2310 FOR M=O TO 46 READ MM LPRINT CHR$(MM); NEXT M RETURN ‘DATA ---––––––––––––––––-–-–-–––--–-–––––-––-–––––– ‘ Draft download character --–––––––––––--–––––––––––– DATA 139,124, 0, 66, 4, 64, 36, 16, 2, 16, 12, 0 ‘ ‘ NLQ download character ––
How theprogram works Thisprogrambeginsby assigninga numberof printercommandsto BASIC stringvariables(lines 1000to 1090).Youcanfindmostof thesecommands near the beginningof chapter4. The WIDTH“LPT1:”255statementin line 1110meansinfhite line width. It preventsthe IBM-PCfrom insertingunwantedcarriagereturnsand line feeds in graphicsdata. Actualprintingbeginsin line 1120.
Type sty 1es are : ,..i:.~;:,, :, ;::~. (::.i;;,,...(;,;.::.:,,.., ~,...::? .+ Courier characters , Sa nse r if char-acte rs ? ORATOR WITH SMALL CAP ITAI. and Print P itches Pi cci pi t.ch CIttier OR are : ( 1Cl CF’1) , Condensed p]cap]tch (17CPII, propor-tionil spacing for Various S, wi t h 1 @wer case characters, F .,. -rTA[.T[;S Fat- a II v;:~..
I Modificationsfor IBM mode This programcan also be run in IBM mode (DIP switch 1-6 OFF’)if you changea fewof the linesas shownbelowto allowfor differencein someof thecommands.Youwillgeta cylinderinsteadof abarreleffect,becuasethe IBM mode does not have any command to micro-adjustthe character spacing.
chapter 7 TROUBLESHOOTING AND MAINTENANCE Thefollowingsectionon troubleshootingandmaintenanceis intendedonly M a brief guideto these functions.Rememberthat yourprinteris a highly sophisticatedelectronicdevice,whichalsocontainshighvoltageinside.For that twcison,only carry out thoseoperationsdescribedin this chapter. CAUTION: Anyattempttocarryoutoperationsotherthanthosedescribed heremayresultin electricshockand/ordamageto the printer.
I Powersupply If the POWER indicatordoesnot illuminate,checkthe following: Check Is the power cable properly plugged into the electrical outtet? Is power being supplied to the outtet? Is theprintervoltage correct? Possible remedv I Turnoffthe@nter,ensure the power cable is securely connected, and then turn the printer back on. Turn off the printer, unplug it, and try with another appliance to determine if electricity is being supplied to that outlet.
If the print is faint,or uneven,checkthe following: Check Possible remedy Istheribbon properly in- Checkandreinstall ifnecessary. 1-”- Is the ribbon worn out? The ribbon has a long life, but eventually will need replacing. Fit a new riblxm cartridge if necessary.
Paper feeding If cut sheet paper (withoutthe ASF) is not feeding smoothly,check the following: Check Is the paper release lever pushed back (to the ~ position)? Is the paper guide in place and vertical? Are the left and right guides too close together? Is the ASF selected with the DIP switch settinm? Are you trying to feed paper using the front panel buttons while the. ON LINE indicator is illuminated? Is the paper too thick? Possible remedy Set the release lever to the ~ position.
Check Possible remedy Are you trying to feed paper You can only feed paper in this way when the printer is using the front panel buttons off-line. Set the printer off-line and then feed paper. while the ON LINEindicator isilluminated? Is the paper too thick? 1 1 There prelimits to the thickness of paper that can be fed in this way (one top copy and two NCR copies). Try with thinner paper.
If the paperpark facilitydoesnot appearto be workingcorrectly,checkthe following: Check Is the paper release lever in the ~ position? Has the fanfold paper been properly parked? Possible remcxly The paper release lever must be set to the ~ position after the fanfold paper has been parked. Make sure that the POWERindicator comes on flashing after the fanfold paper has been parked.
MAINTENANCE Essentially,your printer is a robust piece of equipment, but should be treatedwitha modicumof carein orderto avoidmalfunctions.Forexample: ● ● 9 ● ● Keep yourprinterin a “comfortable”environment.Roughlyspeaking,if youarecomfortable,thentheenvironmentis suitablefor yourprinter,too (see Chapter 1). Do not subjectthe printerto physicalshocksor excessivevibration. Avoid over-dusty environments.Dust is the enemy of all precision mechanicaldevices.
Screws Connector cove! ‘1 \\ ‘FYI \ F/gura 7-T.
! 6. Disengagethecablefromthetabsholdingitdown,then removetheprint head. 7. Foreasy installationof thenewpnnthead, movethecarriagetowardthe left end of the rail. 8. Place the new printhead on its support,seatingit on the two pins. 9. Threadthenewcable thesamewayas theold, securingitunderthethree tabs on the print head carriage. 10.Plug the cable into the connector,insertingit as far as it will go. 11.Fasten the print head down with the two screws. 12.
MEMO
chapter 8 SPECIFICATIONS Printing system ..............................Serial ImpactDot-matrix Printing speed ................................ 150cps (Draftpica) 37.5 cps (NLQpica) Print direction............................,...Bidirectional,logic-seeking Unidirectional,logic-seeking (selectable) Numberof print pins...................,..9 Line spacing................................... 1/6, 1/8,n/72, n/216inches Characters......................................
I Characterdot matrix ...................... 9 x 11(Draft) 18X23 (NLQ) Bit imagedot-matrix...................... DPI 8-pinnormal 60 8-pindouble 120 8-pinhigh-speeddouble* 120 8-pinquadruple 240 8-pinCRT I 80 8-pin CRTII 90 8-pinplotter 72 8-pindouble-plotter 144 9-pin single 60 9-pin double . 120 8X816 8x1632 8x1632 8x3264 8X1088 8x1224 8x979 8x1958 9x816 9x1632 * It is impossibleto printadjacentdotsin themodemarkedwithan asterisk (*). Paper feed ......................................
Ribbonlife .....................................6 millioncharacters(draftpica) Dimensions..................590(w)x 332(d)x127(h)mm 23.2(w)x13.1(d) x5(h)in Weight............................................8.5kg(18.71b) Powersupply ................................. 120VAC,220VAC,240VAC,50/60Hz (vanes accordingtothecountxyofpurchase) Options...........................................
Thefollowingdescribesthepinoutoftheparallel(Centronics-type)interface connector(signalswhich are low when activeare overlined): Pin 1 I I Name Function STROBE Goes from high to low (for 20.5ps) when active 2 \ DATAO High when active 3. DATA1 High when active 4 DATA2 High when active 5 I DATA3 I Hi~hwhen active 6 DATA4 High when active 7 DATA5 High when active 8 DATA6 High when active 9 DATA7 Hieh when active 10 11 ACK BUSY 5p.
chapter 9 CHARACTER SETS This chaptergivestablesof the printer’sstandardand IBM charactersets. The decimal charactercode of each characteris shown in an inset to the lower right of the character. Thehexadecimalcodecanbe foundby readingtheentriesat the top andleft edgesof thetable.for example,the character“A” is in colurnn4 androw 1, so its hexadecimalcharactercodeis 41. this is equivalent(4x 16+ 1= 65) to decimal65, the numberin the inset.
I STANDARD CHARACTER SET 104
I IBM CHARACTER SET #2 106
I
I IBM CHARACTER SET #1 Othercharactersare identicalto characterset W. The duplicationof controlcodesenablessystemswith a 7-bit interfaceto obtain control functionswhen the most significantbit is set to 1 by the “>” command.
IBM SPECIAL CHARACTER SET Additionalcharacterscan be printedby specialcommands.
INTERNATIONAL CHARACTER SETS Whenaninternationalcharactersetis selectedDIPswitches2-2to 2-4or by a commandfromsoftware,the followingchangesaremadein thecharacter set: See Chapter3 for the DIP switchsettings. The commandsfor selectingthe internationalcharactersets are: Standardmode:“R” n IBM mode: “R” n Wheren meanscharactercode n, i.e. CHR$(n)in BASIC.The valuesof n are: 10 DenmarkII O U.S.A.
INDEX m Absolutehorizontaltab, 57 m DIP switches,29-32,78 Ascender,61,71 Autofeed,67 Automaticcarriagerctum,30 Automaticline feed,32,55 Automaticsheetfeeder,8,31,67, 101 Delete,65 Descender,61,71 Dimensionsof printer, 101 Dot matrixsize, 100 Double-sizechamcters,44,46 Double-strikeprinting,37 Downloadcharactercommands,60-63 Downloadcharacters,32,69-75 Draftquality,20,34,60,63,69-73 m Backspace,55 Baillever,3, 10, 13 BASIC,24,72-73,82 Beeper,66 Bidirectionalprinting,67 Bit-imageprinting,58-60,86 Boldprin
L!31 ml ml m Off-1ine,18,66 Hexadecimaldump,23-25 Horizontalpositioncommands,53-57 Horizontaltabulation,57 IBMch~actersets,39,106-109 IBMmode,31,88 IBM-PC,25 Immediateprint,65 Interface: signals,102 specifications, 100 International characters,32,40,110 Italicprinting,20,36 En Justification,55 m Left margin,53 Line feed,48 Line spacing,4748,99 Locatingtheprinter,1 cm Macroinstruction,64 Maintenance,95 Manualfeed,67 Margins: bottom,50 left,53 right,54 top, 50 Masterprintmode,44 Micro-feed,27 Microju
m Quadruple-sizecharacters,44 CKl Rearcover,3, 11 Releaselever,3,8,11 Resetprinter,67 Reverseline feed,48 Reversemicro-feed,27 Ribboncartridge,4, 100 Rightmargin,54 ROM characterset, 63 ml ml Underlining,37 Unidirectionalprinting,67 Unpackingand inspection,2 Unparking,15 El Verticalpositioncommands,47-53 Verticaltabulation,53 Lz- Zero (slashand normal),41 Sanseriftypestyle,20,35 Self tests,21-22 Set/EjectPark button,19 Settingup, 4 Singlesheets: automaticloading,8 manualloading,10 specifications,10
COMMAND SUMMARY MODE CONTROL CODE Std. IBM Std. d> <4> “R” “T” n Std.
I MODE CONTROL CODE FUNCTION PAGE IBM “5” “5” <1> “6” “7” ‘%” “9” IBM Std. “:” “:” <(k- <0> <(b “<” “=” std.
I MODE CONTROL CODE “U” “l” “W” “W” <1> “W” “O” “W” “l” cESC>“X” nl n2 FUNCTION PAGE Unidirectional printing 67 Cancel expanded printing 42 Expanded printing Cancel expanded printing % Expanded printing 42 Sa left and right margins 54 cESC> “Y” nl n2 ml d . . . Print double-density, double-speed 8-bit graphics 58 “Z” nl n2 ml m2 ... Print quadmple-density 8-bit graphics 59 “[” “@” <4> n m Select character height, width, and line spacing 46 Std.
MODE CONTROL CODE IBM IBM E: IBM IBM ~M Std. “-” “O” <&SC>“-” “l” “4” “5” “:” 4> “=” “Q” n “R” n ‘\” nl d “(” “(” “-” “)” “)” “0” “(” “(” “-” “)” “)” “1” “)”“)” “(” “(” “o” -i” ‘(” ‘c4s’-j” ‘j” “(” ‘$(”“B” “)” “)” “O” “(” “(” “B” “)” “)” “1” “(” “(” “F” “)” ‘“)”“O” “(” “(” “F ,, ,,)!. ,.),, “ 1.
ConsumerResponse Star Micronics Co., Ltd. invites your suggestions and comments on your printer and this manual. Please address your correspondence to: WorldwideHeadquarters: STARMICRONICSCO., LTD. 194Nakayoshida Shizuoka,JAPAN422-91 Attn:ProductManager AmericanMarket: STARMICRONICSAMERICA,INC. 420 LexingtonAvenue,Suite2702-25 New York,NY 10170 Attn: ProductManager EuropeanMarket: STARMICRONICSDEUTSCHLANDGMBH Westerbachstra13e 59 P.O. Box 940330 D-6000Frankfurt/Main90 F.R. of Germany Attn:ProductManager U.
PRINTED IN JAPAN