USERS MANUAL LC-200 DOT MATRIX PRINTER ZX 80820487
LC-200 DOT MATRIX PRINTER USERS MANUAL NOT INTENDED FOR SALE
Self Declaration Radio interference.regardingthis equipment has been eliminated accordingto Vfg 1046/1984 announced by the DBP. DBP has been informedof the introductionof this speciafequipmentandhas been grantedthe rightto examine the whole series. It is the user’s responsibilityto see drathis own assembledsystemis in accordancewith the technieal regulationsunderVfg 1046/1984. Toeonfonnto FIZ-regulationsit is necessarytomakeallccxurectionstotheprirrterwith shieldedcable.
HOW TO USE THIS MANUAL Thismanualis organizedintoninechapters.Tolearnhow to makethe best use of yourprinteryou areurgedto readthroughchapters1through3. The remainingchaptersmay be treated as a referenceguide for programming operations, etc. It assumes a degree of knowledgeof the operation of computers(forinstance,it assumesyouknowabouthexadecimalnumbers). The chaptemare as follows: Chapter 1— Settingup the printer This chapterexplainshowto getthe printerunpackedand setup.
I Chapter 6 — MS-DOSand your printer Since the PC or PC-AT family of computersrunningunder MS-DOS is currentlythe most popular conf@ration of microcomputer,we have includeda few hints and tips to help you use yourprinterwith such systems. SincevirtuallyallPCsaresoldwitha MicrosoftBASICinterpreter,wehave also included some hints, and a sample program in this language to demonstratethe capabilitiesof the printer.
FEATURES OF THE PRINTER Thisprinterhas afullcomplementof features,makingit anexcellentpartner for a personalcomputer.It supportsthe IBM/Epsonprintercommandsand charactersets, enablingit to printjust about anythingyour computercan generate,bothtextandgraphics.Someofitsmainfeaturesarethefollowing: ● Extensivesoftwaresupport Since it is compatiblewith the Epson and IBMprinters,it workswith any softwarethat supportsthoseprinters.
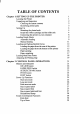
TABLE OF CONTENTS Chapter 1 SETTING UP THE PRINTER LocatingthePrinter UnpackingandInspection Checkingthecartoncontents Identifyingprinterparts SettingUp Mountingtheplatenknob Installtheribboncartridgeand the rollerunit Connectingtheprinterto yourcomputer LoadingSingleSheets Automaticloading Manualloading Loadingand ParkingFanfoldForms Loadingthepaperffomtherear of theprinter Loadingthe paperffomthebottomof theprinter Paperparking Paperunparking LoadingMulti-PartForms AdjustingthePrintingGap Chapter 2 CONTR
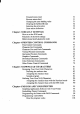
Forwardmicro-feed Reversemicro-feed Changingthe auto loadingvalue Clearingthebuffer/Allreset Selectingthe printcolor Storemacrodefinition Chapter 3 DEFAULT SETTINGS Howto settheEDSmode Functionsof theEDS settings Bidirectionaltest.
Chapter 7 TROUBLESHOOTING Troubleshooting Powersupply Printing Paperfeeding Maintenance Replacingthe PrintHead AND MAINTENANCE 107 107 108 108 110 113 113 Chapter 8 SPECIFICATIONS 115 Chapter 9 CHARACTER SETS StandardCharacterSet#l StandardCharacterSet#2 International CharacterSets IBMCharacterSet#2 Codepage#437(U.S.A.
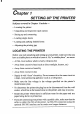
chapter 1 SETTING UP THE PRINTER Subjects covered in Chapter 1 include — . Locatingthe printer ● Unpackingand inspection(partnames) ● Settingup and comecting ● Loadingsinglesheets ● Loadingand parkingfanfoldforms ✎ Adjustingthe printinggap LOCATING THE PRINTER Beforeyou startunpackingand settingup yourprinter,make surethat you have a suitableplaceon whichto locateit.
UNPACKING AND INSPECTION Checkingthe carton contents Now unpackthe contentsof the shippingcarton,andcheckeach itemin the box againstFigure 1-1to makesurethat youhaveeverything(thereshould be seven items). If any of these items are missing,contactyour supplier. Figure I-I. Check to make sure you have all seven items: 1) Printer, 2) Paper guide, 3) Roller unit, 4) Platen knob, 5) Color ribbon cartridge, 6) Monochrome ribbon cartridge, and 7) Manual set (User’s manual, User’s guide and Sticker).
Theoptionalaccessorieswhichyoumayhaveorderedwithyourprinterare: ● Serial-Parallelconverter(SPC-8K) ● Automaticsheet feeder (SF-1ODN) ● Roll paper holder (RH-1OZ) Identifyingprinterparts Make an external inspection of the printer. Note the locations of the followingparts in Figure 1-2. Figure 7-2. The printer’s external parts holdsthe paperagainstthe platen. releasestheplaten.ThisIevermustbe backfor singlesheets,and forwardfor fanfoldforms. Top cover: protectstheprintheadandotherinternalparts.
SEITING UP Place the printer in the desiredlocation,and remove all packingmaterial from inside the top cover. This packing material is intendedto prevent darnageto theprinterwhilein transit.Youwillwantto keep allthepacking material,alongwiththe printercarton,in caseyouhaveto movethe printer to a new location. Mountingtheplaten knob The platenknobis packedinto a recessof the whitefoampackingmaterial whichheld yourprinterinsidethe carton.Be sureto removethe knobfrom the packaging.
F@r8 1-4.Removing the top cover 1. Turn the tension knob counterclockwise on the ribbon cartridge to tighten the ribbon if it is slack. 2. Guide the ribbonbetweenthe Printhead and the silverprinthead shield, making certain that the spindles on the cartridge holder fit into the ~~cketson the cartridge itself. Figure 1-5.
3. ‘l%enbbonshoul dpassbetweentheprinthead andtheprinthead shield (see Figure 1-6). I Figure 7-6. Pass the ribbon between the print head and print head shield 4. After you have installedthe ribboncartridge,installthe roller unit. 5. Openthe rear coverusing the two grips on eitherside. 6. Grippingthe lockleverson bothsidesof the rollerunit,fit themounting bracketsonto the shaft insideof the printermechanism.You will need to tilt the rollerunit slightlybackward. 7.
Roll Figur@1-7. Install the roller unit onto the printer To replacethe top cover, insert the tabs into the slots on the printer case. Swingthe front edge down to close the cover. Leave the top coverclosed duringnormal operation.The cover keeps out dustanddirtandreducestheprinter’soperatingsounds.Openthe coveronly to changethe ribbonor make an adjustment. NOTE: When you remove the color ribbon cartridge, press the ribbon releasecatchtowardyouwithyourindexfinger.
Connectingtheprinter to your computer Connectthe printer to your computerusing a standardparallel interface cable.On a PC or PC/AT-typecomputer,thismeansthat youusethe 25-pin D-typeconnectorat the computerend, andthe Amphenol-type36-pinconnector at the printer end. The contlgurationof the printer’s connectoris given in Chapter 8 should you need a cable for connectingto another computer. If youneed to connectto a serialport,use the optionalSerial-Parallelconverter, SPC-8K. Interface cable Figure 1-8.
LOADING SINGLE SHEETS Thissectionwill take you throughthe proceduresfor loadingsinglesheets of paper. If you areusingthe optionalautomaticsheetfeeder(SF-10DN),referto the ASF instructionbooklet. Automaticloading Single sheets can be loaded manually with the power off, or automatically with the power on. We will start the easy way with automatic loading. 1. Place the paper guide in position by inserting the tabs, located on the bottomof the assembly,into the slotson the rear cover of the printer.
4. Make sure that the releaselever is back. 1 ) Iffanfoldpaperis alreadymountedintheprinter,pressthe C st~~.~~c buttonto parkthepaperin the off-linestate,thenmovethe releaselever backwards. 5. Place a singlesheetbetweenthe guides,placingthe side on whichyou wantto printtowardsthebackoftheprinter.Gentlypushthepaperdown in the guidesuntil you feel it stop. 6. Nowpressthe ( S,~A.&ICT ) button.Thepaperwillbefedintotheprinter and adjustedpast the printhead to a positionready for printing. 7.
Manualloading It is alsopossibletoloadpapermanuallywhiletheprinter’spowerisoff.The procedureis: 1. Place the paper guide in positionby insertingthe tabs, locatedon the bottomof the assembly,into the slotson the rear coverof the printer. 2. Checkthat printerpower is off and the releaselever is back. 3. Adjustthe paper guidesto match the size of paper you will be using. Rememberthatprintingwillstartsomedistancefromtheleft-handedge of the carriage. 4.
I LOADING AND PARKING FANFOLD FORMS Fanfold forms have holes along the sides and perforationsbetween the sheets.They are also called sprocketforms, punchedforms, or just plain “computerpaper”.This printeracceptsformsup to 10”wide.This section will take you throughthe proceduresfor loading,parking and unparking fanfoldforms. Loadingthepaper from the rear of theprinter Youcanloadthe fanfoldpapereitherfromtherearor fromthebottomof the printer.
6. Movethetractorunitsdownwardsby grippingthepositioningleverson both side of the tractorunit as shownin Figure 1-12. Figure 1-12.Movethe tractor units downwards for loading the paper from the rear 7. Withthetractorcovers open, mount the paperby aligning holes withthe pins on the tractorunit. Tractor cover P Ie\er Figure 1-73.
8. Adjustthespacingofthetractorunitsbyslidingthemalongthebar,using the clamp lever at the back of each unit to release and lock them in position.Whenthe clampleveris up, theunitis released,and whenit is down, the unit is locked. 9. Nowclosethetractorcovers,againmakingsurethatthepaperholesare alignedwiththepinson thetractorunits.Iftheyarenotalignedproperly, you.willhaveproblemswithpaperfeeding,possiblyresultingin tearing andjamming of the paper. 10.
Loadingthepaper from the bottomof theprinter You can load the fanfold paper fmm the bottom of the printer with the followingprocedure. 1. Removethe top coverand the rollerunit. 2. Opentherearcover usingthetwo gripsat the side,andpushbackwards. 3: Grip the positioningleverson both sideof the tractorunit, andpull the unit upwardsas shownin Figure 1-15. POsitiOning lever Figure 1-75. Pull up the tractor unit for bottom feeding 4. Place a stack of fanfold paper below the printer. 5.
Figure l-16.”Mount the fanfold paper from the bottom of the printer 7. Nowclosethetractorcovers,againmakingsurethatthepaperholesare alignedwiththepinsonthetractorunits.If theyarenotalignedp~operly, youwillhaveproblemswithpaperfeeding,possiblyresultingin tearing andjammingof the paper. 8. Remountthe rollerunit and replacethe rear coverand the top cover. Paperparking Afier loading fanfold paper from the rear of the printer, you do not have to unload it when you want to print on a single sheet.
5. Movethe releaselever to the back. 6. Mountthe paper guidein the uprightposition. Now you can load single sheets either automaticallyor manually, as explainedpreviously.The fanfoldpaper remainsparkedat the back of the printer. NOTE: YOUcannotpark the fanfoldpaper if you have loaded it from the bottomof the printer. Paper unparking Whenyou want to resume using fanfoldpaper,theprocedureis as follows. 1. Remove all single sheets from the printer. 2. Mount the paper guide in the horizontal position. 3.
LOADING MULTI-PART FORMS Youcan print on continuousmulti-partforms with the built-intractorunit. Youcanusemulti-partformsthathaveupto fourpartsincludingtheoriginal when the Multi-partmode is selectedwith the EDS setting. (For details, pleaserefer to Chapter3.) It is recommendedtouseformsjointedby dottedorpastingunderthenormal office condition. Multi-part forms should be pressure sensitive, and should not be used in the friction feed. (Bottom feed with the pull-tractor is recommended.
ADJUSTING THE PRINTING GAP The distance between the print head and the platen can be adjusted to accommodatedifferentPaperthicknesses.To makethis adjustment,remove the m . cover.Thead.ju~tient leverislocatedattheleftSideOfthe Printer mechanism. Pushing the adjustmentlever backwards narrows the gap; pullingit forwardswidensthe gap. There are five positions, and you can feel the lever clicking into each position.The secondpositionfromtherear is the onemostcommonlyused for single sheets of paper.
I The followingtable provides the recommendedlever positionsfor each papertypes as a reference. Paper Type Single Weight (g/mz) (Each paper) 52-82 2-ply 83-90 40-58 3-ply 40-58 4-ply 40-58 Thickness (mm) (Total) 0.07-0.10 0.11-0.12 0.12-0.16 0.18-0.20 0.21-0.25 0.24-0.26 0.27-0.30 Recommended Lever position 2nd 3rd 3rd 3rd 4ttl 4th 5th NOTE: Pressuresensitivepaperis recommendedfor the multi-partpaper. Multi-part mode is recommendedwhen using the 4-ply paper. (Referto Chapter3.
chapter2 CONTROL PANEL OPERATIONS we controlpanelbuttonscanbe pressedindividuallyto performthe operationsindicatedby theirnames.Otherfunctionscan be achievedby holding thesebuttonsdownwhenyouturntheprinter’spoweron,or by pressingthe controlpanel buttonsin combination. This chapterexplainsall the buttonand indicatorfunctions. . Pause printing . Feed paper (fast and slow,forward and reverse) .
ONLINE button The ( ON LINE ) button sets the printer on-lineand off-line.The status changeseach time you press the button. Whentheprinteris on-line,it can receiveandprintdatafromthe computer. Whentheprinteris off-line,it stopsprintingandsendsthecomputera signal indicatingthat it cannotacceptdata. The printerpowersup in the on-linestatusif paperis loaded.If paperis not loaded,the printerpowersup off-linewith the POWERindicatorflashing.
If you also press the ( ONLINE ] button whileyou are line-feeding,the paper will feed automaticallyto the top of the nextpage. This is explained later. If you press this buttonwhile on-line,this will alternatelyflash the QUIET indicatoron and off. Whenin Quietmode with the QUIETindicatorlit, the printerwill print slightlyslower,but at a reducednoise level. SET/EJECT/PARKbutton NOTE: This buttonhas no effect if the bottomfeed mode is selected.
I FONT button This buttonselectsthe fontto be printed.Draft fontis selectedat power-up unlessthe defaultsettingsarechanged.To changeto HS Draft(High-Speed Draft)or oneof theNLQ(NearLetterQuality)fonts,settheprinteroff-line, then press the (TGNTlbutton repeatedlyuntil the indicatorsbeside the desired selectionilluminate.
POWER-UP FUNCTIONS In additionto their normal functions,all the control panel buttons have specialfunctionsthatoperateif youholdthemdownwhileswitchingpower on. I 9 HS DRAFT m 1C?4JPI c -.”oeAF1 ~ SANSERIFFONT D COURIER ~ ORATOR 9 SCJ?IPT L , 12CPI MICRO FEED SETI:JECT IHu?m PAPER FEEo m POWER L & LINE ‘G~~~ Hexadecimal DUIIIL) SMy in Panel Pitch and Font EDS Mode Bidirectional Test/A(i,justnlcnt Figure 2-2.
I Long test mode If the printer is turned on while the ( PAPERFEED) button is pressed, the printerwill enter the long self-testmode.The printerwill print the version numberof theprinter’sROM andthe currentEDS settings,followedby the wholecharacterset printedin each font and pitch available. The test cyclesendlessly,so you must turn the poweroff to stop it. Figure 24.
Sincethe self-testoccupiesthefullwidthof thecarriage,it is recommended thatthe printeris loadedwiththe widestpaperpossibleto avoiddamageto the printhead and/orplaten.In addition,the totalnumberof linesprintedis considerable,more than can be accommodated on a singlesheet, so fanfold paper is recommendedfor this test. Print area test mode By holdingthe( sE~AL~~cT >buttondownduringpower-up,the printerwill entertheprintareatestmode.Thisway,youcan fmdouthowmanylineson your paper are availablefor printing.
Hexadecimaldump This feature is usefid for programmerswho are debuggingprinting programs and want to see the actual codes the printer is receiving. (Some computerschangethe codesthe programmerintended.) Inthismode,alldatareceivedwillbeprintedin a hexadecimaldumpformat, ratherthan the controlcodesbeing actedon as commandcodes. This mode is accessedwith the followingprocedure: 1. While holding both the(PAPER FEED)and ( ‘EJMCT lbuttons down, turn power ON. A beep tone will be heard. 2. Begin printing.
MostBASICS,however,arenotquitethatstraightforward.Forexample,the IBM-PCwill give you a printoutsimilarto Figure 2-6. ....... ......... ................ . . . . . . . ,,. . . . . . . . .............. .. .............. .. ................ ................ ........... ..... I Figura 2-6. Sample hexadecimal dump with IBM-PC Whenthe IBM-PCBASICinterpretersendshex codeOD(carriagereturn) it adds an extra hex OA(line feed).
SWITCH COMBINATION FUNCTIONS Severaladditionalfunctionscan be achievedby pressingthe controlpanel buttonsin combinations. m Tw of Form II D HSDRAI=T - iocPl -DRAFT - 12CPI - PROP ‘x h 9 ~ _ SANSERIFFONT COURIER~ ORATOR L - MICRO FEED t v SET/EJECT _-OU?ET PARK /—-, PAPER FE SCRIPT Store Macro Ekl’inition Change colol- u “ Forrm Feed f Figure 2-7.
I 3. Press and hold the ( ONLINE ) button. 4. Whileholdingthe ( ONLINE )button down,press the (-) button, then release both buttons at the same time. The printer will beep to indicatethat the top-of-formpositionhas been set. Forwardmicro-feed For finealignment,youcan feedthepaperforwardin very smallincrements as follows: 1. Press the~ ON LINE ) buttonto set the printeroff-line. 2. Press the ( ONLINE ) buttonagain and hold it down. 3. Whileholdingthe c ONLINE ) buttondown,pressthe (PAPERFEED] button.
I Thisvaluewillremainunlessyoupowerofftheprinter.If youwantto retain this value even after you turn off the power, store it using the Macro Definitionfunction,which is describedbelow. Note that you can only changethis valueimmediatelyafterloadingpaper. If you feed paper, you cannotchangethe auto loadingvalue. Clearingthe buffer/Allreset The printer stores receiveddata in a large memory buffer.
1. Press the( ONLINE ) buttonto set the printeroff-line. buttonand hold it down. 2. Press the(=) ‘ ) button. button,press the( ““;,Alik[’ 3. Whileholdingthem Each time you press the ( ;’lwi[:’ ) button,one of the indicatorsof FONTor PITCHwill blink to showthe currentcolor as shownbelow. Indicator Indicator Color Color 10CPI HS DRAFT Yellow Black 12CPI Magenta DRAFT Orange PROP COURIER Green cyan Violet SCRIPT 4. Releaseboth buttonsafter you set the desiredprintingcolor.
34
chapter 3 DEFAULT SETTINGS Mostprintersuse a bankof DIP (DualIn-linePackage)switchesinsidethe printer to achievevariousfunctions.However,this printercan changethe power-updefaultsettingsby usingtheElectronicDIP Switch(EDS)mode. This chapterexplainshow to use the EDS mode. HOW TO SET THE EDS MODE TheEDSmodehas 16kindsoffunctionsyoucansetasthepower-ondefault. ToentertheEDSmode,turntheprinteron whilesimultaneouslyholdingthe (PAPERFEED] and ( ON LINE > buttons.
I FUNCTIONS OF THE EDS SETTINGS The printeris factory-setwith all EDS switchesin the ON position.These are the standard settings.By changingthe settings,you can alter various printerfunctionsto matchyourrequirements.The followingquestionswill help you choosethe proper settings.
Switch A-2: Does your softwaredownloadcharactersto the printer? In orderto downloadcharactersthisswitchmustbe in the OFFposition.The printer then uses its RAM memory for storing character patterns and providesonlya one-lineprintbuffer.If youleavethisswitchON,theprinter usesitsRAMmemoryasaninputbuffer,allowingthecomputerto senddata faster than the printerprints.
Switches C-1 and C-2: Whichprint mode do you wantto set? Theseswitchesselectthe defaultprint pitch and the fontsas shownbelow. NOTE: If youchangetheseswitchesafteryouhave storedthemacro,these settingswill overridethe macro setting. Switches C-3 and C-4: Whatis the pagelength of your paper? LeavetheseswitchesONif you willbe using 1l-inch forms.
Switches D-2 to D-4: Do you want an internationalcharacterset or IBM code page? Internationalcharactersets differin theirassignmentof 12charactercodes in theStandardItaliccharacterset.Seethe charactertablesatthebackofthis manual.With these switchesyou can select one of eight charactersets as follows: Country U.S.A.
BIDIRECTIONAL TEST/ADJUSTMENT MODE This mode is used to adjustthe alignmentof the print head on successive bidirectionalpasses.Aftera periodof somemonths,yourprintermay work itself out of alignmenton left and right printingpasses. This will be most evidentin NLQ printing.This mode will probablybe used very rarely. 1. Turn the printer off and then turn it on again while holdingdown the ) and ( ONLINE ( ,,F~AF.~~cT somethinglike the following: buttons. The printer will then print ) 2.
chapter 4 PRINTER CONTROL COMMANDS me printerhas two emulationmodes:Standardmode and IBM mode. In standardmode,the printeremulatesthe functionsof the Epson FX-850 or EX-800for colorprint. In IBM mode, the printer emulates the IBM Proprinter III. Additional commandcodes are includedas a supersetof these emulations. The emulationis changedby means of EDS switch A-1. When ON, the printerwill be in standardmode,and when OFF,the printerwillbe in IBM mode (see Chapter3).
FONT CONTROL COMMANDS Select draft quality characters Mode std. IBM Decimal ASCII Both “((“ ‘ “ “ “F’ “))“ “ “ “O” “x” “I” “O” “I” “X” “9” 4040 70 41 41 57 27120 48 27120 0 27 73 48 27 73 0 Hexadecimal 28 2846 29 29 39 IB 78 30 IB 78 00 IB 49 30 IB 49 00 Changes from near letter quality to draft quality. Ignored if the _ button was pressed dufig POWer-UP.
Select NLQ font IModel ASCII i ROth I “k” n 1 Decimal I I 27107 I IB 6B n Hexadecimal I I n Selectsan NLQfontaccordingto thevalueof n. In draftmode,this command ~mains dormant and takes effect later when NLQ is selected.Ignoredif the (TGFT]buttonwas pressed duringpowerUp. n O 1 4 7 Font Courier(initialvalue) Sansenf script Orator Select Couriercharacters Mode Decimal ASCII Both “((“ “ “ “F’ “))“ “ “ “O” 4040 7041 Hexadecimal 41 48 28 28 46 29 29 30 Changesto theCourierNLQfont.
Select Oratorcharacters Mode Both Decimal ASCII “((“ ““ “F’ “)” “)” “7” Hexadecimal 4040 7041 41 55 28 2846 ~ ~ 37 Changesto the OratorNLQ font. Ignoredif the(T?3NT) buttonwas ,pressedduringpower-up. Select italic characters Mode std. ASCII “4” Decimal 27 52 Hexadecimal , IB 34 Causessubsequentcharactersto be printedin italics.
Cancelemphasizedprinting Mode ASCII Both “F” Decimal 27 70 Hexadecimal IB 46 Cancelsemphasizedprinting. Double-strikeprinting Mode ASCII Both “G” Decimal 27 71 Hexadecimal IB 47 Causessubsequentcharactersto be printedin double-strikemode witha slightverticalpapermotionin between,causinga thickening of horizontalstrokes. For boldprint,use of double-strikeis recommendedin NLQmode, and combined use of emphasized and double-strikeis recommendedin draft mode.
Stop underlining Mode Both ASCII “-” “O” “-” Decimal 27 45 48 27 45 0 Hexadecimal IB IB 2D 30 2D CO Stopsunderlining. Stafi overlining Mode IBM ASCII ,, – >, “~?. “ – “ <1> Decimal 27 95 49 27 95 1 Hexadecimal IB 5F 31 IB 5F 01 Causes subsequentcharactersto be overlined.Spacesskippedby horizontaltabulationare not overlined. Stop werlining Mode IBM ASCII ,’ – ,, ‘,0.! “ – “ Decimal 27 95 48 27 95 0 Hexadecimal IB 5F 30 IB 5F 00 Stops overlining.
I Cancelsuperscriptor subscript Mode Hexadecimal Decimal ASCII BothI ‘“l’” 27 S4 I 1’ ‘ I J Stops printing superscriptsor subscripts and returns to normal printing. CHARACTER SET COMMANDS Selectstandardcharacterset Mode Both ASCII Hexadecimal Decimal “t” “O” “t” 1B 74 30 IB 74 IX 27116 48 27116 0 Selectsthe standardcharacterset. This is the power-updefault in Standardmode if EDS switchD-1 is OFF.
Select internationalcharacterset Mode Std. Decimal ASCII “R” n 27 82 n Hexadecimal IB 52 n Selectsan internationalcharacterset in the Standardcharacterset accordingto the valueof n. n O 1 2 3 4 5 6 7 Characterset U.S.A France Germany England DenmarkI Sweden Italy Spain I n Characterset 8 Japan 9 Norway 10 DenmarkII 11 Spain II 12 Latin America 13 Korea 14 Irish 64 Legal The first eightof these charactersets (fromU.S.A.to SpainI) can be selectedas power-updefaultsby EDS switchesD-2 to D-4.
Enableprinting of all charactercodes Mode ASCII IBM cESC> ‘1” Decimal nl 27 92 nl d n2 Hexadecimal IB 5C nl d Enablesprintingof allcharactersintheIBMcharacterset,including those assignedto charactercodes which are normallyconsidered controlcodes.Thiscommandremainsin effectfor thenext n] + n2 x256 charactem,wherenl and n2 are numbersbetweenOand255. Duringthisintervalno controlfunctionsareexecuted.If a codewith no assignedcharacteris received,the printerprints a space.
CHARACTER SIZE AND PITCH COMMANDS Pica pitch Mode std. IBM . ASCII “P” Decimal Hexadecimal 27 N) IB 18 12 50 In Standardmode,changesfmmeliteto picapitch (10 cpi)or from condensedeliteto condensedpica (17 cpi). In IBMmode,changes fromeithereliteor condensedtopica(10cpi).Ignoredif the(Fi7CR) buttonwas pressedduringpower-up. Elitepitch Mode std.
1 Cancelcondensedprinting Mode ASCII Both Decimal 18 Hexadecimal 12 In Standardmode,changesfromcondensedpica to normalpica or fromcondensedeliteto normalelite.In IBMmode,alwayschanges to normal pica. Ignoredif the (~) button was pressed during power-up.
I Cancelone-lineexpandedprinting Mode ASCII Both Hexadecimal Decimal ‘al 14 Stopsone-lineexpandedprintingset with or cESC> . Doesnot cancel“W” 1. Selectproportionalspacing Mode std. IBM ASCII Decimal “p” “l” “p” <1> “P” <1> 27112 49 27112 1 27 80 1 Hexadecimal IB 70 31 70 01 IB 50 IB 01 Causessubsequentcharactersto be proportionallyspaced.Ignored if the (FiT5i7)buttonwas pressedduringpower-up. Select fixed spacing Model Std.
Examples:n = 1 giveselite;n = 9 (1 +8) givesemphasizedelite;n = 137(1 + 8 + 128)givesunderlinedemphasizedelite. n value Function 128 Underline 64 Italic 32 Expanded 16 Doublestrike 8 Emphasized 4 Condensed[*] 2 Proportional[*] 1 Elite [*] [*I Ignoredif the -button was pressedduringpower-up. Increasecharacterspacing Mode std. Decimal ASCII n 27 32 n Hexadecimal IB 2U n Increasesthe spacebetweencharactersby n/240 inches,wheren is a numberfrom Oto 127.Used in microjustification.
I Select charactersize Mode Both ASCII “((“ Decimal ““ “S” “)” “)” n 40 40 83 41 41 n Hexadecimal 28 28 53 29 29 n Selectsa combinationofcharacterheightandwidthaccordingto the value of n, as below.Does not movethe base line. n O 1 2 3 Characterwidth Singlewidth Doublewidth Singlewidth Doublewidth Characterheight Singleheight Singleheight Doubleheight Doubleheight Double-heightcharactemare alwaysprintedat near letter quality.
Select characterheight, width,and line spacing Mode ASCII IBM “[” “@” <4> <0> <0> <0> n m Hexadecimal Decimal 27 91 64 o 4 0 IB 5B 40 04 00 0000 Onm nm Selectsa combinationof characterheight,width,and line spacing accordingto thevalueof n and m, as below.Doesnotmovethebase line.
I Set line spacing to 7~2 inch Mode ASCII Both “l” Decimal Hexadecimal IB 31 27 49 Sets the distancethe paper advancesor nwersesin subsequentline feeds to 7/72 inch. Set line spacing to 1/6inch Mode Std. ASCII Decimal “2” Hexadecimal tB 32 27 50 Setsthe distancethepaper advancesor reversesin subsequentline feeds to 1/6inch.
Execute “A” Mate IBM ASCII Decimal 27 50 “2” Hexadecimal IB 32 Sets the line spacing to the value defined by the last preceding “A” command.Sets the line spacingto 1/6inch if there is no preceding“A” command. Line feed Mode ASCII Both Decimal 10 Hexadecimal OA Prints the currentline and feedsthe paperto the next line. See the precedingcommandsfor the line spacing. Reverseline feed Mode ASCII Decimal Hexadecimal std.
Performone n/216-inchreverseline feed Mode std. Decimal ASCII “j” n 27106 n Hexadecimal 16 6A n Feedsthepaperonceby rz/216inchesinthereversedirection,where n isbetween1and255.Doesnotmovetheprintpositionrightorleft. ‘Doesnot changethe line-spacingsetting. Feedpaper n lines Mode Std. Decimal ASCII “f’ “l” n “f’ <1> n 27 102 49 n 27102 1 n Hexadecimal IB 66 31 n 16 66 01 n Feedsthe paper n lines fromthe currentline, wheren is betweenO and 127.
Set page length ton inches Mode ASCII Both “C” n Decimal 27 67 0 Hexadecimal n IB 43 00 n Sets the page length to n inches,where n is between 1 and 32 in Standardmodeor between1and 64 in IBMmode.Thecurrentline becomesthe top of the page. Set bottommargin Mode ASCII Both “N” n Decimal 27 78 n Hexadecimal IB 4E n Setsthe bottommarginto n lines,wheren is between 1 and 127in Standardmode or between 1 and 255 in IBM mode.
Returnto top of currentpage Mode std. Hexadecimal Decimal ASCII IB OC 27 12 Feeds the paper backwardto the top of the current page. Ignored when frictionfeed is used. Disablepaper-outdetector Mode ASCII Both “8” Hexadecimal Decimal 27 56 IB 34 Causes the printer to disregard the signal sent by the paper-out detector,enablingprintingto thebottomofthepaper.Overridesthe settingof EDS switchB-2.
Set verticaltab stopseveryn lines Mode std. ASCII Hexadecimal Decimal “e” “1” n “e” <1> n 27101 27101 49 n 1 n IB 65 31 IB 65 01 n n Cancelsallcurrentverticaltab stopsand setsnew tab stopsevery n lines, where n is between2 and 127. Set verticaltab stops in channel Mode Std. ASCII “b” Decimal nO nl n2 .,. <0> 27 98 nO rd d ... 0 Hexadecimal IB 62 nO nl d .
HORIZONTAL POSITION COMMANDS Set left margin Mode std. ASCII Decimal “l” n 27 108 n Hexadecimal IB 6C n Sets the left marginat columnn (wheren is betweenOand255) in the curnmt character pitch (pica pitch if proportionalspacing is selected).The left margin does not move if the characterpitch is changedlater.
Set left and right margins Mode ASCII IBM “X” Decimal nl n2 27 88 nl n2 Hexadecimal IB 58 nl n2 Setstheleftmarginatcolumnnl andtherightmarginat columnn2. See the preceding commands for margin restrictions and other notes. Carriagereturn Mode ASCII Both Decimal Hexadecimal OD 13 Printsthe currentline and returnsthe next printpositionto the left margin.If EDS switchA-3 is OFF, also performsa line feed.
I Leftjustify Mode std. ASCII Decimal “a” “O” “a” 27 97 48 27 97 0 Hexadecimal IB 61 30 IB 61 00 Alignssubsequenttextwiththeleftmargin,leavingtherightmargin “ragged. Centertext Mode std. Decimal ASCII “a” “l” “a” <1> 27 97 49 27 97 1 Hexadecimal IB 61 31 IB 61 01 Centerssubsequenttext betweenthe left and rightmargins. Rightjustify Mode Std.
Set horizontaltab stops Mode ] Decimal ASCII Both I cESC> “D” nl d ... Hexadecimal cO> I 2766 nl n2 ... 0 I IB 44 nl n2 ... 00 Cancelsall currenthorizontaltab stops and sets new tab stops at columnsnl, n2,etc.in thecurrentcharacterpitch (picapitchif proportional spacing is currently selected), where nl, n2, etc. are numbersbetween 1 and 255. The maximumnumberof horizontal tab stopsallowedis 32 in Standardmodeand64 in IBMmode.
I Relativehorizontal Mode std. Decimal ASCII ‘1” nl n.2 27 92 nl n.2 Hexadecimal IB 5C nl d Movestheprintpositionrightorlefta specifieddistance(maximum 8inches).Ignoredif theresultingpositionis beyondtherightor left margin.The formulasfor the distanceand directionare as follows: If n2 is betweenOand 63,the printheadmovesrightby (TZI+ n2 x 256)/120inches.
GRAPHICS COMMANDS Print normal-density8-bitgraphics Mode Both ASCII “K” Hexadecimal Decimal nl 10 40 d 27 75 nl n2 n2 ml d ... ml d ... d ml d ... Prints bit-image graphics at 60 dots per inch horizontally.The graphicimageis 8dotshighandrd + n2x 256 dotswide.Maximum width is 8 inches(480 dots).ml, m2, ... are the dot data, each a 1bytevaluefromOto 255representing8 verticaldots,withthe most significantbit at the top and the least significantbit at the bottom.
I Print quadruple-density8-bitgraphics Mode Decimal ASCII “Z” Both nl 27 90 d n2 ml m2 ... ml Hexadecimal d m2 IB ... 5A nl ml n2 k? ... Printsbit-imagegraphicsat 240 dots per inch horizontally(maximum 1920dots wide),skippingevery seconddot in the horizontal direction.See “K” for other information. Selectgraphicsmode Mode Decimal ASCII “*” Std. ml ?i? d Hexadecimal 27 42 nO nl d ml d ... nO nl ... IB 2A no n] d ml ni? .
I Print 9-pingraphics Mode std. ASCII Decimal “” “ nO nl n2 ml d ... 27 94 no nl d ml d ... Hexadecimal IB 5E no nl d ml m.2 ... Selectsone of eight graphicsmodesdependingon the valueof nO and prints 9-pin bit-image graphics in this mode. The graphics imageis 9 dotshigh andnl + n2 x 256dotswide.Maximumwidth is 8 inches.Dotsbeyondthe rightmarginareignores.ml, m2, ... are bytepairsrepresenting9 verticaldotseach.
! DOWNLOAD CHARACTER COMMANDS Definedraft downloadcharacters Mode Decimal ASCII “&” cO> nl std. .n2 mO ml d m2 mll 27 38 0 nl d mO ml d d mll Hexadecimal 26 00 nl d mO ml d d ... mll IB Definesone or morenew draftcharactersand storesthemin RAM forlateruse. EDSswitchA-2mustbe OFF;otherwiseRAMis used as an input buffer,not for downloadingcharacters,and this commandis ignored.Draftmodemustbe selectedbeforethiscommand is executed.
DefineNLQ downloadcharacters Model Std. ASCII Decimal “&” nl n2 aO al ml d a2 ... m69 27 38 0 nl d aO al a2 ml d ...m69 Hexadecimal IB d 26 00 d aO al a2 ml d ...m69 Definesone or morenewNLQcharactersand storesthemin RAM forlateruse.EDSswitchA-2mustbe OFF.NLQmodemustbe selectedbeforethiscommandis executed.The parametersaredifferentfromthedraftcharactercommand.aOspecifiestheleftspace,al specifiesthe characterwidth,and a2 specifiesthe right space.
DefineNLQ downloadcharacters Mode ASCII Decimal “=” nl aO IBM al n2 d dVA~ ml m2 ... m46 Hexadecimal 27 61 n] d 21 IB 3D n] d 15 aO al d ml aO al a2 ml m2 ... m46 d ... m46 Definesone or morenewNLQcharactersand storesthem in RAM for later use. EDS switch A-2 must be OFF. NLQ mode must be selectedbeforethis commandis executed.
Select draft downloadcharacterset Mode IBM ASCII Decimal “I” “I” “4” Hexadecimal 27 73 52 27 73 4 <4> IB 49 34 IB 49 04 Selectsthe downloadcharacterset anddraft quality.Ignoredif the _ buttonwaspressedduringpower-upor if EDS switchA-2 is ON. Select draft elite downloadcharacterset ]Model IBM ASCII I “I” “5” “I” <5> Decimal I Hexadecimal I IB 49 35 27 73 53 27 73 5 IB 49 05 Selectsthedownloadcharacterset,draftquality,andelitepitch(12 cpi).
I ROM characterset Sect Mode std. Hexadecimal Decimal ASCII 27 37 48 27 37 0 “%” “O” ‘W.” IB 25 30 IB 25 00 Stops using the downloadcharacterset and returnsto the built-in ROM characterset. Ignomi when EDS switchA-2 is ON. COLOR SELECTION COMMANDS Selectprint color Mode ASCII Both “r” Hexadecimal Decimal 27114 n IB 72 n n Selects the printingcolor accordingto the value of n as shown tilow. Ignoredif the color ribbonis not installed.
Select cyan Mode Both “ “ Hexadecimal Decimal ASCII “ ((“ “c” “ )“ “)” “2” 4040 6741 41 50 28 28 43 29 29 32 Changesthe printcolorto Cyan.Ignoredif the colorribbonis not installed. violet Wed Mode Boti “ (“ “(” Hexadecimal Decimal ASCII “c” Changes the “)” “)” “3” 40406741 41 51 282843292933 printcolorto Violet.Ignoredif the colorribbonis not installed.
OTHER PRINTER CONTROL COMMANDS Set MSB to 1 Mode std. ASCII “>” Decimal 27 62 Hexadecimal IB 3E ‘Setsthe most significantbit of each subsequentbytereceivedto 1, allowinguserswitha 7-bitinterfaceto accesscharacterswithASCII codes greaterthan 127. Set MSB to O Mode std. ASCII “=” Decimal 27 61 Hexadecimal IB 3D Sets the most significantbit of each subsequentbyte receivedto O. Accept MSB as is Mode std.
Quietprint Mode std. ASCII Decimal “S” “l” “s” <1> Hexadecimal 27115 49 16 73 31 27115 16 73 01 1 Selectsthe quietprintmode,in whichthe printerprintseachlinein twopassestoreducethesoundofprinting.Youcanalsosetthequiet modewith the controlpanelbutton. Cancelauiet . .mint IMode I Std. ASCII Decimal “S” “0” “s” 27115 48 27115 0 Hexadecimal IB 73 30 IB 73 00 Cancelsthe quietprint mode, and resumesnormalprinting.
Bell Mode Both ASCII Decimal ~EL> Hexadecimal 7 07 Soundsa brief beep tone from the printer’sbeeper. Bidimctiona!printing Mode ASCII Both “U” “O” “U” Decimal Hexadecimal 27 85 48 27 85 0 IB 55 30 IB 55 00 Causessubsequentprintingto be done in the nmrnalbidirectional mode, which is fasterthan unidirectionalprinting.
Auto feed Mode I ASCII Both ,,(,, ,,(,, / “4” Decimal 27 25 “Y’ “)” I 40 40 ] 4 52 Hexadecimal IB 41 41 I 28 I 19 04 28 34 29 29 Selectstheautomaticsheetfeeder.Ignoredif EDSswitchA-4is ON (ASF inactive). Ejecfpaper fromASF Mode ASCII Decimal “R” Both ,,(,, ,,(,, “R” Hexadecimal 27 25 82 40 40 82 41 41 IB 19 52 28 28 52 29 29 “))“ “ “ Ejectsthe currentpage.Ignoredif EDS switchA-4 is ON (ASFinactive).
MEMO 80
chapter 5 DOWNLOAD CHARACTERS Withthisprinteryoucancreatenewcharactersandsymbols,downloadtheir dot data, and have themprintedin placeof selectedcharactersin the regular characterset. Charactersthat can be generatedin this way range from simplebutusefulsymbolslikethecheckmarkthroughcomplexChineseor Japanesecharacters. Regular characters are permanently stored in the printer’s ROM, but charactersyou designare downloadedand storedin RAM for use.
I . The minimumwidthof a characteris five dots. . The user-definedcharactersmay use eightdots vertically. ● Dots cannotoverlap— that is, youmay not have a dot insidea box next to one that is on a line. . You may define any positionin the ASCIItable. PhotocopythegridinFigure5-2tohelpdesignyournewcharacters.Wewill use a tiny representationof a car-shapedsymbolfor our example. ASCII Code: Descender: Left spxc: Lwt column: mo = Descender x 128 + (Left x 16) + Last I Figure 5-2.
I Next, you must specify the left space and the last print column of the character. Being able to specifythe width of the characterallowsyou to specifythe precise area insidethe grid that the characterwill occupy,so that narrow charactemwill look attractivenext to wide ones. Acceptablevaluesfor the left spaceare Oto 7, andthelast printcolumnare from 4 to 11. Our characterwill occupyfromcolumn1 to column 11,so the left spaceis Oand the characterwidthdata is 11.
Sampleprogram To demonstratehow to use the downloadcharacters,let’s use the “car” characterandsomeotheruser-definedcharacterstoprintasmallgraph.
1360 LPRINT CHR$(9) ; “+--”; 1370 SCALE$= “--+-- “ 1380 FOR 1=2 TO 8 STEP 2 1390 LPRINT SCALE$; 1400 NEXT I 1410 LPRINT “--+” “; 1420 LPRINT CHR$[9);” i 430 FOR 1=2 TO 8 STEP 2 1440 LPRINT “ “;1; 1450 NEXT I 1460 LPRINT CHR$(27) ;’’%’’;CHR$(O) 1470 LPRINT CHR$(27) ;’’S’’;CHR$(O) ; 1480 LPRINT CHR$(9); “IvIILLIONS OF 130LLARS” 1490 LPRINT CHR$(27); UT” 1500 END 85
DEFINING YOUR OWN NLQ CHARACTERS As you probablynoticed,NLQ charactersare printedby two passesof the printhead.Halfof the characteris printedon the firstpass, andthe remainder on the secondpass.The paperis rolledup half a dot heightin between passes to let the print head print dots on the secondpass that overlapthe previousdots, in order to fill in the spacesand producedensercharacters. Additionally,the print head speed is halved, and the dots are printed at doublethe densityof draftcharacters.
three attributebytes, the first byte describesthe character’sleft space,the secondbytedescribesthe characterwidth.And the thirdbytedescribestic rightspace.Appropriateallocationof datain thesethreebytesletsyouplace the characterwhere you like withinthe grid. Usethe gridin Figure5-4 to helpplotthe data.Theverticaldefinitionof the characteris 18 dots. Each byte thereforerepresentsa third of the vertical definition.That’swherethenumbersdowntheleft sideof thegrid comein.
I The following program demonstrates how to use the NLQ download characterswith the Standardmode: ID@O LPRINT CHR$ (27) ; “xl “ ~Olo I,PRINT CHR$ (27) ; “&“ ; CHR$ ( O) ; ~0~0 LpRINT CHR$ (Go) ; CHR$(62) ; 1030 FOR N=60 TO 62 1040 I-PRINT CHR$ (0) ;CHR$ (23) ;CHR$ (0) ; 1050 FOR M=l TO 69 1060 REAII MM 1070 LPRINT CHR$ (MM); 1080 NEXT M 1090 NEXT N 1100 LPRINT 1110 LPRINT CHR$(27) ;’’D”;CHR$(11) ;CHR$(0); 1120 LPRINT CHR$(27) ;”h’’;CHR$(l) ; U.S.
1400 NEXT I 1410 LPRINT CHR$ (27) ; “%’’;CHR$(O] ; ~4~0 Lp~lNT CHR$(27) ;ll~l’;~HR$(oj 1430 LPRINT CHR$ (9);“MILLIC)NSOF DOLLARS” 1440 LPRINT CHR$ (27);“T” 1450 END O, 0, 0, 0, 0, 0, 0, 6, 0 1500 DATA 0, 9, 0, 0, 16,128, 0, 32, 0 1510 DATA 0,~~8 0, 64?128> 63,128, 1520 DATA l), 0, 0,128, 0, 0, 0 o, 0, 0, 0, 1530 DATA (3,1~8 o,~~~, 0, 0, 0, 0, 0, 1540 DATA u, .32, 0 0, 0, 64,128, 1550 DATA 63,128, 0, 15,128.
Assigningthe characterdata with the IBM mode Fundamentally,the processto defineandprintdownloadedNLQcharacter withthe IBMmodeis the sameas for draftcharacters,exceptthat youmust supplyaboutfour times as much characterdata, and you must design the characterwith the two passesof the printhead in mind. Use the grid in Figure5-6 to helpplotthe data with the IBMmode.Dueto the two-passprocess,NLQcharactemcan containup to 16dotsvertically. First m/.,, pass m:.. 128 ...m45 Second .,.
I ...m45 Second ...m4ri pass First /;//.,, pass m:... 128 Code 128 ASCII Descender 64 64 32 32 16 67 7 Left space: o Width: 23 a/ = Descender x 128 d = (Left x 16) + Width 16 8 8 4 4 2 2 1 1 Dot data 0 0 9 9 8 0 lst: 74 38 ,?0 70 126 0 0 0 70 38 22 6 6 6 16 1 1 2nd: Z8 ?4 32 64 1+ 74 ?24 0 0 0 O 64 12 32 ?2 76 74 0 0 0 14 74 ?2 1 Figure 5-7.
1180 11 glJ 1200 1210 1220 1230 1240 1250 1260 1270 1280 1290 1300 1310 1320 1330 1340 1350 1360 1370 1380 1390 1400 1410 1420 1430 1440 1450 1460 1470 1500 1510 1520 1530 1540 1550 1560 LPRINT “AUTOS’ ’;CHR$(9) ; FOR 1=.4 TO 9.3 STEP .4 LPRINT CHR$(61) ; NEXTI LPRINT LPRINT “CHEMICALS’ ’;cHR$(9) ; FOR 1=.4 TO 8.7 STEP .4 LPRINT cHR$(60); NEXTI LPRINT LPRINT “GUNS’’;CHR$(9); FOR 1=.4 TO 1.4 STEP .
— u a . EXPORTS P . AUTOS CHEMICAL S Udduudtiuuddutiuutiududti GUNS +––––+––––+––––+––––+––––t ~ 4 6 8 I?:I’, L... IK..’K C7P.I?3 (-),:,,. I:)r:’ll....l...J.
94
chapter 6 MS-DOS AND YOUR PRINTER WhenusingyourprinterwithanIBMPC,PC-XT,orPC-ATor compatible, youwillprobablybe usingPC-DOSor MS-DOSas an operatingsystem.A numberof softwaretricksmaybe usefulhere.This chapteris not,however, a substitutefor the operatingsystemmanualssuppliedwith yourcomputer. To learn how to print files, etc. it is best to read the relevantparts of these manuals.
Pica Elite Condensedpica Condensedelite Proportional CPI 10 12 17.1 20 Numberof columns 80 96 137 160 Variable Sometimesthe softwme installationwill ask you for an initialization sequenceto nam to the defaultsettings.The commandfor yourprinteris -d3SG @. Makesw thattheEDSswitchesm setfor fhecomet printeremulation,and that you have selectedthe appropriatecharacterset usingthe EDS switches. If you w in doubtaboutthe configuration of yourapplicationsoftware,seek expertadvice.
((c))5 ((C))6 Orange Green If youwantto printa titlein double-sizeOrator,thenchangeto regular-size fonts for othertext, you can use these commandsas follows: File as seen on computerscreen: ( (F) ) 7 [ (5 ) ) 3 Printer commands ( (F) ) O ( (S) ) @ Font commands ( (F ) ) lean be ( (F ) ) 4embedded ( (F ) ) 7anywhere ( (F ) ) ~ 1n a do~ument.
I The printer supportsvariouscommandsin additionto the above, such as quadmple-sizeprinting.Mostoftheseothercommandsconsistof theescape code followedby one or mom lettersor numbers. If yoursoftwareenablesyouto placetheescapecodein yourfdes, or if you areableto definethisasauseroptionduringinstallation,youcanalsoembed these escape sequences. PROGRAMMING THE PRINTER WITH DOS COMMANDS If your system includesthe file PRINT.COMyou can use the main DOS printingcommand.
COPY and TYPE do not permit youto executeother commandswhilethe file is printing. If youwanta particularfont,orprintpitch,youcanmakethesesettingsfrom the controlpanelbefore you start printing.See Chapter2. IfyouprintfromtheDOScommandlevelveryoften,it willbeadvantageous to.createa printersetupfde. Theninsteadof settingfontetc.manuallyeach time, you can complete the setup with a single command from your computer.
I ‘V indicatesthat the followingcharacteris a controlcode. ‘V[ enters the cESC> code. cESC> has charactercode 27, and “[” is the 27th character fromA in the ASCIIsequence.Similarly,‘VA entersthe controlcodecl>. See your DOS manualif you need furtherinformationaboutEDLIN. You can now set up the printerby sendingit the file NLQELITE.DAT.To avoidunnecessaryloggingof commands,switchhard-copyoutputoff (by pressingCTRL-PRTSCifhardcopyis on).ToprintthefileREADME.
PROGRAMMING WITH BASIC As an exampleof programmingthe printeron MicrosoftBASIC,we have listed the program for the IBM-PC. This program runs in the printer’s Standardmode,andthe dowrdoadablecondition(EDSswitchA-1 ON and A-2 OFF).
I 1490 NEXT I ‘Left justify 1500 LPRINT E$; “aO” ;CHR$ (36); ‘Set 1/6” Line spacing 1510 LPRINT E$; ’’3’’ 1520 LPRINT E$; “ “;CHR$(0); ‘Normal character space 1530 LPRINT E$; ’’Q’’;CHR$(8O) ‘Set right margin 1540 LPRINT 1550 1560 LPRINT C$; ’’Otherfeatures:” E$; ’’5’’;”, “; 1570 LPRINT H$;E$; ’’4’’ItalicsM;s”; 1500 LPRINT E$; ’’E’’ Emphasizedz;E$’;E$ ;“F’’;”,“; ‘Double–striken;E$ ;“H’’;”,“ 1590 LPRINT E$; ’’G”; ’’UnderliningM;E$;H–O’’;”,“; 1600 LPRINT H$;E$; ’’-;’’; ‘SJUpERU;E$;!!TU; M and ,,; 1610 LPRINT E
I 2070 2080 2090 2100 2110 2120 2130 2140 2150 2160 2170 2180 2190 2200 2210 2220 2230 2240 2250 2260 2270 2280 2290 2300 2310 2320 2330 2340 2350 2360 2370 2380 2390 2400 2410 2420 2430 2440 2450 2460 2470 2480 2490 2500 2510 2520 2530 2540 2550 2560 2570 2580 2590 2600 2610 2620 2630 FOR M=O TO 11 READ MM LPRINT CHR5(MM); NEXT M RETURN ‘ Define NLQ download character LPRINT C$;E$; ’’&’’;CHR$(O) ;CHR$(60);CHR$(60); LPRINT CHR$(0);CHR$(23) ;CHR$(IJ); RESTORE 2270 FOR M=l TO 69 READ MM LPRINT CHR$(MM); NEXT
I How theprogram works Thisprogrambeginsby assigninga numberof printercommandsto BASIC stringvariables(lines1000to 1070).Youcanfindmostof thesecommands near the begiming of chapter4. The WIDTH“LPT1:“255 statementin line 1090meansinfiniteline width. It preventsthe IBM-PCfrom insertingunwantedcarriagereturnsand line feeds in graphicsdata. Actualprintingbeginsin line 1100.
I Dwble+ieight, 1)0uk)1e–5ized , E x ~ = 1-1d e- d .
106
chapter 7 TROUBLESHOOTING AND MAINTENANCE The followingsectionon troubleshootingandmaintenanceis intendedonly as a brief guide. Remember that your printer is a highly sophisticated electronicdevice,whichalso containshigh voltageinside.For that reason, only carry out those operationsdescribedin this chapter. CAUTION: Artyattemptto carryoutoperationsotherthanthosedescribed heremay resultin electricshockand/ordamageto theprinter. Whencarryingout anyrepairsor maintenance,alwaysfollow the instmctionscarefully.
Powersupply If the POWER indicatordoes not illuminate,checkthe following: I Check 1 Possible rernedY I Isthepowercableproperly Turnofftheprinter, makecertain that thepowercable pluggedintotheelectricalissecurely comected, andthentumtheprinter backon. outlet?. Ispowerbeingsupplied to Turnofftheprinter, unplugit. Try with another appti- theoutlet? anceoftheoutletto deterrnin eifelectricity isbeingsup pliedtothatoutlet.
If the print is faint,or uneven,checkthe following: Check Is the ribbonproperlyinstalled? I Is theribbon wornout? Possible remedy Checkandreinstall ifnecessary. Theribbon hasalonglife, butwill eventually needreplacing. Fitanew ribbon cartridge ifnecessary. I If dots are missingin the printing,checkthe following: Are dotsmkskg atrandom in theprinting? Possible remedy Theribbon hasbecomeslack, causing ittogetcaught up.Stopprinting, removetheribbon cartridge, reten. sionandrer)lace it.
Paper feeding If cut sheet paper (withoutthe ASF) is not feeding smoothly,check the following: Check Is the paper release lever pushedback (to the ~ position)? Is the paper guide in place and vertical? Are the left and right guides too close together? Possible remedy Set the release lever to the ~ position. The paper guide should be in place vertically for cut sheets to feed smoothly. If the left and right guides are too close together, the paper will not feed smoothly.
Check Are you trying to feed paper using the front panel buttons while the ON LINE indicator is illuminated? Is the paper too thick? Possible remedy You can only feed paper in this way when the printer is off-line. Set the printer off-line and then feed paper. There are limits to the thickness ofpaperthatcanbe I in this way. Try using thinner paper.
Ifthepaperparkfttnctiondoesnotappeartobe workingcorrectly,checkthe following: I Check Is the paper release lever in the ~ position? Has the fanfold paper been properly parked? \ Possible remedy The papsr release lever must be set to the ~ position after the fanfold paper has been parked. Make sure that the POWER indicator comes on flashing after the fanfold paper has been parked.
MAINTENANCE Essentially,your printer is a robust piece of equipment, but should be treatedwithamodicumofcarein orderto avoidmalfimctions.Forexample: Keepyourprinterin a “comfortable”environment.Roughlyspeaking,if you arecomfortable,thentheenvironmentis suitablefor yourprinter,too (see Chapter1). Do not subjectthe printerto physicalshocksor excessivevibration. Avoidextremelydustyenvironments.Dust is the enemyof all precision mechanicaldevices.
Front tab der Spr Hea Figure 7-1. Replacing the print head 6. Disengagethe cable from the connectorholdingit down,then remove the print head. 7. Plug the cableinto the connectorof the new print head. 8. Placethe new printhead on its support,seatingit on the two pins. 9. Fasten the printhead down with the two screws. 10.Remountthecolorribbonholderwithcareto positionthe springandthe fronttab correctly. 11.Replacetheribboncartridgeandtopcover,andplugthepowercordback in.
chapter 8 SPECIFICATIONS P@ting system ..............................Serial ImpactDot-matrix Printing speed ................................Pica 2oocps High-SpeedDraft 150cps Draft NLQ 37.5cps Elite 225cps 180cps 45cps logic-seeking Print direction.................Bidi~ctionaL Unidirectional,logic-seeking (selectable) Print head ~.nwH.timHuMmmuutiH-h.9pins Life:lOOmillioncharacters Line spacing................................... 1/6, l/8, n/72, n/216inches Characters......u.=ti--......
C d B i N D H Q C C P D ........................ 9 x 1 ( 1 X2 ( m d d I I *I i i ( ....................... D 6 1 1 2 8 9 7 1 t p P f . P f s P w . a d ( ( ( ( ( ( ( ( i t m . . i . . b E s . W W . . R t . . M C y 1 w a a . . m . 4 4 . ( + c 1 (. . . . 1. 1l D D F E P f c I . R o t . . ........................................E E I I x4 x9 x9 x1 x6 x7 x5 x1 m s . M 9 9 9 9 9 9 9 9 a. p F C o o o o o o o o p s (. . ( . d ( ( m o g . .
R l M C . ( ( . D ....................................4 1 W ..........................................6 P s m m c c x3 x1 p p x1 x5 m i . ( ................................. 1 ( c Options ..........................................
T f f c d ( N F 1 S G f h 2 D H w a 3 D H w a 4 D H w a P D H w a 6 D H w a 7 D H w a 8 D H w a D H 5 1 B L w p r 1 P H w p o H w p 1 S 1 N 1 S 1 C C 1 + + G T R W 1 3 3 E 3 E 3 S O G E S I A a o ( 2 w a a l p a r o d t r C d b d w E s i o g g ( D o f p t l h s g i l p i r r s w g f p g i N 3 1 I G i a A 9 w ( t l 5 1 1 t p ot p w a l w p c c d t a e
chapter 9 C T f t T l d c o t r T h e o t 1s i h 6 t d C i c p s t c s a o e I c c i s s i a i t t c c t c b f b r t e at t a l e t c “ i i c 4a r c c i 4 T i e ( 1 1= 6 t n i t i F r b b t p a i b a < r L L V,IU.
I STANDARD CHARACTER SET #1 I 120 1011121314151 6171
1
STANDARD CHARACTER SET #2 O 1 c a i t s c s #
INTERNATIONAL CHARACTER SETS W a i t f c c a m s i s i t c 3 $ $ $ $ $ H $ $ $ H .$ $ $ $ $ $ 9 9 [ \ - ~ A o [ \ R 0 A o - \ 9 1 s u 1 A A 6 9 “ “ “ “ “ u “ 9 ‘ ‘ ‘ ‘ ‘ 6 il i N z ‘ [ E k Y 0 0 1 A A i N C 3 .
IBM CHARACTER SET #2 Code Page #437 (U.S.A.
. 125
I Code Page #850 (Multi-1ingual) O 126 c a i t C P #
cofePa! re# Otht -c sa i 9 (POmJuese) t C A P 1 # c D F E o i 1 - 2 -% 3 h k 243 4 ~. % I 5 __@ 7 8 I-m Lx .
I 1
co fePaj re#863 (Canadian Fre\ ch) Othe -c sa i t C P # — D E I F o 1 2 3 4 ~ 6 7 9 % 9 h 0 l % Yz! B c D h E F k ’223 129
Code Page #865 (Nordic) O 130 c a i t C P #
IBM CHARACTER SET #1 O T o < c a i d o c c “ f c t c s # c e s w t m s i t s m w a7 i t b i s t 1b t 131
IBM SPECIAL CHARACTER SET A — 132 c c b p b s c
INDEX u A horizontaltab,66 Ascender,70,82 Auto feed,79 Autoloading,31 Automaticlinefeed, 37,63 Automaticsheetfeeder,9,37,78,117 m Backspace,63 BASIC,28,84,88,91, 101 Beeper,78 Bi&ectional printing,40,78 Bit-imageprinting,67-69,104 Boldprinting,45 Bottomfeed, 15 Bottommargin,59 Buffer,32,37, 116 m Cancelcommand,76 Carriagereturn,63 Centering,64 Channelsof verticaltab stops,61 Charactercodes,printingof all,49 Characterset commands,47-49 Charactersets, 115,119-132 Character size and pitch commands, 50-55 Char
Gap, 19 67, 104 G Graphicscommands,67-69 m Hexad@maldump,28-29 Horizontalpositioncommands,62-66 Horizontaltabulation,65 HS draf~24 m IBMcharactersets,47, 124-132 IBMcodepage, 39,48 IBM mode,36,38 IBM-PC,29 Interface: signals,118 specifications,116 Internationalcharacters,39,48, 123 Italicprinting,44 m Justitlcation,64 n Left margin,62,63 Line fed, 57 Line spacing,55,56, 115 Locatingtheprinter,1 Macrodefinition,33 Maintenance,113 Manualfeed,78 Margins: bottom,59 left,62,63 right,62,63 I&ster printmode,52 Mi
m Quadruple-sizecharacters,53 Quietprint,23,77 m Rear cover,3, 12 Releaselever,3, 10, 12 Resetprinter,79 Reverseline feed,57 Reversemicro-feed,31 Ribboncartridge,4,116 Rightmargin,62,63 Rollerunit,3,7 ROM characterset, 74 Underlining,45 Unidirectionalprinting,78 Unpackingand inspection,2 Unparking,17 IVerticalpositioncommands,55-61 Verticaltabulation,61 Zero (slashand normal),49 Sansenffont,24,43 Scriptfont,24,43 Self tests,25,26 Set/Eject/Parkbutton,23 Settingup, 4 Singlesheets: automaticloading,9 ma
COMMAND SUMMARY Standard Mode T f c t e w t S m % 2 + n n n t T E “9.” <&“~0” ...
“ : n O 1 nm n ... 2 n n n d ... n d m2 . ... n bottom n n “ , , < “ “ < < C < < c “ “ “ “ “ “ “ * < “ “ s % ... ... “A” nO ... ~ + z z ..
I d e ~ o q n a - & ,,-,, ,, , :$ ‘“::: , ,4,, ; ,’],, “; ,, , ,, ,! ,. ,, ,’ ,, , ,, ,, ,, ,. ,, ,, :$ ;[: , ,, ,, “ .. ,4 , ,, ,, c’ ] , “ ,, :g ,, .. ] ,! .4 ,, ,.
IBM Mode T f c t e w t I m < < n % n 2 d d n n n n “ c 139
= - ‘ “ n . Worn margin Cancef bottom n * ~ - * ~ “ @ a “ “ * “ C * -* . ** * d . , “. “* “ < ““ “‘ “ d n “ n n m m ... “ n n m m . “ “ b & * “ nm + of d - d “ C “ a “ * “ “ @ * @ d C a d “ “ “ “ “ “ m .. n n < w “ “ “ “ “ , ,, , ,, , ,, ,, ‘, ,, ,, ,, , ,, .! ‘. 1,,, ,! , “ .. ‘, ..
n n 141
C R Star Micronics Co., Ltd.
PRINTED IN JAPAN