
Multi-Font User's Manual
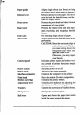

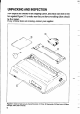


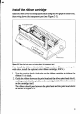
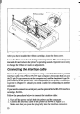
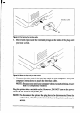
Table Of Contents
- 挀漀瘀攀爀
- 䠀伀圀 吀伀 唀匀䔀 吀䠀䤀匀 䴀䄀一唀䄀䰀
- 吀䄀䈀䰀䔀 伀䘀 䌀伀一吀䔀一吀匀
- 䌀栀愀瀀琀攀爀 䤀一吀刀伀䐀唀䌀吀䤀伀一
- 䌀栀愀瀀琀攀爀 ㈀ 匀䔀吀吀䤀一䜀 唀倀 吀䠀䔀 倀刀䤀一吀䔀刀
- 䌀栀愀瀀琀攀爀 ㌀ 伀倀吀䤀伀一䄀䰀 䄀䌀䌀䔀匀匀伀刀䤀䔀匀
- 䌀栀愀瀀琀攀爀 㐀 倀䄀倀䔀刀 䤀一匀吀䄀䰀䰀䄀吀䤀伀一 䄀一䐀 唀匀䔀
- 䌀栀愀瀀琀攀爀 㔀 䌀伀一吀刀伀䰀 倀䄀一䔀䰀 伀倀䔀刀䄀吀䤀伀一匀
- 䌀栀愀瀀琀攀爀 㘀 匀䔀吀吀䤀一䜀 吀䠀䔀 䴀䔀䴀伀刀夀 匀圀䤀吀䌀䠀䔀匀
- 䌀栀愀瀀琀攀爀 㜀 倀刀䤀一吀䔀刀 䌀伀一吀刀伀䰀 䌀伀䴀䴀䄀一䐀匀
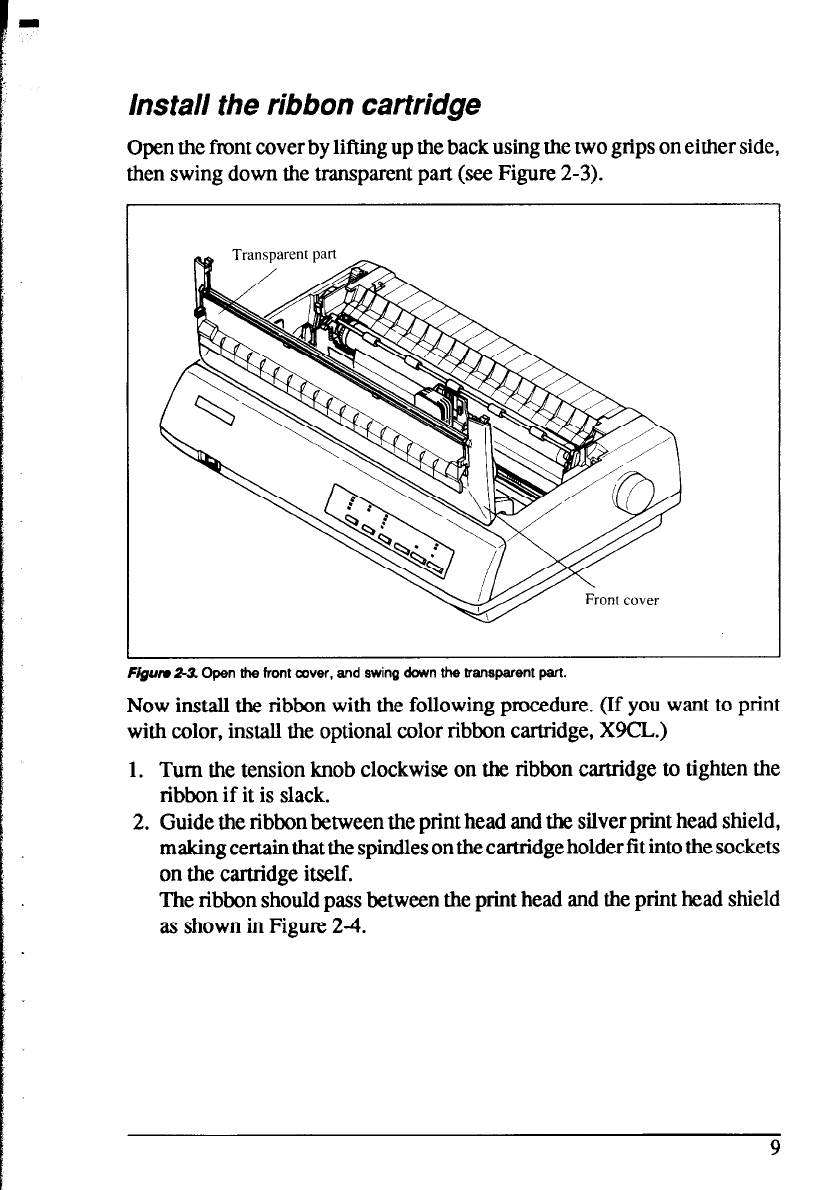
Install the ribbon cartridge
Open the front cover by lifting up the back using the two grips on either side,
then swing down the transparent part (see Figure 2-3).
Flgurr 2L3. Open the front cover, and swing down the transparent part.
Now install the ribbon with the following procedure. (If you want to print
with color, install the optional color ribbon cartridge, X9CL.)
1. Turn the tension knob clockwise on the ribbon cartridge to tighten the
ribbon if it is slack.
2. Guide the ribbon between the print head and the silver print head shield,
making certain that the spindles on the cartridge holder fit into the sockets
on the cartridge itself.
The ribbon should pass between the print head and the print head shield
as shown in Figure 24.
9