
Multi-Font User's Manual
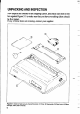
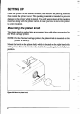
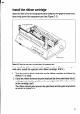
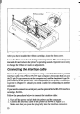
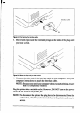
Table Of Contents
- 挀漀瘀攀爀
- 䠀伀圀 吀伀 唀匀䔀 吀䠀䤀匀 䴀䄀一唀䄀䰀
- 吀䄀䈀䰀䔀 伀䘀 䌀伀一吀䔀一吀匀
- 䌀栀愀瀀琀攀爀 䤀一吀刀伀䐀唀䌀吀䤀伀一
- 䌀栀愀瀀琀攀爀 ㈀ 匀䔀吀吀䤀一䜀 唀倀 吀䠀䔀 倀刀䤀一吀䔀刀
- 䌀栀愀瀀琀攀爀 ㌀ 伀倀吀䤀伀一䄀䰀 䄀䌀䌀䔀匀匀伀刀䤀䔀匀
- 䌀栀愀瀀琀攀爀 㐀 倀䄀倀䔀刀 䤀一匀吀䄀䰀䰀䄀吀䤀伀一 䄀一䐀 唀匀䔀
- 䌀栀愀瀀琀攀爀 㔀 䌀伀一吀刀伀䰀 倀䄀一䔀䰀 伀倀䔀刀䄀吀䤀伀一匀
- 䌀栀愀瀀琀攀爀 㘀 匀䔀吀吀䤀一䜀 吀䠀䔀 䴀䔀䴀伀刀夀 匀圀䤀吀䌀䠀䔀匀
- 䌀栀愀瀀琀攀爀 㜀 倀刀䤀一吀䔀刀 䌀伀一吀刀伀䰀 䌀伀䴀䴀䄀一䐀匀

chapter 2
SETTING UP THE PRINTER
This chapter describes the following procedures to set up your new printer.
If you have optional accessories, refer to chapter 3 after setting up the printer.
l Locating the printer
l Unpacking the carton box
l Mounting the platen knob
l Installing the ribbon cartridge
l Connecting the printer to your computer
LOCATING THE PRINTER
Before you start unpacking and setting up your printer, make sure that you
have a suitable place on which to locate it. By “a suitable place”, we mean:
l A firm, level surface which is fairly vibration-free
l Away from excessive heat (such as direct sunlight, heaters, etc)
l Away from excessive humidity
l Away from excessive dust
l Supply it with “clean” electricity. Do not connect it to the same circuit as
a large, noise-producing appliance such as a refrigerator.
. Make sure the line voltage is the voltage specified on the printer’s
identification plate.
9 To disconnect the printer, the plug has to be disconnected from the wall
socket, which has to be located close to the printer, and easy to access.
l Install the printer where there is sufficient mom for the paper and any paper
being fed in or printed out.
l If you are connecting your printer with a Centionics parallel interface,
make sure that the cable is within 2m (6ft) of the printer. An RS-232 serial
connection using the optional IS-8XL interface cartridge can be made over
longer distances.
5