ND-10115 USER’S MANUAL NOT INTENDED FOR SALE PN 80820 163
Federal Communications Commission Radio Frequency Interference Statement This equipment generates and uses radio frequency energy and if not mstalled and used properly. that is. in strict accordance with the manufacturer’s instructions.
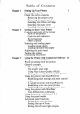
Table of Contents Chapter 1 1 Setting Up Your Printer Locating the printer Check the carton contents Removing the printer cover Removing the packing tube Installing the ribbon cartridge Installing the mute cover Installing the interface board Chapter 2 7 Getting to Know Your Printer Controls and parts of the printer Parts of the printer Controls and indicators Extra functions Other controls Selecting and loading paper Loading single sheets Loading sprocket-feed paper Adjusting the print head Testing t
Chapter 4 Printing with BASIC 39 Some basics of BASIC First steps ASCII codes and the CHR$ function Control codes The escape codes A note on command syntax Selecting the right software mode Some special kinds of text Near Letter Quality characters Italic printing Underlining and overlining Superscripts and subscripts Changing the print pitch Expanded print Condensed print Proportional printing Making words stand out Mixing print modes Chapter 5 Formatting Text Lines and line spacing Starting a new lin
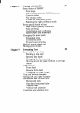
Chapter 6 81 Special Features of the Printer Now hear this Resetting the printer Taking the printer off line Printing the bottom of the sheet Backspace, delete, and cancel text Printing zeroes Immediate-print Adjusting the width of space between characters Uni-directional printing The seven bit dilemma Block graphics characters and special symbols International characters sets Printing characters in the control code area Printing BIG characters The optional sheet feeder The macro control code Reading a h
Appendix C 147 Function Codes Commands to control print style Font style controls Print pitch controls Special print modes Controlling the vertical print position Line feed and reverse line feed Form feed and related commands Top/bottom margins and vertical tabs Controlling the horizontal print position Download character commands Dot graphics commands Macro instruction commands Other commands Appendix D Command Summary in Numeric Order 201 Standard mode IBM-P mode IBM-G mode Appendix E Technical Sp
CHAPTER 1 SETTING UP YOUR PRINTER Subjects covered in Chapter 1 include l Choosing a suitable place for your printer l Unpacking l Setting up LOCATING THE PRINTER Give some thought to the best place to put the printer. Both the printer and computer should be used in normal office surroundings. For best performance, we recommend: l l l l l . l Use the printer on a flat surface. Keep it out of direct sunlight and away from heat-producing appliances.
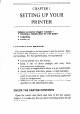
2 You should also have a parallel interface board to connect your computer to the printer. Also available are a parallel interface board with extra buffer memory and a serial interface board, both optional. (More on interfaces later.) Figure l-l. Check to make sure you have all five items: 1) Printer, 2) Mute cover, 3) Paper guide, 4) Ribbon cartridge and 5) User’s manual.
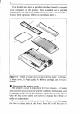
3 the way. To replace the cover, slide the tabs in at the front and lower it into place. Figure l-2 shows the proper position and movement for both removing and replacing the cover. Printer Figure 1-2. Remove the printer cover by lifting cover carefully. W Removing the packing tube The printer is shipped with a protective spiral tube to keep the print head from being damaged during shipping. This tube must be removed before use. First, take off the printer cover.
N Installing the ribbon cartridge This printer uses a neat, easy-to-change ribbon cartridge To fit or change the ribbon carwith automatic threading. tridge: 1. Turn oj,Ythe power and remove the printer cover. 2. Slide the print head gently to the center of the printer. Warning: The print head gets hot during operation, so let it cool off before you touch it. 3. Set the release lever to either single sheet or sprocket-feed paper. 4. With the ribbon facing away from you, use the guide hold.
5 Print Figure 1-5. To thread the ribbon, slide the print head carriage manually to the right or left, and the ribbon will slip down by itself into its proper position. n Installing the mute cover The mute cover reduces the printer’s operating sounds. Note the position of the guide pins on the mute cover as shown in Figure l-6. Holding the mute cover at each end, insert the guide pins into the cutout hooks on the printer cover. Hold the mute cover down onto the printer.
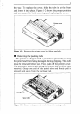
n Installing the interface board Interface cover board Figure 1-7. Slide the I/F board into the slot. A parallel interface board comes standard with your printer. In addition, there are two optional interface (I/F) boards: a serial interface board that lets you connect to a serial (RS-232C) computer port; and the other board contains extra buffer memory for parallel output. All three boards are installed the same ,way. To install or change an I/F board, turn off the power and turn the printer around.
CHAPTER 2 GETTING TO KNOW YOUR PRINTER Subjects covered in Chapter 2 include l Parts of the printer - what they’re for and how to use them l Paper selection and loading l Adjustment l Testing printer operation CONTROLS AND PARTS OF THE PRINTER n Parts of the printer COVER - This protects the ribbon and the print head from dust and dirt, and cuts down the sound of the printer. MUTE COVER - This further reduces the sound of the printer.
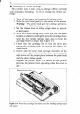
Mute cover Power cord Figure 2-1. Front and rear views of the printer. PLATEN - This is the rubber cylinder that carries paper to the print head. INTERFACE COVER - On the back of the printer, this cover conceals and protects the interface board. The cover is cut away to expose the external connector to which you attach your computer cable.
9 n Controls and indicators Now let’s go over the controls and indicators of the printer, starting with the control panel on the right. There are nine indicators and six keys on the control panel. IO-inch type 1S-inch type Figure 2-2. The control POWER panel. INDICATOR - Glows green when the power is OiZ. PE INDICATOR - Stands for “Paper Empty”, and glows red when the printer runs out of paper and when certain printer malfunctions occur.
ON LINE KEY and INDICATOR - Glows green when the printer is ready to receive data from your computer (on line). When the printer is off line. it sends a signal to the computer indicating that it cannot accept data. Pressing the On Line key switches the printer between on line and off line. When you turn the power switch on, the printer is placed on line automatically. n Extra functions There are eleven more functions that are not directly specified on the control panel.
11 For details, please refer to the end of next chapter. n Other controls There are other controls, not connected to the control panel. Some of the more important ones are: POWER SWITCH - The switch that turns the printer on and off is at the back, on the left side. PLATEN KNOB - This knob is at the middle of the right side and lets you turn the platen by hand, like a typewriter. Caution:Turn the platen knob only with the Power switch of$ Turning the knob with the power on could damage the drive gears.
\yy - The bottom one is used when you want to release the paper completely to adjust it. The paper bail holds the paper against the platen according to the setting of the release lever. The bail is opened when the release lever is in the top position, closed when the lever is in the second or third positions, and opened by the printer when the lever is in the bottom position. Figure 2-5. Use friction feed for single sheets and tractor feed for continuous paper.
13 Figure 2-6. Raise the paper guide for loading Figure 2-7. Prop up the paper the notches provided for it. single sheets.
14 4. Position the adjuster at the triangle marked on the guide for standard margins, or set it according to your own requirements. 5. Set the release lever for single sheets-the second position from the top. 6. Align a sheet of paper on the guide along the adjuster. 7. Turn on the power switch. (The Paper Empty indicator will glow because ther is no paper.) 8. Now set the release lever to the auto-feed setting-the top position. The printer will advance the paper automatically. 9.
15 n Loading sprocket-feed paper This is standard computer paper, with the holes along the sides and perforations between the sheets. It is also called sprocket, punched, fan-fold, or just plain “computer paper”. It can be as narrow as 4”, and up to 10” wide (4 inches to 15.5 inches on 15-inch type). 1. Turn on the printer and set the release lever for sprocket-feed paper. 2. If the paper guide is installed, remove it, and put it aside for a moment. 3. Place a stack of fan-fold paper behind the printer. 4.
16 9. Set the release lever to the auto-feed setting. The printer will advance the paper automatically. 10. Feed the paper through the slot in the printer cover. 11. Install the paper guide on the printer. See Figure 2-10 for details. When used with sprocket-feed paper, the guide is turned around and laid flat on top of the printer as a paper separator. Make sure that the tabs on the guide fit into their receivers. Figure Z-10. Ready to load the sprocket-feed position of the paper.
17 There are four positions; you can feel the lever clicking into the various notches. The first step (shown) is the one most commmonly used for single sheets of paper. Try different positions until you get the best printing results. Release lever Adjust Figure 2-11. The adjustment lever allows for different thicknesses ot paper.
18 .-. Self-test 1 DIP switch 2-2 ON !“tt$%t‘ O*+.-./01=5456789:: .=.‘~‘BRBCDEFGIiIJt.LMNOF’OfiSTU’~WXYZI‘,l I JKLMNOPi~R.5 JUUWX YZC \ 1,‘ -’ ahcdrfghij/,Irnopyrstur,w*y-(,‘:” _‘aoc. !"$$%6'()*+,-./01234567S9:;<->?~ABCDEFGHIJKLMNOP~RSTUVWXYZL\l~~‘nbc XYZ[\J-_‘abcdefghijklmnopqrstuvwxyz( 1)" IJKLHNOPQRSlVW !"#%%k 0 *+.-./01254567S9:: IJKL~NOPQRSJUUWXYZC \3-‘-’ =: ?CAHCDEFGHIJt LMNCJf~‘ClRSTLIVWXYZC\l m’atc ahcdefyhzJlilmnop~rstuL,wxy--(.‘)- !"#5$6'()'+,-.
defqhl.li lmnooqrstuuwxyz :::’ f,‘#$%&. c ,*t,-.,0~“j~5L;89:;, = ,‘@*RCDEfeY defshijklmnopqrstuvwxyz( I)- !"XS%&"o*+,-./0123456789:;(->?QABCDEFGH defghl~Llmnopqrstuvw::~~~: I:” .!“*E%,S*i defghijklmnopqrstuvwxyz( :)” !"#S%bT60*+,-./0123456789::(->?@ABCDEFGH defghl.,lilmnopqr-,tuvw::y~ efgnl~lklmnopqr~tuvw:.yfqhl.1~.1mnopqrc,tuvw:.yqhul lmnaparstuvwy: hll~.lmr,oPqr stuvw::y:: ~~t.lmnopqrstuvw!:y~ ~*~.--.,01c’3~~6~:~:0:;~:= ~-mfic~EFeH : I :’ ’ “#%%?T- ()*x+. -.
20 MEMO
1 CHAPTER 3 USING THE PRINTER WITH COMMERCIAL SOFTWARE Subjects covered in Chapter 3 include l Using commercial software l Controlling the printer with the Panel mode USING COMMERCIAL SOFTWARE Many of you purchased this printer to use with commercial software. You made a good choice because this printer is compatible with most commercial programs, from word processing programs to spreadsheet programs to accounting programs. Many of these programs have a routine for describing your printer.
22 Some programs don’t ask you what kind of printer you have, but instead ask some questions about what your printer can do. The answers to the “most asked” questions are: Yes - this printer can do a “backspace”, and this printer can do a “hardware form feed”. With these questions answered, you are ready to start printing. Read the manual that came with your software and the next Chapter to see how to make it send information for this printer to print.
23 the help of your program manual and the supporting chapters in this manual, you should be able to figure out how yours works. GENERAL CONCEPTS Each word processing program has a way to get out of the standard text entry mode in order to accept the special printer function codes. WordStar uses the CONTROL key in different ways to define the print function codes. EasyWriter II has a system function which allows you to define print pitches and special print functions for use with the ALT key.
24 master reset code and resets the printer to its DIP switch settings. These print characteristics are the same as the ones used by the printer when it is first turned on. The code sequence for master reset is < ESC > “@“. By checking the ASCII equivalents in Appendix C, you can see that the decimal expression is 27 64. You’ll see these numbers several times in this section.
I 25 We suggest you do three things. First, you should review Chapter 4 and Appendix C to become as familiar as possible with ASCII codes and the function codes. Second, read Chapter 4 which describes them in greater detail and shows examples of how they are used in BASIC programming. The functions will, for the most part, act the same Understanding what’s in your word processing program. available and how they perform will help you use them correctly in your documents.
r 26 By changing the pitch settings, you can use the document ruler line to print pica, elite and condensed width pitches. In addition, you can use a similar method to print in near letter quality. The print control codes can be redefined to enhance the final product of your document. The boldface, underline, superscipt and subscript functions require only a slight “recoding” of information in the printer driver.
27 Press RETURN and the Edit Global Sequences screen will be displayed. These codes control the print functions for form feed, line feed, margin settings and automatic justification. We do not recommend that you edit any of these codes. Press RETURN and the Edit Pitch Table screen will be displayed. On this screen, you will enter the ASCII decimal values to define the print pitches. The first two fields in each line define the pitch range (which in this case are both the same number).
these codes. They define how many lines per inch the printer uses. Press RETURN to transfer to the Edit Font Support screen. Change all of the entry fields to Option 2 (Control Code Support) on the Edit Font Support screen. Also, make changes in the other fields to look like the figure shown below. Enter the codes written in italic into lines 41 - 50. 41. 42. 43. 44. 45. 46. 47.
29 Enter the codes written in italic into lines 51 - 66. 51. 52. 53. 54. 55. 56. 57. 58. 59. 60. 61. 62. 63. 64. 65. 66.
With the cursor under the “S” in “SUBJECT”, set the print pitch in the ruler line to condensed width pitch. Name the ruler line “condensd” (without the quotes) and change the character pitch to 17 and the line spacing to 6. To make the subject title expanded, use the ALT and = keys (in the .line mode) to highlight the line. Now, change the pitch setting in the next line to pica by setting a new ruler line: Ruler Name - pica; Character Pitch - 10.
31 your document The ASCII code sequence would be 27 80 27 52 to print italic pica pitch. n Redefining your own print control keys The ASCII codes to redetine the print control keys (Edit Font Sequences) are pretty straightforward. There are individual ASCII decimal values to turn on and off different prints. You want to affect that aspect but not the print pitch itself. Leave that for your document ruler line. Remember, all the codes can be found in Appendix C of this manual.
They include: nPS ^PD h PT /rPC Underscore Double-strike Superscript Print Pause hPB Boldface ^PX Strikeout ^PV Subscript It is also possible to define the ^PA (alternate pitch) command to change the print pitch of your document. The WordStar User’s Manual fully describes the use of these ^P functions. You should refer to your manual if you need help with them. There are four alternate “P codes that can be defined during the installation of your WordStar program to perform other printer functions.
If you do change several of the things listed in the /Print menu, Lotus l-2-3 will remember the selections that you have made and use them each time you print the spreadsheet. They are even saved with the spreadsheet so that they will be the same the next time that you use the spreadsheet. You can specify the range to print in all the normal ways: by pointing, by typing the cell addresses of the endpoints, by entering a range name, or by using the F3 key to point to a range name.
You can direct sections of headers and footers to the left, right, or center by using the / character. Each header or footer is divided into three sections; Left, center and right. The / character shows the limits of these sections.
USING THE PANEL MODES At the end of this chapter, we’ll explain about the “Panel” mode, which is a powerful function of the printer. Some commercial software does not support defining your own selections. In this case use the “Panel” modes. Selection of any of the Panel Modes at power-on ensures that your choices remain in effect until you turn the power off. This means that the printer will ignore any codes sent by the software that you are using.
36 key, press the MODE key once again to make your choice, and press the ON LINE key again. Remember that you may select which print mode is the standard one by setting DIP switch 2- 1. To select the Italic Panel Mode, press the TOF key while turning on the power. More than one attribute may be set in this way.
37 n Setting print start position When you want to align the print start position, you can set it by the micro-feed operation with the control panel, instead of turning the platen knob manually. 1. Set the Off Line mode by pressing the On Line key. 2. While holding down the On Line key, press one of the following keys. Paper Feed key - Forward micro-feed TOF key - Reverse micro-feed 3. When you can set the print start position, release the Paper Feed key or the TOF key first, then release the On Line key.
.MEMO
CHAPTER PRINTING 4 WITH BASIC Subjects covered in Chapter 4 include l Listing BASIC programs on the printer l How a program prints things l Control codes, escape codes, and command syntax l Selecting the right software mode l Near letter quality (NLQ) characters l Fixed and proportional character spacing l Special printing Printing in italics Underlining and overlining Superscripts and subscripts Boldface and emphasized text Mixing print modes.
the easiest operations one can do, but even they may depend on what computer you have. In Microsoft BASIC, we can list all the steps in a program by entering LIST. This lists them on the CRT screen; if we want to print them on a printer, we prefix the command with an L (enter LLIST). The Microsoft BASIC command for outputting information is PRINT. Like the LIST command, this displays the information on the CRT screen so we have to add an L (+ LPRINT) if we want to use the printer.
41 a dollar sign. Some numbers cause the printer to do other things, too. For instance, sending a 7 sounds the printer’s bell. Taken together, these numbers and their meanings make up the ASCII code (pronounced ask-key), which stands for the American Standard Code for Information Interchange. There are ASCII codes for all the letters of the alphabet (upper case and lower case), 0 to 9,,most punctuation marks, and some (but not all) of the functions of the printer.
42 Your printer has a lot of control codes to let you do some useful things. Let’s try one that we’ve mentioned several times already: 10 ’ Demo of ASCII code 20 LPRINT CHR$(7) 30 END RUN That’s the printer’s bell (we call it that even though it sounds like a buzzer).
43 needed, so they included the escape (ESC) code to allow almost any number of additional codes to be defined when they became necessary. ESC allows us to “escape” from the ordinary set of control codes so we can specify additional functions and other information needed for a printer function. In this manual, we’ll write the ESC code inside broken brackets, like this- < ESC > . < ESC > - decimal 27 - is always followed by at least one other number; it is never used alone.
44 Even though there are many commands that require the use of ASCII code 0 (the character); the number “0” (zero or ASCII code 48) cannot be substituted. In these cases, instead of an unadorned 0 we will show CHR$(O) each time these commands are referenced. That’s it for the basics. You are now ready to learn how to use the many features of your printer.
45 40 LPRINT CHR$(27);"xO"; 50 LPRINT “This line shows standard print. ” In this program, line 20 selects NLQ characters with < ESC > “x” 1 command. Line 30 prints a sample before line 40 switches printer back to draft printing with an < ESC > “x” 0. When you run the program you should get this: shows NEAR LETTER QUALITY! line -I-i-1j. 53 :1:i r-iES 5 t-i13PiI5. 5 t a I?cl a IFcl 8,/_1.l-it Y This Now switch set the mode. This This turn off the power switch.
46 Table 4-2 Italic commands Use this program 10 20 30 40 50 ’ Demo LPRINT LPRINT LPRINT LPRINT to see italic characters: of italic and roman CHR$(27) ; “4” ; “This line is in ITALIC characters.” CHR$(27) ; “5”; “This line is in ROMANcharacters. ” Here is what you should get: In this program, line 20 turns italic on with < ESC > “4”, and line 40 turns italic off with < ESC > “5”. Now, set the “Italic Panel” mode, as described in Chapter 3, then run the program again.
47 Table 4-3 Underline and overline commands Control code Function Underline ON Underline OFF Overline ON Overline OFF “-” 1 “-” 0 < ESC > “-” 1 < ESC > “L” 0 It’s that simple. Let’s try it with this program: 10 ’ Demo of underlining and overlinins 20 LPRINT “Demo of “; 30 LPRINT CHR$(27) ; “-1”; 40 LPRINT “UNDERLINED” ; 50 LPRINT CHR$(27) ; “-0”; 60 LPRINT ” and I’; 70 LPRINT CHR$ (27) ; “-1”; 80 LPRINT “OVERLINED” ; 90 LPRINT CHR$ (27) ; “-0”; 100 LPRINT ” printing.
and are half the height of normal characters. Superscripts print evenly with the tops of regular printing while subscripts print evenly with the bottom of regular printing. They are frequently used to reference footnotes, and in mathematical formulas. Table 4-4 has the codes for using superscripts and subscripts.
I .; : ~ 49 pica (and is the same as the pica pitch on most typewriters). This works out to 136 characters per line. You can also print 12 characters per inch (elite pitch). This gives you 163 characters per line. You can set these pitches by using the Print Pitch key on the control panel manually, or by software as shown in the table below.
50 ' Demo of expanded print 20 LPRINT "Demonstration of 'I; 30 LPRINT CHR$(14); 40 LPRINT "EXPANDED"; 50 LPRINT CHR$(20); 60 LPRINT M printing." 70 LPRINT "Notice that 'I; 80 LPRINT CHR$(P4); 90 LPRINT "EXPANDED mode" 100 LPRINT "automatically turns off at the end of a line." 10 Expanded print set with CHR$( 14) is automatically cancelled at the end of the line. This is convenient in many applications, such as for one line titles.
51 When you turn on expanded print with < ESC > “W” 1 it stays on until you turn it off with < ESC > “W” 0. Table 4-6 Expanded print commands n Condensed print Each of the print pitches also can be condensed to its normal width. This is called condensed print. Try this program to see how it works: 10 ’ Demo 20 LPRINT 30 LPRINT 40 LPRINT ,50LPRINT 60 LPRINT of condensed print "Demonstration of "; CHR$(15); "CONDENSED"; CHR$(lS); u printing.
I 52 Table 4-7 Condensed print commands Function Condensed ON Condensed OFF Control code CHR$(15) or < ESC > CHR$( 15; CHR$(18) By combining expanded print and condensed print with the two pitches, this printer has eight different character widths available. Enter this program to see how the print pitches, expanded print and condensed print can be combined: 10 ' Demo of various print pitches 20 LPRINT CHR$(l5); 30 LPRINT CHR$(27);"M"; 40 LPRINT "This line is CONDENSED ELITE pitch.
53 n Proportional printing Have you ever looked closely at the printing books and magazines? Doesn’t it look nice? The main reason is that each character is given an amount of space proportional to its actual width. A typewriter (and most printers), on the other hand, give every character the same amount of space, no matter how wide it is. (Pica pitch, for example, gives a “w” and an “i” l/l0 of an inch each. Looking at these letters you see that a “w” is two or three times as wide as an “i”.
54 Line 20 selects the elite pitch and line 40 turns on the proportional printing with < ESC > “p” 1. Line 50 prints a line with proportional elite pitch. Then, line 60 selects the pica pitch, so that line 70 prints a line with proportional pica pitch. Finally, line 80 resets the proportional printing and line 90 prints a line in normal pica pitch.
II_, ,‘: ‘. : 10 ’ Demo 20 LPRINT 30 LPRINT 40 LPRINT 50 LPRINT 60 LPRINT 70 LPRINT 80 LPRINT 90 LPRINT 100 END of boldface and emphasized CHR$(27) ;“G”; “This line is BOLDFACEprinting.” CHR$( 27 1 ; “E” ; “This line is BOLDFACEand EMPHASIZED.” CHR5(27) ; “H” ; “This line is EMPHASIZEDprinting.” CHR5(27) ;“F”; “This line is normal printing. ” Run this program. This line is The results will look like this: FOLDFACE printing. This line is BOLDFACE and EMPHASIZED. This line is EMPHASIZED printing.
56 You have at your disposal a unique command that lets you choose any valid combination of print modes and pitch. This is the Master print mode command. It looks like this: < ESC > “!” n Here, the value of n defines the print style to be selected. The value of n can range from 0 to 255, which is the range of values that can be stored in one eight-bit byte. If you look at each bit in this byte, you’ll find that each one represents a printing style variation.
57 To better understand the way the print modes work, consider that each mode except pica (pica is the default) has a separate switch that can be turned on and off via software. Once the switch is on, it stays on until turned off. However when two modes that conflict are turned on at the same time, the printer must choose which one to use. For example, suppose you turn on both Condensed and These cannot combine, so the printer Emphasized modes.
MEMO
CHAPTER FORMATTING 5 TEXT Subjects covered in Chapter 5 include l The carriage return and line feed l The amount of space between lines l Moving to the next page l The number of lines on a printed page l Horizontal and vertical tabs l Setting margins-left, right, top and bottom l Centering and aligning Chapter 4 showed us the basic techniques for using the printer. Now we’re ready for the more advanced ones. We’ll concentrate on changing the appearance of the page to suit our needs.
it returns the print head to the left margin. It does not advance the paper (if DIP switch l-5 is on; see below). Line feed is more complicated. Each time the printer receives a CHR$(lO) it both advances the paper one line and returns the print head to the left margin, ready to start a new line. Now to add a little confusion-most (but not all) versions of BASIC add a line feed (CHR$( 10)) to every carriage return (CHR$( 13)) they receive.
61 Table 5-l Line feed commands Function Return print head to left margin Advance paper one line Reverse paper one line Control code CHR$(13) CHR$( 10) < ESC > CHR$( 10) n Changing the line spacing When you turn your printer on, the line spacing is set lines per inch. This is fine for most printing applications, when you want something different, the printer makes it to set the line spacing to whatever you want.
I 62 This is what you will get: If you run this program with DIP switch 2-2 off (IBM mode), you cannot get the printout as shown above. The < ESC > “A” CHR$(n) command in the IBM mode only defines the line spacing as n/72 of an inch; the < ESC > “2” command changes the line spacing to the amount defined by the previous < ESC > “A”.
63 You may wonder why l/72 of an inch was chosen as the increment for the line spacing command. There’s a good reason: the dots that the printer makes are l/72 inch apart. So this means that you can vary the line spacing in increments as fine as one dot - unless you want finer spacing, in which case you may use one third dot spacing. The < ESC > “3” CHR$( n) command sets the line spacing in increments of l/216 inch.
1 64 Table 5-2 shows all the line spacing commands, including several “shortcut” commands for commonly used line spacings.
65 :. .. The < ESC > “J” CHR$(n) command causes the printer to make one line feed of n/21 6 inch, but does not change the setting of the line spacing. Try this program to see how it works: NEW line feeds 10 ’ Demo of one-time 20 LPRINT “LINE NUMBER1.” 30 LPRINT “LINE NUMBER2. ‘I; line feed 40 ’ One-time 50 LPRINT CHR$(27) ;“J”;CHR$(lOO) ; 60 LPRINT “LINE NUMBER3.” 70 LPRINT “LINE NUMBER4. ” 80 END Here is what your printer will produce: L L.
! 66 PAGE CONTROL Now that we have seen how to control line spacing, we can go on to page control - positioning the printing on the page and adjusting the paper length. n Form feed The simplest forms control code is the form feed. Form feed (or < FF > ) is CHR$(12) and causes the printer to move the paper to the top of the next sheet.
67 back to the top of the page to start the second column. The code for reverse form feed is easy to remember: < ESC > . Table 5-3 Form feed commands Clontrol code Function Advance paper to top of next page Reverse paper to top of current page 1 Sets,the top of form to the current 1 position CHR$(12) < ESC > CHR$( 12) 1 < ESC > “4”n ,TTxXf (mlvl-r mode only) I n Changing the page length You may have some computer forms that are not 11 inches high.
I ‘i 68 After you have run this program, turn off the printer and adjust the top of form position. When you turn the printer back on the page length will reset to its normal setting (usually 11 inches). TOP AND BOTTOM MARGINS Some programs don’t keep track of where they are printing on the page. This causes problems when you get to the bottom of a page because these programs just keep on printing, right over the perforation.
69 10 ' Demo of top and bottom margins 60 LPRINT CHR$(12); : ' form feed 70 FOR I=1 TO 150 80 LPRINT "THIS IS LINE";1 90 NEXT I 110 LPRINT CHR$(12); : ' form feed 120 END When you run this program it will print 150 lines right down the page and across the perforations. When it’s done line 110 sends a form feed to advance to the top of the next page. Now add the following lines to your program. (Don’t forget the semicolons or you won’t get quite the same results that we did.
70 - C/ L---+------------------ _.
71 Try setting the margins with this program: Demo of margins 10 20 GOSUB70 30 LPRINT CHR$(27);“1”;CHR$(lO); 40 LPRINT CHR$(27) ;“Q”;CHR$t70); 50 GOSUB 70 60 END 70 FOR I=1 TO 80 80 LPRINT “X” ; 90 NEXT I 100 LPRINT 110 RETURN The tirst thing that this program does is to branch to the subroutine that starts in line 70. This subroutine prints 80 X’s in a row. The first time that the subroutine is used, all the X’s tit in one line.
72 HORIZONTAL AND VERTICAL TABS Suppose you need to move across the page to a certain position several times in a document. It’s not much fun to type in space after space. You don’t have to - you can “tab” your way across the page. Your printer’s tabs are like those on a typewriter, but much more powerful. You have both horizontal and vertical tabs which can be used for both text and graphics - and they’re really handy for indenting paragraphs and making tables.
73 When you run the program now it produces this: The words are now closer together, but still evenly spaced. To reset the default tabs, use the following program: LPRIN'TCHR$(27);"eO";CHR$O This command lumns. resets the horizontal tabs to every eight co- Table 5-7 Horizontal tab commands Advance I Set Function to next tab position tabs at nl, n2, etc. Set tabs every n columns Set tabs every 8 columns Control code CHR$(9) K Ecp A “D” CHR$(n1) 1CHR$(n 2) . . . . .
The absolute horizontal tab command moves the print head to a specified position on the page. The positon that you want the print head to move to (measured from the left margin) is specified by the values of nl and n2 in l/60-inch units using the formula nl + n2 x 256. Try this program to see how this works. ’ Demo of absolute horizontal tabs FOR I=60 TO 70 STEP 2 LPRINT I ; “ttt++“; LPRINT CHR$(27) ;“$“;CHR$(I) ;CHR$(O) ; LPRINT “Horizontal tab.
n Vertical tabs Vertical tabs have the same kinds of uses that horizontal tabs do - they just work in the other direction. Horizontal tabs allow you to reach a specific column on the page no matter where you start from. Vertical tabs are the same. If you have a vertical tab set at line 20, a vertical tab (or < VT > ) will move you to line 20 whether you start from line 5 or line 19. Vertical tabs are not set at the power-on default.
Add one more line to the program to demonstrate feature of vertical tabs. one more 80 LPRINT CHR$(ll);"FIFTHH TAB." NQW when you run the program the first page looks just like before, but line 80 sends one more < VT > than there are tabs. This doesn’t confuse the printer - it advances the paper to the next tab position, which happens to be the first tab position on the next page. There’s a one-time vertical tab command that works just like the one-time horizontal tab command.
77 ‘I* 5th Line, 7th Column” 70 LPRINT CHR$(27) ;“fl”;CHR$(3); 80 LPRINT CHR$(27);“fO”;CHR$(5); 5th Column” 90 LPRINT ‘I* 8th Line, 100 END 60 LPRINT In this program, line 30 sends a one-time vertical tab with < ESC > “f” 1 command. Line 50 sends a one-time horizontal tab with < ESC > “f’ 0 command. Finally, line 70 and line 80 send one-time vertical tab and one-time horizontal tab, so the line 90 prints text at the specified position.
78 Table 5-10 Vertical tab channel commands Function Control code Setvertical tabsatnl, n2, etc. < ESC > “b”CHR$(nO)CHR$(nl) CHR$(n2).....CHR$(O) aschannel n0 “/”CHR$(nO) Select vertical channel n0 You can store up to eight channels of tab stops. They are numbered from 0 to 7. If you have already stored a set using < ESC > “B” command, your printer has labelled it as channel 0. Try this program how to see the vertical tab channels work.
OP OF ST TAB ‘ND TAB FORM OF OF CHANNEL CHANNEL ‘OF OF LST TAB ror OF FORM FORM 1 OF CHANNEL 2 IST TAH OF CHANNEL ? 2ND TAB OF CHANNEL Z 1 2ND TAB OF CHANNEL I CENTER ING AND AL .IGNING TEXT Text can be arranged in any of four formats: left aligned or left justified (normal printing with “ragged” right margin), centered between the margins, right aligned (right justified), or fully aligned.
I 80 10 ’ Demo of aligning and centering 20 LPRINT CHR$(27);"1";CHR$(20); 30 LPRINT CHR$(27);"Q";CHR$(601; 40 LPRINT CHR$(27);"a";CHR$(O); 50 LPRINT "THIS LINE IS LEFT JUSTIFIED." 60 LPRINT CHR$(27);"a";CHR$(l); 70 LPRINT "THIS LINE IS CENTERED." 80 LPRINT CHR$(27);"a";CHR$(2); 90 LPRINT "THIS LINE IS RIGHT JUSTIFIED." 100 LPRINT CHR$(27);"a";CHR$(3); 110 LPRINT "THIS LINE IS LEFT AND RIGHT (FULL) JUSTIFIED.
CHAPTER 6 SPECIAL FEATURES OF THE PRINTER I. Subjects covered in Chapter 6 include l Printer’s bell l Master reset l IX-directional printing l International character sets l Printing BIG characters l The optional sheet feeder l Macro instruction l Reading a hex dump In the previous chapters we have learned about several groups of control codes. In this chapter we will look at more control codes.
it will sound the bell for a quarter of a second. This can be used to remind the operator to change the paper or to make other adjustments to the printer. You can try this by typing: LPRINT CHR$(7) n Resetting the printer Up to now when we wanted to reset the printer to the power on condition we have had to either turn the printer off and on again, or to send the specific codes that reset the particular features. There is an easier way.
Your printer has the ability to print right to the bottom of the sheet. You can disable the paper-out detector so that it doesn’t stop the printer. This will allow you to print to the end of the sheet, and even beyond if you are not careful. The codes to control the paper-out detector, along with the other codes that we have just looked at are in the following table.
I 84 The following program 10 20 30 40 50 60 70 80 90 LPRINT LPRINT LPRINT LPRINT LPRINT LPRINT LPRINT LPRINT LPRINT shows how these codes work. "BACKSPACE DOES NOT"; CHR$(8);CHR$(8);CHR$(8); 'I=== WORK" "DELETE DOES NOT"; CHR$(127);CHR$(127);CHR$(127); “WORK” "CANCEL LINE"; CHRs(24); "DOES NOT WORK" Here is what this program will print: The backspace codes in line 20 move the printhead a total of three spaces to the left so that the first part of line 30 will overprint the word “NOT”.
85 n Immediate-print This printer can print at the quick rate of 180 characters per second. But it will also print more slowly at the speed of your typing. In the immediate-print mode, the printhead prints one character at a time, as you send it. The printer also moves the paper up so that you can see the current line and then down to continue printing. You can turn the immediate-print mode on with < ESC > “i” 1. Before looking at it, let’s review the normal operation of the print buffer.
10 20 30 40 50 60 70 80 90 spaces ’ Demo of adjusting LPRINT CHH$ (27) ; “xl”; FOR I=10 TO 1 STEP -2 LPRINT CHR$(27);” “;CHR$‘(i); LPRINT “This line is added” ; I ; “spaces. NEXT I LPRINT CHR$(27) ;‘I “;CHR$(O) ; LPRINT “This line is Normal space. ” END This This This line is line is line This This line line This line added 10 ” spaces. ndded 8 spaces. is added 6 spaces. is added 4 spaces. is added 2 spaces. is Normal space.
87 10 ’ Demo of uni-directional printing 20 LPRINT CHR$(27) ; “1” ; 30 FOR I=1 TO 10 40 LPRINT II,, II 50 NEXT I 60 LPRINT :LPRINT 70 LPRINT CHR$(27) ; “Ul”; 80 FOR I=1 TO 10 90 LPRINT ,I I, II 100 NEXT I 110 LPRINT CHR$(12) ;CHR$(27) ;“Q” Here tionally, have to bottom is what you will get. The top line is printed bi-direcand the bottom is printed uni-directionally. You will look hard because there isn’t much difference, but the vertical lines are perfectly alignined. Let’s analyze the program.
! 88 command immediately moves the printhead to the left margin and then prints the remainder of the line from left to right. n The seven bit dilemma Some computers (not the IBM-PC fortunately!) don’t have the capability to send eight bits on their parallel interface, but can only send seven bits. This would make it impossible for these computers to use this printer’s block graphics characters and special symbols if our engineers hadn’t thought of a solution.
89 You can also specify the power-on default character set by setting DIP switch 2-4 on for character set #l and off for character set #2. The following program will print out all of the graphics characters available: 10 LPRINT CHR5(27) ; “0”; 20 LPRINT. CHR$(27) ; “6” ; 30 FOR J=3 TO 6 40 LPRINT.
90 Figure 6-1.
91 70 LPRINT CHR$(179);CHR5(32);CHR$(32);CHR5(32); CHR$(32);CHR$(53);CHR$(179) 80 LPRINT CHR$(192);CHR5(196);CHR5(196); CHR$(196);CHR$(196);CHR5(196);CHR5(217) 90 LPRINT CHR5(27);"7" If you have a 7-bit interface, add the following lines to the program given above: 15 LPRINT CHR5(27);">"; 95 LPRINT CHR$(271;"=" In this program, line 10 selects character set #2 so that all the graphics characters can be used (including the “club” symbol). Then lines 20~ 80 print the 5 of clubs figure.
92 International Table 6-4 character set commands 1 Denmark type II < ESC > “R” CHR$(lO) Note: When you set the printer to the IBM-P mode, use < FS > instead of . The characters that change are shown beneath their ASCII code in Table 6-5. Table 6-5 International character sets Spain pxl$l@l 1Denmark type I n Printing characters in the control code area When you refer the Appendix B, you’ll find many characters are printed in the control code area.
93 plus 127. and the high-order control codes are 128 through 159 plus 255.) These codes don’t normally print symbols on paper, rather they cause the printer to change modes. To make them print as normal symbols requires an extra command. For example, the command to “normalize” the high-order control codes is < ESC > “6”. Try this program with the DIP switch 2-2 on.
94 80 90 100 110 120 130 140 150 160 170 180 190 200 210 220 230 IF I=24 THEN 110 IF I=27 THEN 110 LPRINT CHR$(I); NEXT I LPRINT FOR I=128 TO 134 LPRINT. CHR$(I); NEXT I LPRINT CHR$(144);CHR$(145); FOR*I=149 TO 159 IF I=152 T'HEN 210 IF I=155 THEN 210 LPRINT CHR$(I); NEXT I LPRINT CHR$(27);"10" END When you run this program you should get like this: Now, we’ll show you the characters in the control code area in the IBM-P mode. Turn the DIP switch 2-2 off, 2-3 on, and 2-4 on.
1 95 If you want to print more characters using the < ESC > “\” command you must tell the printer how many characters should be printed. The total number of characters is equal to nl + (n2 x 256). For example, if you want to print 300 characters, nl = 44 and n2 = 1 (300 = 44 + 1 x 256), the control code will be the following: < ESC > “\” CHR$(44) CHR$(l) I L / There is one more command to print a character in the control code area: < ESC > “,,” n.
96 Table 6-6 Control code area commands Function Control code Printable code area expansion < ESC > “6” (Standard mode only) Control code area expansion < ESC > “7” (Standard mode only) Select undefined Cancel undefined Print characters Print a character < ESC > “I”1 (except IBM-P mode) codes as characters codes as characters from all character from all character < ESC > “I”0 (except IBM-P mode) set < ESC > “\” nl n2 (IBM-P mode only) set < ESC > ‘lh” n (IBM-P mode only) n Printing BIG chara
97 When you run this program, you will get like this: As you can see, when the big character command is used, the baseline for each character does not align. If you want to align the baseline, try this program: 10 ' Demo of BIG characters 20 LPRINT “THIS IS “; 30 LPRINT CHR$(27);“j”;CHR$(21); 40 LPRINT CHR$(27);“h”;CHR$(l); 50 LPRINT “DOUBLE”; 60 LPRINT CKR$(27);“h”;CHR$(O); 70 LPRINT CHR$(27>;“J”;CHR$(18>; 80 LPRINT ” SIZED PRINTING. ” 90 LPRINT :LPRINT :LPRINT 100 LPRINT “THIS IS “.
98 that done on computer paper, and you don’t have to tear the “perforations” off each sheet as you must with fan-fold paper. The automatic sheet feeder feeds a new sheet automatically every time the printer receives or generates a form feed. Any time you wish, you can turn the auto-feed unit on and off by using control codes.
forthe macro: one to defineit,and one to use it.They are given in the Table 6-9. Table 6-9 Macro instruction commands Function Define macro Use macro Control code < ESC > “ + ” . . . (codes you include) . . . CHR%(30) < ESC > “ + ” CHR$( 1) To see how this works we can build a macro that will reset the printing style to normal, no matter what style it may be to start with. The following program will define a macro to do this.
10 20 30 40 50 60 70 80 LPRINT LPRINT LPRINT LPRINT LPRINT LPRINT LPRINT END CHR$(27);"Q";CHR$(40); CHR$(271;"a";CHR$(2); CHR$(27);"-1"; CHR$(27);"h";CHR$(1); "TESTING ABCD" CHR$(27);"+";CHR$(1): "TESTING ABCD" . n Reading a hex dump The BASIC in some computers changes ASCII codes before they send them to the printer. If you run into problem because of this, try this hex dump to check the ASCII codes. First turn off the printer.
I 101 oc, 0 1 0: 0 1. 01 ,:,s 06 0, 08 09 OR OB OC OD OE OF 10 11 12 1‘1 14 15 16 17 18 19 1A 16 1C 1D 1E 1F “0 T.0 2B 2C >1 ;l :: 52 2; 3; 24 74 25 :5 26 ?6 2, ;7 28 =a 29 z9 -‘A xl TB 3C 2D 5D 2E ‘;E 2F 3F 40 41 51.1 51 61.
102 MEMO
. CHAPTER 7 DOWNLOAD CHARACTERS AND DOT GRAPHICS i. b”. Subjects covered in Chapter 7 include l Designing and printing your own characters l User-designed graphics Using the procedures outlined so far, all of the printer’s standard functions can be utilized. There are two additional user-defined functions available: designing and printing your own characters, and designing and printing your own dot graphics. These two functions can be used to design and print any symbol, or any graphic shape.
I 104 nation of dots. For example, if the data representing “1” was sent to the print head, only the bottom pin would fire; if “2” was sent, only the second pin from the bottom would fire, and if “3” was sent, the two bottom pins would fire, and so on. Columns of these dots side by side make all the characters. As the printhead moves across the page, each sf the pins prints a row of dots. Figure 7-1.
I 105 l l l l dots wide by 9 dots high. Vertically, dots can only be centered in a box. See Figure 7-2. The minimum width of a character is five dots. Unlike standard characters that are restricted to a height of seven dots, user-defined characters may use eight dots vertically. Dots cannot overlap - that is, you may not have a dot inside a box next to one that is on a line. You may define any position in the ASCII table, except the block graphics area when you are downloading in the IBM modes. __.
106 ASCII Code: 64 Descender: 32 Start column: End column: 16 M” = Descender * 128 + (Start 8 I 16) + End 4 2 1 Total m, m~mlm.mrmsm,msmem.om~~ I Figure 7-3. Use this grid (or one similar to it) to define your own draft characters. ASCII Code: Descender: 1 Start column: End column: M” = Descender + 128 + (Start + 16) + End Figure 7-4. Add the values of the dots in each column sum of each column at the bottom.
107 You will see the letters ml, m2, m3, etc., are above your values. When you define the character, you will substitute your value for each of these letters. Before you complete the definition, you will need to decide exactly where in the standard ASCII set you want to place your characters. After downloading, you access your new character by sending the code for the character you replaced. For example, we decided to assign our flask to the “ < ” character.
I 108 ml to of the so on. are 0. ml1 are the column data we defined along the bottom grid; ml the left-most column value, m2 the next, and You must define eleven data, even if the last few data For the flask, the complete command will be: CHR$(27);CHR$(38);CHR$(O);CHR$(60);CHR$(60); CHR$( 139);CHR$(2);CHR$(5);CHR$(8);CHR$(241); CHR$(O);CHR$(O);CHR$(241); CHR$@);CHR$(S); CHR$(2);CHR$(O) Put this command into the appropriate syntax for the language you are using.
109 l l Define characters, and send data to printer: < ESC > “8~” CHR$(O) . . . . Tell printer to use download character set: < ESC > 6byfo”1 To demonstrate how to use the download characters, let’s use the “flask” character and some other user-defined characters to print a small graph.
r 1,: : ‘: 110 310 320 330 340 350 360 370 380 390 400 410 420 430 440 450 460 470 NEXT I LPRINT LPRINT CHR$ (9);‘It--” ; SCALE$=“--+--” FOR I=2 TO 8 STEP 2 LPRINT SCALE$; NEXT I LPRINT ‘I--t ‘I LPRINT CHR$(9);” ‘I; FOR I=2 TO 8 STEP 2 LPRINT ” “;I; NEXT I LPRINT CHR$ (27);“%O” LPRINT CHR$(27);“SO”; LPRINT CHR$ (9);“MILLIONS OF DOLLARS” LPRINT CHR$ (27);“T” END n Defining proportional characters Defining proportional characters uses the same process as above, except that we add additional information.
when desired. Acceptable values are from 4 to 11. The minimum character width is five dots, anywhere within the range. q Downloading with the IBM-P mode In the IBM-P mode, which emulates the IBM Proprinter, you can download characters with a different control code in addition to the < ESC > “8~” code.
If the total count is greater than or equal to 256, then divide the total count by 256. nl = the remainder, and n2 = the integer part of the result.
DEFINING YOUR OWN NLQ CHARACTERS As you have probably noticed, NLQ characters are printed by two passes of the print head. Half of the character is printed on the first pass, and the remainder on the second pass. The paper is rolled up half a dot height in between passes to let the print head print dots on the second pass that overlap the previous dots, in order to fill in the spaces and produce denser characters.
128 64 64 32 32 16 16 8 8 4 4 2 2 1 1 Total 1st m, m, m, m7 m, m,, m,, m,. ml7 rn,, rn,, ma, rn, m. m. me rn,, m,, m,. m,, m,. m,, rn,, 2nd ASCII Code: Descender: Left space: Right space: MO = Descender * 128 + (Left * 16) + Right m,. rn,, m,. m,, rn,* m,, m,. m,, m.O m., m.. m.. rn,, m,, m,, m,, m,, m,, rn3, m,, m., m., m., Figure 7-6. Use this grid (or one similar NLQ characters. to it) to define your own If we replot our flask for NLQ, the grid data will look like Figure 7-7.
115 128 128 64 64 32 ASCII 32 Code: 6 @ 16 Descender: 16 8 Left space: 8 1 Right space: 4 4 2 Ma = Descender * 128 + (Left * 16) + Righl 2 1 t Total 1st 2nd m, m, m, m, m, m,, m,,m,, ml7 ml9 rnzl mx3 m, m, m, me m,. mr2 m,. mra ml-rnzO mz2 1 L. 1 1, 1. 2. 0. p.a.1. 1 1 p. 9. 8 .JYb. 0. p. 0. ay0. 8. Y. 9. m,. rnze rn*, m,. m,, m,. m,. rn,, mro m., ma. m** rnzl mh ml* rnax m,, m,, rn,, rnsp m., rn., rn., fi, 7. 8. L6. 0. 8. 0. 0. 16. B. 't. 8. 0. a. I. day. 0. k5. g.dw.p, a. B. Figure 7-7.
116 9, 6, 9, 6, 70, 0, 38, 0, 22, 0 170 DATA 28. 32, 14, 64, 14, 0. 14. 0,124, 0, 12 180 DATA 64, 12, 32, 14, 16, 14, 0, 14, 0, 0 190 DATA 128, 0, 24, 7, 56, 1, 56, 7, 8, 8. 6 200 DATA 8, 2, 8, 4, 8, 0, 8, 32, 8, 24, 0 210 DATA 32, 16, 14, 48, 14, 48, 14, 32, 0, 0, 40 220 DATA 0, 36, 0, 40. 0, 32, 0, 32, 0. 0 230 LPRINT CHR$(27);"D";CHR$(ll);CHR$(O); 240 LPRINT CHR$(27);"h";CHR$(l); 250 LPRINT u U.S. EXPORTS" 260 LPRINT CHR$(27);"h";CHR$(OJ; 270 LPRINT CHR$(27);"%1"; 280 LPRINT "AUTOS";CHR$(9); 290 FOR I=.
520 530 540 550 560 570 NEXT I LPRlNT LPRINT LPRINT LPRINT END AUTOS CHEMICALS GUNS CHR$(27);"%0" CHR$(27);"SO"; CHR$(9);"MILLIONS OF DOLLARS" CHR$(27);"T" ~~~~~~~~~~~~~~~~~~~~~~ +----+----+----+---.-+----+ 2 4 6 8 MILLIONS USER-DESIGNED OF’ DOLLARS DOT GRAPHICS Designing and printing graphics is similar to the procedures for characters, except that the printed width can range from one to 3264 dots on a 15inch type printer.
II 118 number that can be sent in one byte (253, the formula to work out nl and n2 is: if the number of columns is X, then nl = X MOD 256, and n2 = TNT(X/256) Table 7-l may make the calculation easier.
119 n Higher resolution graphics There are seven graphics modes summarized in Table 7-2. you can use; they are Table 7-2 Dot graphics commands You will notice that the higher the density of the graphic mode, the more points you will need to plot. Higher density modes also take longer to print. The double density double speed mode ignores every second column of dots to give you a quick printout for debugging purposes; you can then change to true double density graphics for the final printout.
MORE GRAPHICS PROGRAMMING TIPS At the end of this chapter, we’ll discuss two modes that the printer offers to help you solve potential graphics problems. A redefining code allows you to change the density for graphics programs that use one of the four alternate codes. The g-pin graphics mode allows you to use all nine pins on each line and thus speed up screen dumps.
121 ‘.... is a printer, each data line corresponds to one pin on the print head. Thus each byte sent will fire up to eight pins. But the printer has 9 pins available. So how do you fire the ninth pin with only 8 data lines? In fact, do you really want to bother with just one extra pin? For this purpose, your printer has a special 9-pin graphics mode (it won’t, however, work with 7-bit interface systems). In this mode the printer takes 2 bytes to fire all 9 pins as shown in Figure 7-8.
122 MEMO