Star Trac E-TR Treadmill OWNER’S MANUAL
TABLE OF CONTENTS Introduction . . . . . . . . . . . . . . . . . . . . . . . . . . . . . . . . . . . . . . . . . . . . . . . . . . . . . . . . . . . . . . . . . . . . . . . . . . . . . . . . . . . . . . Chapter 1: Safety Instructions . . . . . . . . . . . . . . . . . . . . . . . . . . . . . . . . . . . . . . . . . . . . . . . . . . . . . . . . . . . . . . . . . . . . . . . Vieligheidsinstructies . . . . . . . . . . . . . . . . . . . . . . . . . . . . . . . . . . . . . . . . . . . . . . . . . . . . . . .
INTRODUCTION Welcome to the world of STAR TRAC. This Owner’s Manual will acquaint you with the assembly, operation and maintenance of your STAR TRAC E SERIES TREADMILL, so that you may begin reaching your fitness goals. The E SERIES TREADMILLs provide the most comprehensive integration of user needs with the Club’s needs in the Club’s most used cardio vascular product, the Treadmill. Users will appreciate the multifunctional display of the E series for its style and utility.
CHAPTER SAFETY INSTRUCTIONS 1 This chapter includes fitness safeguards and precautions for the installation and use of the E SERIES TREADMILL. These safety notes are directed to you as the owner of the Star Trac E SERIES TREADMILL. Please read this chapter carefully before installing or using your equipment and be sure to train all your members and fitness staff to follow these safety instructions.
VEILIGHEIDSINSTRUCTIES WAARSCHUWING Dit prodkt is voor gebruik op een circuit met een nominale waarde van 120 volt en is in de fabriek uitgerust met een speciaal elektrisch snoer en stekker om verbinding met een passend elektrisch circuit toe te staan. Zorg ervoor dat dit produkt verbonden is met een stopcontact dat dezelfde configuratie heeft als de stekker. GEBRUIK GEEN ADAPTER BIJ DIT PRODUKT.
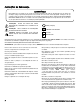
PRECAUTIONS CAUTION: READ THE OWNER’S MANUAL COMPLETELY BEFORE OPERATING THIS TREADMILL STOP (OF ACTION) CAUTION: BEFORE CLEANING OR SERVICING, DISCONNECT POWER SUPPLY ALTERNATING CURRENT CAUTION: MOVING PARTS, KEEP HANDS AND FEET FROM UNDER THE TREADMILL WHEN OPERATING ON I ON O OFF OFF These safety notes are directed to you as the owner of the STAR TRAC E SERIES TREADMILL. For safety purposes, please train all your members and fitness staff to follow these safety instructions.
MESURES DE PRECAUTION ATTENTION: .LISEZ SOIGNEUSEMENT LE MANUEL D’UTILISATION AVANT D’UTILISER CE TAPIS ROULANT ARRÊT (MISE HORS SERVICE) ATTENTION: DÉBRANCHEZ A LA SOURCE AVANT D’EFFCTUER UN ENTRETIEN DU UNE RÉPARATION COURANT ALTERNATIF ATTENTION: : CONTIENT DES PIECES MOBILES. GARDEZ LES MAINS ET LES PIEDS A L'ECART DE LA PARTIE INFERIEURE DU TAPIS ROULANT PENDANT SON FONCTIONNEMENT. ON I OUVRE O FERME OFF Ces instructions sont destinées su propriétaire du TAPIS STAR TRAC E SERIES.
SICHERHEITSVORSCHRIFTEN WARNUNG Dieses Produkt ist für den Gebrauch an einer passenden Netzsteckdose mit 220 Volt Spannung bestimmt und werkseitig mit einer dafür vorgesehenen Netzleitung und einem Netzstecker ausgerüstet. Stellen Sie sicher, daß das Gerät nur an einem Anschluß mit gleicher Bauart wie der Stecker angeschlossen wird. VERWENDEN SIE DEINEN ADAPTER FÜR DEN BETRIEB DES PRO / PRO S.
ISTRUZIONI DI SICUREZZA ATTENZIONE Questo prodotto è da usare su un circuito elettrico con una tensione nominale di 220 volt ed è fornito dalla fabbrica con un cavo elettrico e spina specifici per permettere il collegamento ad un circuito elettrico appropriato. Assicuratevi che il prodotto sia collegato ad una presa che abbia la stessa configurazione della spina. NESSUN ADATTATORE DEVE ESSERE USATO CON QUESTO PRODOTTO.
INSTRUÇÕES DE SEGURANÇA ADVERTÊNCIA Este produto deve ser usado em um circuito com tensão nominal de 220 volts. Ele foi fabricado com um cabo de alimentação e plugue específicos para permitir a sua conexão com um circuito elétrico apropriado. Certifique-se de que o produto esteja conectado a uma tomada com as mesmas configurações do plugue. NÃO UTILIZE ADAPTADORES PARA ESTE PRODUTO.
INSTRUCCIONES DE SEGURIDAD ADVERTENCIA Este producto está preparado para utilizarse en un circuito de 220 voltios y se suministra equipado de fábrica con un cable y un enchufe eléctricos específicos para permitir su conexión a un circuito eléctrico apropiado. Asegúrese de que el producto se conecte a una toma de corriente con la misma configuración que el enchufe. NO UTILICE NINGÚN ADAPTADOR CON ESTE PRODUCTO.
SIKKERHEDSINSTRUKTIONER ADVARSEL Dette produkt er beregnet til brug i forbindelse med et el-net med nominel effekt på 220 volt. Det leveres med særlig ledning og stik fra fabrikken, som kun passer til den korrekte type el-net. Sørg for, at produktet er sat til en stikkontakt, som har samme konfiguration som stikket. DER MÅ IKKE BRUGES ADAPTER TIL DETTE PRODUKT. Hvis produktet absolut skal omstilles til en anden slags el-net, skal omstillingen foretages af kvalificeret servicepersonale.
ASSEMBLY AND SETUP CHAPTER 2 UNPACKING Remove all parts from the shipping crate and verify that the following parts were included in your shipment: Description Qty. Frame Assembly w/ Motor Shroud . . . . . . . . . . . . . . . . . . . . . . . . . . . . . . . . . . . . . . . . . . . . . . . . . 1 Top Rail with Display . . . . . . . . . . . . . . . . . . . . . . . . . . . . . . . . . . . . . . . . . . . . . . . . . . . . . . . . . . . . 1 Neck . . . . . . . . . . . . . . . . . . . . . . . . . . . . . . .
2. Installing the Neck Remove the (4) pre-installed Socket Head Cap Screws and washers from the motor shroud end of the frame assembly. Retain the screws for use when installing the neck. Washer Lock Washer Socket Head Screw 3. Removing the Motor Shroud Remove the (4)10-24 screws securing the motor shroud to the frame assembly, and lift the motor shroud off of the frame assembly. Retain the screws for use when re-installing the motor shroud. 10-24 Screws 4.
b) Lift the Display unit and take the (3) cables that are attached to the display and feed them down the neck (this may require 2 people). Use the 1/4” Hex allen key to install the (4) Socket Head Cap Screws through the mount into the display unit. Be careful not to pinch the cables. Washer Lock Washer Socket Head Screw Step 5b 6. Installing the Handrails a) Locate the left handrail (the handrail with the STOP switch).
6. Connecting the Display Cables Motor Control Board DC Power Board NECK Loacate the Motor Control Board (MCB) and the DC Power Board. Service Hole MCB Cable Take the cables from the lower neck service hole. Use the cable labled MCB Cable and connect it to the MCB. Now take the FAN Power cable from the neck and connect it to the DC Power board. Go to the bottom of the display neck, Take the C-SAFE connector bracket and connect it to the neck using (2) M4 x 0.7 Phillips Head Screws.
7. Final Assembly 10-24 Machine Screws Re-install the shroud over the motor compartment, install the (4) 1024 Machine Screws that were saved from earlier. Insert the (4) plastic caps in the lower neck. Plastic Caps 10-24 Machine Screws M4 x 0.7 Screws M4 x 0.7 Screws Install the bottom of the display using the (6) M4 x0.7 x 19mm long Phillips head screws. Next install the back of the display with (8) of the same screws. M4 x 0.7 Screws M4 x 0.
Leveling your E Series Treadmill Before you plug in the treadmill, make sure it is where you plan to use it and it is level to the ground. If necessary, level your treadmill using the two adjustable feet under the tailroller. Loosen the lock nuts, rotate the feet until the treadmill is stabilized, and retighten the lock nuts. Leveling Feet ATTENTION Star Trac recommends that treadmills be spaced a minimum of 20.0 inches (0.5 m) apart to allow safe and easy ingress and egress.
CHAPTER OPERATING INSTRUCTIONS 3 Operating the STAR TRAC E SERIES TREADMILL is very easy. Simply step onto the running belt, press QUICK START, and begin walking or running naturally. Learning the features and incorporating the STAR TRAC E SERIES TREADMILL into your members’ fitness programs is just as easy. In this chapter, you will learn the display function and how to get the most out of every STAR TRAC E SERIES TREADMILL workout.
Graphic Display: Traces your progress through each of the programs and allows you to anticipate changes in terrain. Display elements illuminate from left to right across the bottom of the display to indicate your progress through the course. At each step, display elements illuminate in columns to indicate your ascent up the gradient that is in effect. Motivational Track: Shows your progress counter clockwise around 1/4 mile (400-meter) course, starting from the bottom center.
QUICK START Quick Start lets you begin your workout by simply pressing one key. Quick Start uses a default weight of 155 pounds and a time limit of 99 minutes. YOU control the treadmill speed, incline and distance for up to the maximum allowed program time. To operate the Quick Start program: 1. Stand on the running belt and press the QUICK START key. The running belt slowly accelerates to its minimum speed of 0.5 mph (0.8 kph). 2.
I When your desired time goal has been entered, press the workout parameter. key to accept the displayed value and advance to the next 3. You are prompted to enter a maximum speed. I You may enter any speed from 0.5 to 12.5 mph (0.8 to 20.0 kph). I You can enter the maximum speed using the numeric keypad. Use the I You can press the I When the desired maximum speed has been entered, press the next workout parameter. or keys to enter the desired maximum speed.
To operate the 5K LOOP program: During program setup, you can use the key to return to a previously accepted parameter. 1. Stand on the running belt; press the key. You are prompted to enter your weight. You may enter your weight manually as described below. I If you do not enter your weight, the treadmill will display a default weight of 155 pounds (70 kg). You may enter any weight from 1 to 500 pounds (1 to 226 kg). I You can enter your weight using the numeric keypad.
5. You can adjust the speed of the treadmill during the program: I You can specify a desired speed from 0.5 to 12.5 mph (0.8 to 20.0 kph), using the numeric keypad. Use the to enter your desired speed, then press the key to accept the entered speed. keys I 6. You can adjust treadmill speed from 0.5 to 12.5 mph (0.8 to 20.0 kph), in 0.1 mph (or 0.1 kph) increments. Press the key to increase the treadmill speed; press the key to decrease the treadmill speed.
I You can press the ments. I When your correct weight has been entered, press the out parameter. or key, as necessary, to increase or decrease the displayed weight in 1 pound (or 1 kg) increkey to accept the displayed value and advance to the next work- 5. You are prompted to enter a workout time. I The default workout time is 99 minutes. You may enter any time from 5 to 99 minutes. I You can enter a workout time using the numeric keypad.
3. If, for any reason, the treadmill does not detect your heart rate signal, the treadmill will gradually decrease the workout intensity. After the heart rate signal is re-acquired the interval training program will resume. To operate the Constant Heart Rate Control program: This heart rate feature is designed to maintain your heart rate at a constant level by varying the treadmill incline during your workout.
10. You can scroll through workout data during the program (see “Viewing Workout Data During a Program” for details). 11. If you wish to pause the program, press the STOP key once. Caution: If you press the STOP key twice the program will end. 12. When you have reached your workout goal, the treadmill will enter the Cooldown cycle (see “Cooldown Cycle” for more information). If you wish to exit your program before you have reached your workout goal, press the STOP key twice.
7. The Information Window displays the message “TEST RUNS AT 3.4 MPH, ELEVATING FROM INCLINE 0 TO 12.” Press the key to continue. 8. The Information Window displays the message “TEST WILL TERMINATE IF YOUR HR EXCEEDS 150 FOR MORE THAN 1 MINUTE.” Press the key to continue. You are prompted with a 3 second countdown, then the treadmill begins the program. 9. The FIT TEST runs for 12 minutes. During the test, the treadmill speed is set at 3.4 mph.
5. You are prompted to enter your gender. I Press the key for “Male”; press the key for “Female.” I When your correct gender has been entered, press the key to accept the displayed value and advance to the next parameter. 6. You are prompted to enter your age. I You may enter any age from 1 to 99 years. I You can enter your age using the numeric keypad. Use the keys to enter the desired age. I I You can press the or key, as necessary, to increase or decrease your age in 1 year increments.
To operate the Military Test programs: The Military Test programs provide workouts of a preset distance, as required by the Army, Navy, USMC and USAF. As the names imply, the object of each test is to complete the run distance as quickly as possible. At the completion of the test, a time-based score (defined by the respctive branch of the Military) is returned to the user. Each test begins with treadmill incline at 1% (which best simulates outdoor running).
9. You can adjust the incline of the treadmill during the program: NOTE: You cannot change the incline for the Navy 1.5 Mile Run. I You can adjust treadmill incline from 0 to 15%, in 0.5% increments. Press the press the key to decrease the treadmill incline. 10. You can adjust the speed of the treadmill during the program: I key to increase the treadmill incline; You can specify a desired speed from 0.5 to 12.5 mph (0.8 to 20.0 kph), using the numeric keypad.
I You can adjust treadmill speed from 0.5 to 10.0 mph (0.8 to 16.0 kph) for 110-volt units or 0.5 to 12.0 mph (0.8 to 19.3 kph) for 220-volt units, in 0.1 mph (or 0.1 kph) increments. Press the key to increase the treadmill speed; press the key to decrease the treadmill speed. 3. When the cooldown cycle ends, the treadmill will slow to a stop. If you wish to exit the cooldown cycle before it ends automatically, press the STOP key. The treadmill will slow to a stop.
CHAPTER CHAPTER TITLE 4 To assist you in your training program, this chapter provides you with exercise principles, tips for training and hints to stay motivated climbing up the conditioning ladder. THE FIRST STEP TO A BETTER LIFESTYLE With the STAR TRAC E SERIES TREADMILL, you’ve taken an important first step to achieving your fitness goal. But, it’s important to have the right fitness tools to stay motivated and achieve results.
F.I.T. Principle Every cardiovascular program should be developed based on frequency, intensity and duration. Determining your Target Heart Rate Range 1) Frequency - the number of exercise sessions per week. Regular exercise should be performed at least three or four days a week to be beneficial, although fewer sessions may be sufficient for some. Those in superior physical condition typically train five to seven days per week. 2) Intensity - how hard each exercise is.
Program I: Week 1,2 3,4 5,6 Heart Rate (%) 60 to 65 60 to 65 60 to 65 Duration (minutes) 15 15 15 Workouts per Week 3 3 3 Heart Rate (%) 65 to 70 65 to 70 65 to 70 Duration (minutes) 20 20 20 Workouts per Week 3 3 3 Heart Rate (%) 70 to 75 70 to 75 70 to 75 Duration (minutes) 20 25 25 Workouts per Week 4 4 4 Heart Rate (%) 75 to 80 75 to 80 75 to 80 Duration (minutes) 25 25 30 Workouts per Week 4 4 4 Heart Rate (%) 80 to 85 80 to 85 80 to 85 Duration (minutes) 30 35 35 Workouts per Week 4 4 4
follow and a means to monitor progress. While many of the programs include a warm-up phase, in the Manual Program make sure a warm-up and cool-down period is factored in. If you are doing a running workout, a good starting speed is 5.0 mph. If you are doing a walking or jogging workout, a good starting speed is 3.8 mph. Target Training Chart Use the following table for a quick glance at your target training zone for both heart rate and rate of perceived exertion.
CHAPTER TITLE CHAPTER 5 Star Trac strongly recommends performing regular preventive maintenance on your STAR TRAC E SERIES TREADMILL. Without regularly scheduled maintenance, normal wear and tear may cause cumulative effects, such as misalignment or premature wear. This may result in downtime. For this reason, we highly recommend following the maintenance schedules..
ADJUSTMENTS The running belt and its headroller, drive belt, tailroller, and running deck are designed to be self-centering, slip-free, and smooth-operating without the need for frequent adjustments.
CHAPTER CHAPTER TITLE 6 After having used your STAR TRAC E SERIES TREADMILL for many workouts, you may wish to change some of its settings. MANAGER MODE The Manager Mode allows you to query and modify the basic settings of your treadmill. To enter Manager Mode: 1. Press and hold the , , and keys together. 2. A beep will sound and “MANAGER MODE” will display momentarily in the Information Window. 3. Release the keys. “MCI VX.XX CKSM XXXX” will display in the Information Window.
Lowest Value Default Value Highest Value AUTO STOP OFF OFF ON ON=Auto stop feature enabled. OFF=Auto stop feature disabled. CSAFE OFF OFF ON ON=CSAFE communication enabled. OFF=CSAFE communication disabled. LOCK OUT OFF OFF ON ON=Treadmill lock out enabled. OFF=Treadmill lock out disabled. LOCKOUT ID 10000 12345 65535 Treadmill lockout ID. MINIMUM SPEED* 0.5/0.8 0.5/0.8 2.0/3.2 Minimum speed in mph (UNITS=English), or km/hr (UNITS=Metric). MAXIMUM SPEED* 5.0/5.0 Item 10.0/16.
Enter Key: Updates (saves) the value of the displayed parameter in Flash memory. Alternatively, the used (see above). key may be Number/Program Select Keys: Enter new data item values for numeric parameters. Stop Key: Exits Maintenance Settings Mode and restarts the treadmill greeting. The items that you may display and change with the previous keys are: Lowest Value Default Value Highest Value MC1 V X.XX N/A N/A N/A Display’s primary processor software version and checksum. MC2 V X.
Lowest Value Default Value Highest Value 1.00 1.98 12.99 STOP SWITCH - - - LAST DECK 0 0 65,535 Number of miles (UNITS=English), or km (UNITS=Metric) since the running deck was last serviced or replaced. LAST BELT 0 0 65,535 Number of miles (UNITS=English) or km (UNITS=Metric) since the running belt was last replaced. PROGRAM STATS - - - Provides access to programs usages and counters.
ELEVATION CALIBRATION The Elevation Calibration function allows for calibration of the treadmill's elevation function. To enter the Elevation Calibration function: 1. While in the Maintenance Mode, navigate to the Elevation Calibration by the next Press the 2. Press the press the or the previous parameter buttons. key, the Information Window will display the message “USE INCLINE +/- TO MOVE ELEVATION”. key, as necessary, until the treadmill is at its lowest elevation.
CHAPTER TROUBLESHOOTING 7 Star Trac recommends that you refer your questions about your STAR TRAC E SERIES TREADMILL operation and suspected malfunctions to Star Trac’s Service Hotline at (800) 503-1221, or USA 1-714-669-1660. However, you may wish to investigate error messages that appear in the Information Window. You may do so by reviewing the information in this section. KEY DOWN: This error generally occurs when a key is held pressed while the ON/OFF switch is moved to ON.
REGULATORY INFORMATION FCC AND CHAPTER 8 OTHER DOMESTIC / INTERNATIONAL REGULATIONS The E SERIES TREADMILLS have been tested and found to comply with the limits for a Class A digital device, pursuant to Part 15 of FCC rules. Under the FCC guidelines, operation is subject to the following two guidelines: (1) this device may not cause harmful interference, and (2) this device must accept any interference received, including interference that may cause undesired operation.
STAR TRAC 14410 Myford Road Irvine, California 92606 Telephone: (800) 228-6635, (714) 669-1660 Fax: (714) 508-3303 http://www.startrac.