
Instruction Manual

Instruction Manual
5
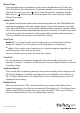
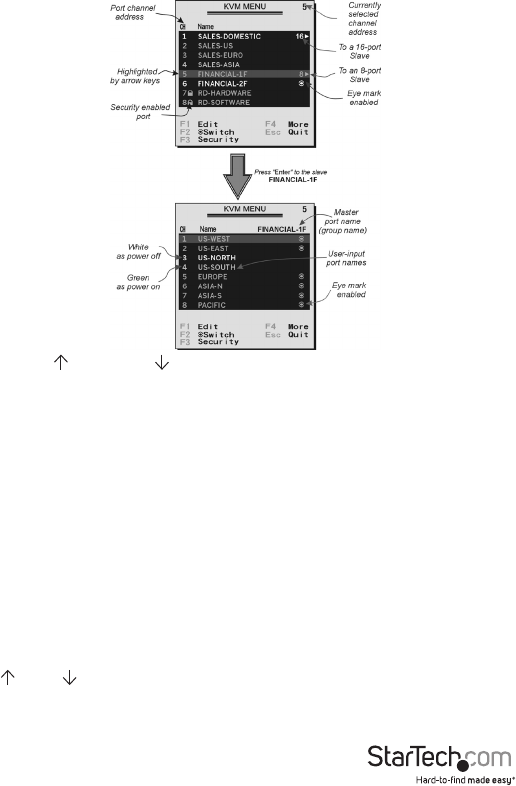
Use the up < > and down < > arrow keys to highlight a computer and the <ENTER>
key to select it. Or, you may press <ESC> to exit the OSD and remove the OSD menu
from the display; the status window returns to the display and indicates the currently
selected computer or operating status.
A triangle mark ( ►) to the right of a name indicates the port is cascaded to a Slave;
the number at the left of the triangle mark shows the number of ports the Slave has
(i.e. 8 for an 8-port switch). The <ENTER> key brings you one level down and another
screen pops up listing the names of the computers on that Slave. The name of the
Slave will be shown at the upper right corner of the OSD menu. It is useful to group
computers and still be able to see the group name.
An eye mark (
N
) to the right of a name indicates the computer is selected to be
monitored in Scan mode. In OSD, this mark can be switched on or o by function key
<F2>. Press the <ESC> key to exit OSD and to return to the selected computer; the
computer name is also shown on the screen.
Editing Computer Name Assignments
Function key <F1> - To edit the name entry of a computer or a Slave, rst use the
< > and < > arrow keys to highlight a port then press <F1> followed by name
entry. Valid characters are ‘A’~’Z’, ‘0’~’9’ and the dash (-) character. Lowercase letters
are converted to uppercase ones. Press <BACKSPACE> to delete one letter at a time.