
Owners manual


Instruction manual
4
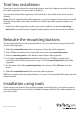
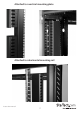
Tool-less installation
If you don’t need to move the mounting buttons, you don’t require any tools to attach
the cable organizers to a server rack or cabinet.
You can attach the cable organizers to the outside or the inside of the server rack or
cabinet.
Note: If you’re attaching the cable organizer to a rack or cabinet with a roof, you should
slide the removable cover down and remove it from the cable organizer before you
install it.
• Attach the cable organizers to the server rack or cabinet so that the mounting
buttons t into the keyhole-shaped mounting holes on the server rack or cabinet.
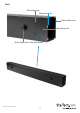
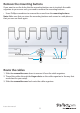
Relocate the mounting buttons
The mounting buttons come preinstalled but you can move them to any of the holes
on the cable organizer.
1. Slide the removable cover down to remove it from the cable organizer.
2. Use a Phillips screwdriver to remove the screw from the mounting button.
3. Select a mounting hole on the back or sides of the cable organizer.
4. Line up the mounting button with the hole and use a Phillips screwdriver to
insert the screw that you removed in step 1 into the mounting button and cable
organizer.
5. On the other side of the mounting button, thread one of the M4 nuts onto the
screw.
6. Slide the removable cover back onto the cable organizer.
Tip! If you misplace the mounting buttons, you can use the provided M5 cage nuts and
screws instead.
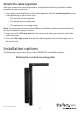
Installation using tools
If your server rack doesn’t have keyhole-shaped mounting holes, you need to remove
the mounting buttons and use the included hardware to attach the cable organizer to
your server rack.