
User's Manual


Instruction Manual
10
Testing the console
1. To test that the console is working properly, perform the following steps:
2. Power up the LCD Rack drawer, and then turn on your computer.
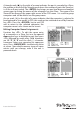
3. Make sure the video image is centered within the screen area. Use the OSD controls
to adjust the image (see Panel controls and OSD functions) or press the Auto button
on the right hand side of the monitor.
Note: You can adjust the horizontal and vertical position, contrast, and brightness
to better suit your video card and your personal preference.Before you begin, make
sure that power to all of the devices you will be connecting to the console have been
turned o. To prevent damage to your installation due to ground potential dierence,
make sure that all of the devices being installed are properly grounded. Once all
peripherals have been connected, please power them on.
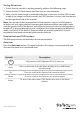
Panel controls and OSD functions
The following controls are located on the console monitor:
Auto tune
Press the Auto tune button. The panel will adjust the display size automatically and
also tune the panel to its optimized state.
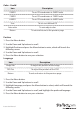
Controls Descriptions
Soft power on/o. Adjacent LED is lit when on
Auto
Auto-synchronize and scale down display to any valid factory
preset timings
Up Press to scroll to the function you want to adjust.
Down Press to scroll to the function you want to adjust
Menu
To access the main menu. This button also acts as the Enter
button.