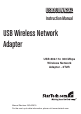
USB300WN2X2 Instruction Manual USB Wireless Network Adapter USB 802.11n 300 Mbps Wireless Network Adapter - 2T2R Manual Revision:10/04/2010 For the most up-to-date information, please visit www.startech.
FCC Compliance Statement This equipment has been tested and found to comply with the limits for a Class B digital device, pursuant to part 15 of the FCC Rules. These limits are designed to provide reasonable protection against harmful interference in a residential installation. This equipment generates, uses and can radiate radio frequency energy and, if not installed and used in accordance with the instructions, may cause harmful interference to radio communications.
Table of Contents Introduction............................................................ 1 Packaging Contents............................................................ 1 System Requirements......................................................... 1 Installation.............................................................. 2 Driver Installation................................................................ 2 Hardware Installation..........................................................
Introduction The USB300WN2X2 USB Wireless 802.11n Network Adapter allows almost any USB-enabled desktop, laptop or netbook computer system to connect to a ‘b’, ‘g’, or ‘n’ wireless network. Using a 2T2R (2 Transmitter/2 Receiver) Multiple Input Multiple Output (MIMO) design over the 2.4GHz frequency, the USB adapter is capable of reaching up to 300 Mbps over an 802.11n network, while improving signal reception and range. Backward compatible with 802.
Installation Driver Installation Windows 2000/XP/Server 2003 1. Upon starting Windows, before plugging in the wireless adapter, insert the included Driver CD into the computer’s CD/ DVD drive. 2. AutoPlay should automatically launch the Driver/Software installation splash screen. If not, open My Computer and right-click on the CD/DVD drive the disk is inserted into and select “AutoPlay”. 3. Select the option to install the Driver and Utility. This should launch the Realtek Installation wizard. 4.
Windows Vista/7/Server 2008 R2 1. Upon starting Windows, before plugging in the wireless adapter, insert the included Driver CD into the computer’s CD/ DVD drive. 2. AutoPlay should automatically launch the Driver/Software installation splash screen or prompt you to run Setup.exe. If not, open “Computer” and right-click on the CD/DVD drive the disk is inserted into and select “AutoPlay”. 3. Select the option to install the Driver and Utility. This should launch the Realtek Installation wizard. 4.
Verifying Installation Windows 2000/XP/Vista/7 From the main desktop, right-click on “My Computer” (“Computer” in Vista/7), then select Manage. In the new Computer Management window, select Device Manager from the left window panel. Double-click on the Network adapters option. A new Wireless adapter should be listed.
Wi-Fi Protected Setup (WPS) WPS is an easy way for anyone to automatically setup a secure wireless network on a Windows-based computer. A WPS compatible wireless access point (AP) is required. There are two methods of setting up WPS. Push Button Configuration 1. Once the adapter is connected and installed on the computer system, press the WPS button on the side of the wireless adapter. 2. Press the WPS button on the wireless AP.
Specifications Bus Interface USB 2.0 Chipset ID Realtek RTL8192SU Connectors 1 x USB type A male LEDs 1 x Activity Supported Protocols IEEE 802.11n, IEEE 802.11g, IEEE 802.11b Supported Security Protocols WEP, WPA, WPA2, TKIP/AES Maximum Data Transfer Rate 802.11n: 300 Mbps Operating Temperature 0°C ~ 40°C (32°F ~ 104°F) Storage Temperature 0°C ~ 70°C (32°F ~ 158°F) Humidity 5% ~ 95% RH Dimensions 58.0 x 24.0 x 9.0mm Weight 7.
Technical Support StarTech.com’s lifetime technical support is an integral part of our commitment to provide industry-leading solutions. If you ever need help with your product, visit www.startech.com/ support and access our comprehensive selection of online tools, documentation, and downloads. Warranty Information This product is backed by a lifetime warranty. In addition, StarTech.
StarTech.com has been making “hard-to-find easy” since 1985, providing high quality solutions to a diverse IT and A/V customer base that spans many channels, including government, education and industrial facilities to name just a few. We offer an unmatched selection of computer parts, cables, A/V products, KVM and Server Management solutions, serving a worldwide market through our locations in the United States, Canada, the United Kingdom and Taiwan. Visit www.startech.