
User Manual
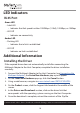
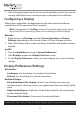
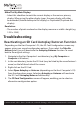
Table Of Contents
- Compliance Statements
- Safety Statements
- Warning Statements
- Product Diagram
- Top View
- Side View
- Product Information
- Package Contents
- Requirements
- Powering the Multiport Adapter
- USB Power Delivery 3.0
- USB Power Delivery 2.0
- Connecting the USB-C Power Adapter
- Disconnecting the USB-C Power Adapter
- Connecting the Multiport Adapter
- USB-A Ports
- HDMI Port
- RJ45 Port
- USB-A Port
- Inserting an SD Card
- Removing an SD Card
- LED Indicators
- RJ45 Port
- Additional Information
- Installing the Driver
- Configuring a Display
- Display Preference
- Troubleshooting
- Reactivating an SD Card Autoplay/Autorun Function

8
To view manuals, videos, drivers, downloads, technical drawings, and more visit www.startech.com/support
HDMI Port
The HDMI Port is used to connect a Video Display Device to the connected Host
Computer.
1. Connect an HDMI Cable to the HDMI Port on the Multiport Adapter.
2. Connect the other end of the HDMI Cable to an HDMI In port on a Video
Display Device.
RJ45 Port
1. Connect a CAT5e/CAT6 cable to the RJ45 port on the Multiport Adapter.
2. Connect the CAT5e/CAT6 cable’s other RJ45 connector to an RJ45 port on a
compatible Network Device.
USB-A Port
The two USB-A ports on the Multiport Adapter can be used to connect
compatible USB devices such as Media devices (e.g. External Media Drive) or
devices for use with the connected Host Computer (e.g. Keyboard, Mouse, etc.).
1. Connect a USB-A cable to the USB-A port on the Multiport Adapter.
2. Connect the other end of the USB-A cable into a USB-A port on your
compatible device.
Inserting an SD Card
1. Insert an SD Card label side up into the SD Card Slot on the Multiport
Adapter.
Note: The Host Computer’s Operating System (OS) will automatically detect
the SD Card and install the required driver software.
2. Using the Host Computer’s OS, navigate to the SD Card’s location (e.g. root
directory).
3. Access the data on the SD Card inserted in step 1.