PEXESATA2 Instruction Manual PCI Express eSATA Controller Card 2 Port PCI Express eSATA Controller Adapter Card
FCC Compliance Statement This equipment has been tested and found to comply with the limits for a Class B digital device, pursuant to part 15 of the FCC Rules. These limits are designed to provide reasonable protection against harmful interference in a residential installation. This equipment generates, uses and can radiate radio frequency energy and, if not installed and used in accordance with the instructions, may cause harmful interference to radio communications.
Table of Contents Introduction...................................................................... 1 Packaging Contents.....................................................................1 System Requirements..................................................................1 Installation........................................................................ 1 Hardware Installation....................................................................1 Driver Installation...................................
Introduction Packaging Contents • 1 x PCI Express eSATA Card • 1 x Low profile bracket • 1 x Instruction Manual • 1 x Driver CD System Requirements • A CD/DVD-ROM drive (for driver installation) • An eSATA drive to be connected to the host computer • Microsoft Windows® 2000, XP, Server 2003, Vista Installation Hardware Installation 1. Shut down the computer. As an added precaution, remove the power cord from the back of the computer. 2. Open your computer case.
4. Remove the slot cover from the rear panel of the computer chassis that corresponds with the designated PCI Express expansion slot. Retain the screw (if applicable) used to hold the slot cover in place. Align the PCI Express card with the designated slot. Applying pressure evenly across the top edge of the expansion card, firmly but gently insert the card into the slot, ensuring that the card is properly aligned with the rear panel. 5.
3. Follow the setup instructions to select your choice for partition and file system. 4. After setup examines your disks, it will copy files from the CD to the hard drive selected above and restart the system. After restart the setup process will resume installation, until complete. Adding PEXESATA2 to an Existing Windows® 2000/XP/Server 2003/Vista installation 1. During OS boot up, Windows will display the ‘Found New Hardware Wizard’. ‘Mass Storage controller’. 2.
Verifying Successful Installation Windows® 2000/XP/Server 2003/Vista 1. Right click on the ‘My Computer’ icon, select ‘Properties’, left click on the ‘Hardware’ tab, and then on the ‘Device Manager’ button. 2. Double click on ‘SCSI and RAID Controllers’, If there is no yellow ! or ? in front of ‘Silicon Image SiI 3132 SATALink Controller’, the driver is functioning correctly. 3. To view information about the devices attached to the controller, use the SiICfg Utility and click on the device from the list.
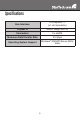
Specifications Bus Interface PCI Express 1.1 (x1 slot connector) Chipset ID Silicon Image SiI3132 Connectors 2 x eSATA Maximum Data Transfer Rate 3.
Technical Support StarTech.com’s lifetime technical support is an integral part of our commit-ment to provide industry-leading solutions. If you ever need help with your product, visit www.startech.com/support and access our comprehensive selection of online tools, documentation, and downloads. Warranty Information This product is backed by a one year warranty. In addition, StarTech.
StarTech.com has been making “hard-to-find easy” since 1985, providing high quality solutions to a diverse IT and A/V customer base that spans many channels, including government, education and industrial facilities to name just a few. We offer an unmatched selection of computer parts, cables, A/V products, KVM and Server Management solutions, serving a worldwide market through our locations in the United States, Canada, the United Kingdom and Taiwan. Visit www.startech.