Instruction Manual RESIDENTIAL GAS WATER HEATERS GAS MODELS POWER VENT GS675YRVIT AND GS675HRVIT WITH HOT SURFACE IGNITION 500 Tennessee Waltz Parkway, Ashland City, TN 37015 www.statewaterheaters.com Thank you for buying this energy efficient water heater. We appreciate your confidence in our products. You should thoroughly read this manual before installation and/ or operation of this water heater.
SAFE INSTALLATION, USE AND SERVICE Your safety and the safety of others is extremely important in the installation, use and servicing of this water heater. Many safety-related messages and instructions have been provided in this manual and on your own water heater to warn you and others of a potential injury hazard. Read and obey all safety messages and instructions throughout this manual.
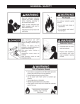
GENERAL SAFETY 3
GENERAL SAFETY 4
TABLE OF CONTENTS SAFE INSTALLATION, USE AND SERVICE.........................................2 GENERAL SAFETY...............................................................................3 TABLE OF CONTENTS..........................................................................5 INTRODUCTION....................................................................................5 Preparing for the Installation..............................................................5 TYPICAL INSTALLATION.................
INSTALLATION REQUIREMENTS FOR THE COMMONWEALTH OF MASSACHUSETTS For all side wall terminated, horizontally vented power vent, direct vent, and power direct vent gas fueled water heaters installed in every dwelling, building or structure used in whole or in part for residential purposes, including those owned or operated by the Commonwealth and where the side wall exhaust vent termination is less than seven (7) feet above finished grade in the area of the venting, including but not limited to decks and porch
TYPICAL INSTALLATION Replacement Parts and Deliming Products (A) VENT PIPE (B) ANODE (C) HOT WATER OUTLET (D) OUTLET (120 VAC) (E) FLUE BAFFLE (F) GAS SUPPLY (G) MAIN MANUAL GAS SHUT OFF VALVE (H) GROUND JOINT UNION (J) SEDIMENT TRAP (K) OUTER DOOR (L) UNION (M) INLET WATER SHUT OFF VALVE (N) COLD WATER INLET Replacement parts and recommended delimer may be ordered through authorized servicers or distributors.
TYPICAL INSTALLATION Mixing Valve Usage FIGURE 2. This water heater has been design certified as complying with American National Standard for water heaters and is considered suitable for: HOTTER WATER CAN SCALD: Water heaters are intended to produce hot water. Water heated to a temperature which will satisfy space heating, clothes washing, dish washing, and other sanitizing needs can scald and permanently injure you upon contact.
LOCATING THE NEW WATER HEATER Facts to Consider About the Location Carefully choose an indoor location for the new water heater, because the placement is a very important consideration for the safety of the occupants in the building and for the most economical use of the appliance. This water heater is not for use in manufactured (mobile) homes or outdoor installation. Whether replacing an old water heater or putting the water heater in a new location, the following critical points must be observed: 1.
Propellants of aerosol sprays and volatile compounds (cleaners, chlorine based chemicals, refrigerants, etc.), in addition to being highly flammable in many cases, will also react to form corrosive hydrochloric acid when exposed to the combustion products of the water heater. The results can be hazardous, and can also cause product failure. Insulation Blankets Insulation blankets are available to the general public for external use on gas water heaters but are not necessary with these products.
located in the above manner, should be provided. Each opening should have a free area of not less than one square inch per 4000 Btu/hr (5.5 cm2/kW) of total input of all appliances in the enclosure. If horizontal ducts are used, each opening should have a free area of not less than one square inch per 2000 Btu/hr (11cm2/kW) of the total input of all appliances in the enclosure. A.
INSTALLING THE NEW WATER HEATER Chemical Vapor Corrosion Closed Water Systems CORROSION OF THE FLUEWAYS AND VENT SYSTEM MAY OCCUR IF AIR FOR COMBUSTION CONTAINS CERTAIN CHEMICAL VAPORS. SUCH CORROSION MAY RESULT IN FAILURE AND RISK OF ASPHYXIATION. Water supply systems may, because of code requirements or such conditions as high line pressure, among others, have installed devices such as pressure reducing valves, check valves, and back flow preventers.
Figure 10 shows typical attachment of water piping to water heater. The water heater is equipped with 3/4 inch NPT water connections. plugged. The Temperature-Pressure Relief Valve must be installed directly into the fitting of the water heater designed for the relief valve. Install discharge piping so that any discharge will exit the pipe within 6 inches (15.2 cm) above an adequate floor drain, or external to the building.
When installed at elevations above 7,700 feet (2,347 meters), input rating should be reduced at the rate of 4 percent for each 1,000 feet (305 meters) above sea level which requires replacement of the burner orifice in accordance with National Fuel Gas Code (ANSI Z223.1/NFPA 54). Contact your local gas supplier for further information.
Sediment Traps Never use this water heater unless it is completely full of water. To prevent damage to the tank, the tank must be filled with water. Water must flow from the hot water faucet before turning “ON” gas to the water heater. To fill the water heater with water: 1. Close the water heater drain valve by turning the handle to the right (clockwise). The drain valve is on the lower front of the water heater. 2. Open the cold water supply valve to the water heater.
U.S. HORIZONTAL VENT CLEARANCES WARNING VENT HOOD(S) MAY BE EXTREMELY HOT DURING OPERATION. FIGURE 15. 2. A venting system should terminate at least 3 feet above any forced air inlet located within 10 feet. 2. This water heater is capable of venting the flue gases the equivalent of thirty (30) feet of 3 inch pipe or one-hundred (100) feet of 4 inch pipe as listed in Table 1. 3.
NOTE: This unit can be vented using only the following materials: PVC (DWV; ASTM D2665 or CSA B181.2), PVC (Sch 40, 80, 120; ASTM D1785 or CSA B137.3), PVC (SDR Series; ASTM-D2241 or CSA B137.3), CPVC (CPVC 41; ASTM-D2846 or CSA B137.6), CPVC (Sch 40, 80; ASTM-F441 or CSA B137.6), CPVC (SDR Series; ASTM-F442), ABS (Sch 40 DWV; ASTM D2661 or CSA B181.1).
Vent Terminal Installation, Sidewall 4. Do not plug in power cord until vent system is completely installed. The Power Vent operates on 120 Vac, therefore a grounded outlet must be within reach of the 6 foot flexible power cord supplied with the vent. The power cord supplied may be used on unit only where local codes permit. If local codes do not permit use of flexible power supply cord: 1.
CAUTION LABEL ALL WIRES PRIOR TO DISCONNECTION WHEN SERVICING CONTROLS. WIRING ERRORS CAN CAUSE IMPROPER AND DANGEROUS OPERATION. VERIFY PROPER OPERATION AFTER SERVICING. FIGURE 18. POWER VENT WIRING SCHEMATIC.
Installation of Vent System, Sidewall Provide support for all pipe protruding through the roof. All piping should be properly secured. The vent system piping should be supported every 5 feet (1.5 m) of vertical run and every 3 feet (91 cm) of horizontal run. All piping and fittings must be joined by the proper procedures as described under: VENT PIPE PREPARATION.
Vent Pipe Preparation PRIMER 1. INITIAL PREPARATION It is recommended that Tetrahydrofuran (THF) be used to prepare the surfaces of pipe and fittings for solvent welding. Do not use water, rags, gasoline or any other substitutes for cleaning PVC or CPVC surfaces. A chemical cleaner such as MEK may be used. A. Make sure the solvent cement you are planning to use is designed for the specific application you are attempting. B.
B. Deburring Use a knife, plastic pipe deburring tool, or file to remove burrs from the end of small diameter pipe. Be sure to remove all burrs from around the inside as well as the outside of the pipe. A slight chamfer (bevel) of about 10°-15° should be added to the end to permit easier insertion of the pipe into the end of the fitting. Failure to chamfer the edge of the pipe may remove cement from the fitting socket, causing the joint to leak. STEP E F.
FOR YOUR SAFETY READ BEFORE OPERATING WARNING: If you do not follow these instructions exactly, a fire or explosion may result causing property damage, personal injury or loss of life. BEFORE OPERATING: ENTIRE SYSTEM MUST BE FILLED WITH WATER AND AIR PURGED FROM ALL LINES. A. This appliance does not have a pilot. It is equipped with an ignition device which automatically lights the burner. Do NOT try to light the burner by hand. B. BEFORE OPERATING smell all around the appliance area for gas.
TEMPERATURE REGULATION Any water heater’s intended purpose is to heat water. Hot water is needed for cleansing, cleaning, and sanitizing (bodies, dishes, clothing). Untempered hot water can present a scald hazard. Depending on the time element, and the people involved (adults, children, elderly, infirm, etc.) scalding may occur at different temperatures.
FOR YOUR INFORMATION Start Up Conditions of a “rotten egg smell” in the hot water. The smell is a result of four factors which must all be present for the odor to develop: SMOKE/ODOR It is not uncommon to experience a small amount of smoke and odor during the initial start-up. This is due to burning off of oil from metal parts, and will disappear in a short while. a. A concentration of sulfate in the supply water. b. Little or no dissolved oxygen in the water. c.
PERIODIC MAINTENANCE Venting System Inspection ports. If the proper flame characteristics are not evident, see Figure 22, make sure that the flow of combustion and ventilation air is not blocked. You should also check for sooting. Soot is not normal and will impair proper combustion. A visual inspection of the main burner and HSI igniter assembly should also be done at least once a year, see Figure 22. Soot build-up indicates a problem that requires correction before further use.
flammable liquids, etc. must not be placed against or adjacent to the water heater which can cause a fire. 4. Remove old anode rod. 5. Use Teflon® tape or approved pipe sealant on threads and install new anode rod. Anode Rod Inspection 6. Turn on water supply and open nearby hot water faucet to purge air from water system. Check for any leaks and immediately correct any if found. Restart the water heater as directed under “Operating Your Water Heater.
Draining and Flushing 3. Turning counterclockwise ( screw handle. ), remove the hex cap below the 4. Remove the was her and put the new one in place. 5. Screw the handle and cap assembly back into the drain valve and retighten using a wrench. DO NOT OVER TIGHTEN. 6. Follow instructions in the “Filling The Water Heater” section. 7. Check for leaks. 8. Follow the lighting Instructions in the “Lighting and Operating Instructions” section to restart the water heater.
LEAKAGE CHECKPOINTS Never use this water heater unless it is completely filled with water. To prevent damage to the tank, the tank must be filled with water. Water must flow from the hot water faucet before turning “ON” gas to the water heater. B Water must flow from the hot water faucet before turning “ON” gas to the water heater. D A *Condensation may be seen on pipes in humid weather or pipe connections may be leaking. C B. *The anode rod fitting may be leaking. C.
REPAIR PARTS LIST 8 16 Key No.
TROUBLESHOOTING GUIDELINES Trouble Shooting Please check guidelines below. For your safety, water heater service should be performed only by a qualified service technician. Read the GENERAL SAFETY INFORMATION section first. INTELLI-VENT TROUBLESHOOTING CHART - USER CONTROL # LED STATUS PROBLEM SOLUTION 1 The gas control valve/thermostat has sensed inadequate or no earth ground. 2 The gas control valve/thermostat has sensed reversed polarity in the 120 VAC power supply.
# 7 8 9 LED STATUS PROBLEM SOLUTION Self diagnostic check has detected a problem with the gas valve driver circuit, internal microprocessor, or other internal circuits. 10 The gas control valve/thermostat has sensed main burner flame out of proper sequence. 11 Water temperature in the tank has exceeded 195° F and has activated the ECO (energy cut off) high temperature limit. 12 Self diagnostic check has detected that one or both of the temperature adjust buttons are stuck.
TROUBLESHOOTING GUIDELINES These guidelines should be utilized by a qualified service agent.
NOTES: 34
LIMITED RESIDENTIAL GAS WARRANTY state of California where such charges are the manufacturer’s responsibility. c. All cost necessary or incidental for handling and administrative charges, and for any materials and/or permits required for installation of the replacement heater or part. THIS WARRANTY IS APPLICABLE TO THE ORIGINAL OWNER ONLY.
500 Tennessee Waltz Parkway, Ashland City, TN 37015 www.statewaterheaters.