
Manual


32
WPS-100-DVR-8CH Installation and Users Manual
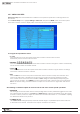
6.2.1 VIDEO LOSS SETUP
Video Loss Setupallowstheadministratortodenehowthesystemrespondswhenvideosignalislostfor
the camera.
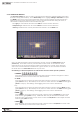
In the Camera Setup menu, highlight Settings in Video Loss and press the ENTER button on the front panel
of the DVR or remote control to display Video Loss Setup sub menu for the selected camera.
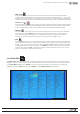
To navigate and operate this menu:
•▲▼◄►
Press these buttons on the front panel of the DVR or remote control to select an item.
Alternatively use the mouse to select an item.
•NUMERIC
Press these buttons on the front panel of the DVR or remote control to change the camera. Alternatively
use the mouse to select the desired camera.
• COPY ( )
Press the COPY button on the front panel of the DVR or remote control to copy the Video Loss settings
of the focus camera to all of the cameras.
•ESC
Press the ESC button on the front panel of the DVR or remote control to escape from this menu and
return to the main menu. Alternatively use the mouse to exit the sub menu by clicking on the “X.”
Ifthecontentsinthismenuhavebeenmodied,aSave dialog box will be displayed requesting the
user to save the changes. Press ENTER on the front panel of the DVR or remote control to exit and save,
ESCtoexitwithoutsaving.Anothermethodtoescapeistousethemouseto“right-click”andexitthe
sub menu.
Thefollowingisabriefdescriptionforeachiteminthesubmenuanditsspecicoperations:
•DURATION
Set the length of time the buzzer and the corresponding Alarm Out relay will remain triggered once video
loss is detected for this camera. The buzzer and Alarm Out relay will reset immediately once video signal
is restored. Press +/- buttons to adjust the value from 3 seconds to 60 minutes or ‘-‘forindenite,requiring
the Alarm Reset button to be pressed.
•CAMERATOGO
The Camera To GosettingwillspecifywhichPTZcamerawillgotoapredenedpresetwhenvideoloss
is detected for this camera. This feature can only be used with a PTZ camera.