EN
SPECIAL MESSAGE SECTION This product utilizes batteries or an external power supply (adapter). DO NOT connect this product to any power supply or adapter other than one described in the manual, on the name plate, or specifically recommended by Steinberg/Yamaha. WARNING: Do not place this product in a position where anyone could walk on, trip over, or roll anything over power or connecting cords of any kind.
FCC INFORMATION (U.S.A.) 1. IMPORTANT NOTICE: DO NOT MODIFY THIS UNIT! This product, when installed as indicated in the instructions contained in this manual, meets FCC requirements. Modifications not expressly approved by Yamaha may void your authority, granted by the FCC, to use the product. 2. IMPORTANT: When connecting this product to accessories and/or another product use only high quality shielded cables. Cable/s supplied with this product MUST be used. Follow all installation instructions.
PRECAUTIONS PLEASE READ CAREFULLY BEFORE PROCEEDING * Please keep this manual in a safe place for future reference. WARNING Always follow the basic precautions listed below to avoid the possibility of serious injury or even death from electrical shock, short-circuiting, damages, fire or other hazards. These precautions include, but are not limited to, the following: Power supply/AC power adaptor Water warning • Only use the voltage specified as correct for the instrument.
Maintenance • When cleaning the instrument, use a soft, dry cloth. Do not use paint thinners, solvents, cleaning fluids, or chemical-impregnated wiping cloths. ENGLISH • When setting up the product, make sure that the AC outlet you are using is easily accessible. If some trouble or malfunction occurs, immediately turn off the power switch and disconnect the plug from the outlet. Even when the power switch is turned off, electricity is still flowing to the product at the minimum level.
Introduction Introduction Thank you for purchasing the ADVANCED INTEGRATION CONTROLLER CC121. If you are using Cubase, the CC121 is a highly intuitive, indispensable aid in recording, editing and sound shaping. Simply connect the CC121 to a computer via USB, and you’ve got a comprehensive control center and seamless environment for complete music production with Cubase.
Package Contents The CC121 package contains the following items. After opening the CC121 package, make sure that it includes all of the items listed below. · · · · · · CC121 AC power adaptor (PA-3C, PA-130 or equivalent)* CC121 Operation Manual (this book) USB cable TOOLS for CC121 CD-ROM Cubase AI 4 DVD-ROM * May not be included depending on your particular area. Please check with your Steinberg/Yamaha dealer.
Turning the Power On and Off System Requirements for Software The system requirements below are necessary for installing software included in the accessory disks (TOOLS for CC121 and Cubase AI 4). NOTE · Note that the system requirements may be slightly different from those described below depending on the particular operating system. Windows OS: Macintosh Windows XP Professional /XP Home Edition /Vista (32bit) Pentium 1.
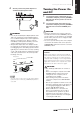
4 Securely connect the power adaptor to a standard household power outlet. Turning the Power On and Off 1 2 To supply the power actually from the connected host computer, press the [STANDBY/ ON] switch on the rear panel to set it to the ON position. To cancel the power supply from the connected host computer, press the [STANDBY/ ON] switch to set it to the STANDBY position. CAUTION WARNING • Use only the included power adaptor (PA-3C or PA130) or an equivalent recommended by Yamaha).
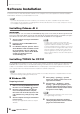
Software Installation Software Installation To use the CC121 you must first install the software on the computer. This section explains the software installation. Install Cubase AI 4 before you install TOOLS for CC121. NOTE · If you have already installed a version of Cubase (such as Cubase 4.5) that is compatible with operation with the CC121 (page 15), the instructions on installing Cubase AI 4 described below are not necessary. Jump to the next section “Installation using TOOLS for CC121.
7 Insert the TOOLS for CC121 CD-ROM into the CD-ROM drive. 14 Installing Steinberg CC121 Extension 8 Open the “Extensions_” folder on the CDROM, then double-click the file “setup.exe.” A “Welcome to the InstallShield Wizard for Steinberg CC121 Extension” window appears. NOTE · If the same version of Steinberg CC121 Extensions has already been installed in your computer, a software ”Confirm Uninstall” window appears. In this case, click [Cancel].
Software Installation ■ Windows Vista: 10 Preparing to install 1 2 3 4 Make sure that the [STANDBY/ON] switch of the CC121 is in the STANDBY ( ) position. Disconnect all the devices other than the mouse and keyboard from the computer, then connect the CC121 directly to the computer (without using a hub) by using a USB cable. NOTE · If the “Would you like to install this device software?” message appears, confirm that the publisher is “YAMAHA CORPORATION,” then click [Install].
■ Macintosh: Preparing to install 1 2 3 4 Make sure that the [STANDBY/ON] switch of the CC121 is in the STANDBY ( ) position. Disconnect all the devices other than the mouse and keyboard from the computer, then connect the CC121 directly to the computer (without using a hub) by using a USB cable. Start the computer and log on to the Administrator account. Insert the TOOLS for CC121 CD-ROM into the CD-ROM drive.
Starting the CC121 and Cubase Starting the CC121 and Cubase Once installation (page 10) has been successful, the CC121 can be used at any time by following the simple procedure below, allowing the computer to recognize the CC121. 1 2 Exit Cubase if it has already been started. Cubase cannot recognize the CC121 if you turn on the power of the CC121 after starting Cubase. Make sure to start Cubase after turning on the power of the CC121.
The Controls and Connectors Front Panel Channel sections (page 15) EQ sections (page 16) Function section (page 17) CUBASE READY lamp (page 15) Transport section (page 17) ■ CUBASE READY lamp AI KNOB section (page 19) ■ Channel sections 2 This LED lamp indicates whether the CC121 is turned on or not and whether communication between the CC121 and the computer is enabled or not. This lamp flashes to indicate that the CC121 is bus-powered from the connected computer.
The Controls and Connectors ■ EQ sections NOTE · The motorizing function of the fader is available only when the AC power adaptor is connected to the CC121. · The touch sensitivity of the fader can be adjusted. Refer to “Adjusting the touch sensitivity of the fader” on page 21 for details. 1 2 2 PAN knob 3 Controls the PAN parameter. 3 [ ] (Mute) button 4 Turns the Mute on or off. 4 [ ] (Solo) button 5 Turns the Solo on or off.
■ Transport section ■ Function section 3 2 1 4 5 8 6 7 2 This section enables you to control the transport functions on Cubase. 1 [ ] (Previous) button Moves the current position to the previous marker (or the beginning of the project if there is no previous marker. 2 [ ] (Forward) button Monitor Control: ] (Next) button When this is selected, the Function section adjusts the monitor level of the Control room mixer. For details, see the next page.
The Controls and Connectors 1 VALUE knob/button Rotating this knob adjusts the volume level of the assigned function, while pressing the knob turns the assigned function on or off. 2 FUNCTION [1] - [4] buttons Selects the parameter operated by the VALUE knob. The pressed button lights, allowing you to confirm which button is selected.
■ AI KNOB section 2 3 1 Locking the parameter to be edited This section lets you control a desired parameter specified via the mouse pointer and moving the current position of the project. 1 AI KNOB This multi-function knob can control a desired parameter within the principal window and plug-in software on Cubase, specified via the mouse pointer (as long as the [LOCK] button and [JOG] button are turned off).
The Controls and Connectors Rear Panel 1 2 3 4 1 [STANDBY/ON] switch Press this switch to turn the power to the CC121 on or off (standby) (page 9). 2 USB TO HOST terminal This terminal is used to connect the CC121 and the computer by using a USB cable. Since the CC121 is bus-powered, the power can be supplied from the computer to the CC121 via this terminal. 3 FOOT SW jack This terminal is used to connect an optional foot switch, letting you control a certain parameter of Cubase with your foot.
Adjusting the touch sensitivity of the fader You can adjust the touch sensitivity of the fader over a range from 1 to 8. 1 2 3 4 Press the [STANDBY/ON] switch of the CC121 to set it to the STANDBY ( ) position, then connect the CC121 to the computer via a USB cable. Press the button corresponding to the desired sensitivity, following the list below. A setting of “1” produces the most gradual response while a setting of “8” produces the most sensitive response. Sensitivity Button Start the computer.
Troubleshooting Troubleshooting ■ The power of the instrument does not turn on. · Make sure that the CC121 is properly connected to the computer via a USB cable. The USB buspower is necessary to use the CC121. The AC power adaptor is used as the auxiliary power supply for driving the motorized fader and cannot supply enough power necessary for using the CC121 as a controller for Cubase. · Confirm whether or not a proper USB cable is used.
License Agreement for TOOLS for CC121 ATTENTION SOFTWARE LICENSE AGREEMENT PLEASE READ THIS SOFTWARE LICENSE AGREEMENT (“AGREEMENT”) CAREFULLY BEFORE USING THIS SOFTWARE. YOU ARE ONLY PERMITTED TO USE THIS SOFTWARE PURSUANT TO THE TERMS AND CONDITIONS OF THIS AGREEMENT. THIS AGREEMENT IS BETWEEN YOU (AS AN INDIVIDUAL OR LEGAL ENTITY) AND YAMAHA CORPORATION (“YAMAHA”). BY BREAKING THE SEAL OF THIS PACKAGE YOU ARE AGREEING TO BE BOUND BY THE TERMS OF THIS LICENSE.
License Agreement for Cubase AI 4 IF YAMAHA OR AN AUTHORIZED DEALER HAS BEEN ADVISED OF THE POSSIBILITY OF SUCH DAMAGES. In no event shall Yamaha’s total liability to you for all damages, losses and causes of action (whether in contract, tor t or otherwise) exceed the amount paid for the SOFTWARE. 7. THIRD PARTY SOFTWARE Third party software and data (“THIRD PARTY SOFTWARE”) may be attached to the SOFTWARE.
Inc., Yamaha Corporation and other licensors) and are licensed by Steinberg to you only for use in the creation of a live or recorded performance that includes the licensed samples as part of a derivative musical work created by the licensed end user.
License Agreement for Cubase AI 4 may require for the provision of further activation codes e.g. your proof of purchase (invoice, receipt) and a signed assurance by fax or letter stating your name, address and that the already installed software cannot be used any more. Trial Version Software can be used on a computer also at reinstallation only altogether 30 days. 5.5.
cant differences of the functions described in the documentation do not justify any warranty claim. Other documents and statements are insignificant in terms of the quality of the product. 11.3.2. If the software does not essentially fulfill the functions described in the documentation, your only warranty claim against Steinberg and Steinberg’s only obligation consists in an exchange of the software or a refund of the selling price at the discretion of Steinberg. 11.3.3.
For details of products, please contact your nearest Steinberg representative or the authorized distributor listed below. Pour plus de détails sur les produits, veuillez-vous adresser à Steinberg ou au distributeur le plus proche de vous figurant dans la liste suivante. Die Einzelheiten zu Produkten sind bei Ihrer unten aufgeführten Niederlassung und bei Steinberg Vertragshändlern in den jeweiligen Bestimmungsländern erhältlich.
Steinberg Web Site http://www.steinberg.net U.R.G., Pro Audio & Digital Musical Instrument Division, Yamaha Corporation © 2008 Yamaha Corporation This document is printed on chlorine free (ECF) paper. Auf Umweltpapier gedruckt. Ce document a été imprimé sur du papier non blanchi au chlore. Este documento se ha impreso en papel sin cloro alguno.