
Manual


24-Pump, 128-Station Controller Chapter 8: Appendix 103
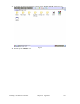
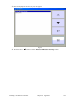
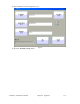
45. A Warning Window (Fig 22) will appear.
Fig 22
46. Press the “OK” button in the upper right corner of the Warning Window (Fig 22).
47. After a short delay the VersaView will reboot.
48. If the calibration screen (Fig 18) appears, follow the on-screen instructions (use a pencil eraser,
pen cap or other dull pointing device).
49. The Windows CE desktop will appear for a short time. The VersaView will then launch the
Primary Display program.
50. If you are upgrading/setting up the Primary
screen, the VersaView setup is complete. If you are
setting up a Remote
screen, continue to the next section “Remote Display”.
Remote Display
1. Remove the VersaView Program Compact Flash Card labeled 744.00115.00 24P128S Disp
Program.
2. Cycle power on the VersaView.
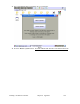
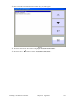
3. An Error Screen (Fig 10) will appear stating that the Runtime file was not found.
4. Press the “OK [F7]” button.
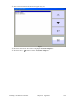
5. The RSView ME Station Screen (Fig 12) will appear.
6. Insert the new VersaView Program Compact Flash Card labeled 744.00115.00 24P128S Disp
Program.
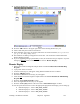
7. Press the “Load Application [F1]” button.
8. The Load Application Screen (Fig 13) will appear.
9. Press the “Source [F1]” button so the circle next to “External Storage 1” is filled.
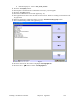
10. Use the up and down arrows to select the appropriate program for the display you are setting up:
• Remote Display #1 – Select “745_00008_00.mer”.
• Remote Display #2 – Select “745_00009_00.mer”.
• Remote Display #3 – Select “745_00013_00.mer”.