
Installation Guide
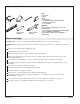


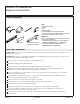

Tools and Materials
Before You Begin
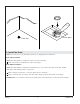
IMPORTANT! To ensure a successful installation, install the bath on a level finished floor.
IMPORTANT! Carefully follow the silicone sealant manufacturer’s instructions for application and curing
time.
Observe all local plumbing and building codes.
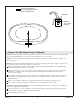
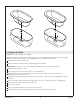
Determine the location of the bath.
Make sure that the subfloor offers adequate support for the bath.
Unpack and inspect the bath and components for damage. Return the bath and components to the
carton until installation.
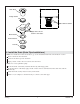
For installations with limited or no access from below, install with a drain elbow and gasket.
To simplify future maintenance, make sure that all plumbing connections around the bath are easily
accessible.
Two people are needed to install this product.
This bath is designed for freestanding installation only.
This bath features an integral overflow.
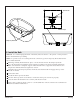
Install a floor- or rim-mounted faucet with this freestanding bath.
If installing a rim-mount faucet, make sure that there is no interference above or below the rim
before drilling any holes.
Your product may appear different from that shown. The installation procedure is the same.
This bath conforms to CSA B45.5/IAPMO Z124. All dimensions are nominal.
Plus:
• Drop Cloth
• Shims
• 2x4s
• Wood Blocks
• 1/2" (13 mm) Exterior Grade Plywood
(for Rim-mount Faucet)
• 1-1/2" Tailpiece
Construction
Adhesive
100% Silicone
Sealant
Optional:
For installations with limited or no access
below the bath.
• 1-1/2" Straight or 90 Degree PVC Drain Elbow
(Kohler 1069646 or Equivalent)
• Drain Elbow Gasket (Kohler 1068203 or
Equivalent)
1383921-2-B 2 Sterling