Level IS-HUB4 STEWARTAUDIO Port 1 Input Sig On Input IntraSound System Owner’s Manual February 2012 www.stewartaudio.
Important Safety Instructions Before using your Stewart Audio Inc. Power Amplifier, please read this Owner’s Manual carefully to ensure optimum trouble-free performance. WARNING: TO REDUCE THE RISK OF ELECTRICAL SHOCK, DO NOT EXPOSE THIS AMPLIFIER TO RAIN OR MOISTURE. DANGEROUS HIGH VOLTAGES ARE PRESENT INSIDE THE ENCLOSURE. DO NOT OPEN THE CABINET. REFER SERVICING TO QUALIFIED PERSONNEL ONLY.
Table of Contents 1 Welcome Important Safety Instructions······························································ 2 Table of Contents ················································································ 4 1 Welcome ························································································· 5 Congratulations on the purchase of your new Stewart Audio IntraSound System.
2 System Overview 2.2 Example System Setup The IntraSound System by Stewart Audio consists of two key components: the IS-HUB4 and the IS-AmpNode-10. Other components such as Cat5 cable and speakers play a role in the system but will not be the focus of this manual. 2.1 System Components & Dimensions 7.25in 18.4cm Level IS-HUB4 STEWARTAUDIO Port 1 Output Port 2 Port 3 Port 4 Input Sig On Power 24VDC 1.5in 3.8cm Input Hub Front 1.5in 3.8cm 1.5in 3.8cm Hub Side 2.65in 6.75cm 2.65in 6.
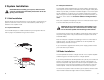
3.1.2 Output Connections 3 System Installation CAUTION: Before installing your system, make sure that you have read the Important Safety Precautions at the beginning of this manual. 3.1. Hub Installation Stewart Audio recommends that the unit is secured in some fashion to prevent movement of the unit if one of the cables is pulled during installation of an amplifier node. 3.1.1 Input Connections The IS-HUB4 accepts an unbalanced stereo input using either RCA or 3.5mm plugs.
3.2.1 Node Input Connections Gain Configuration The IntraSound system utilizies Cat5 to send power as well as a stereo signal to each node on the line. For the initial connection between the IS-HUB4 and an IS-AmpNode-10, a Cat5 cable should connect any port on the hub with either the left or right port of the node. The remaining port of the node can be used to daisy chain it to another node Caution: Do not connect the final node in a line back to the IS-HUB4. Doing so may damage the hub.
4 Operation 4.1 Operating Precautions 1. Before use, your amplifier must be configured for proper operation, including input and output wiring hookup. Improper wiring can result in damage to equipment or potentially harm to the operator. Consult section 3 for setup instructions. 2. Tampering with the circuitry, or making unauthorized changes is not only dangerous but may also violate local regulations. 3. Use care when making connections between the amplifier and the input or output equipment.
5 Troubleshooting 6 Technical Specifications Maximum Output 20Hz - 20kHz Problem: Hub’s Power indicator does not turn on. Procedure: Check that the hub is plugged into a live outlet. After you have ensured that it is not a power issue, check that you have a hot signal going into the inputs. If a signal is not detected, the hub will go into a sleep mode after 5 minutes to comply with Energy Star. Problem: Amplifier Node’s power indicator does not turn on.
7 Warranty Information 6.1 Warranty Summary All Stewart Audio amplifiers and accessories, unless excluded in this summary, are covered by a 3-year limited warranty on parts and labor from the date of purchase. In order to be eligible for warranty repairs, the amplifiers and accessories must have been purchased through an authorized Stewart Audio dealer and submitted by the original purchaser. This warranty is only valid in the country in which the amplifier was purchased. 7.1.1 Eligibility Requirements.
7.2.3 Packaging Instructions (cont.) 1. Please write the RA number on three sides of the box. Include the Stewart Audio RA number inside the box and a brief description of the problem. 2. Do not ship any accessories (manuals, cords, hardware, etc.) with your unit. These items are not needed to service your product. Stewart Audio will not be held responsible for these items if they are returned with the amplifiers. 3. When shipping your amplifier, it is important that it has adequate protection.