STI International, Inc.
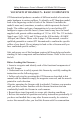
Safety Reference • Owner’s Manual • All Model 2011 Firearms Important Safety Information Inside Read, Understand and Follow all instructions and safety rules inside this Manual before handling any STI series firearm. Improperly handled firearms of any kind represent a hazard to persons and property. Contents Model and Serial Number Information ....................................... 2 Safe Ownership The Need For Instruction ............................................... 2 General Precautions .............
Safety Reference • Owner’s Manual • All Model 2011 Firearms Handgun Maintenance Disassembly .................................................................. 20 General Care ................................................................. 27 Cleaning ........................................................................ 28 Requesting Factory Service .......................................... 30 Warranty Statement ...................................................................
Safety Reference • Owner’s Manual • All Model 2011 Firearms READ FIRST ! We at S.T.I. International would like to congratulate you on your purchase of an STI firearm. We feel these are the finest handguns made. We welcome your comments by phone, or e-mail at sales@stiguns.com. While STI stands behind our firearms 100%, and strive to offer the best customer service in the industry, there are maintenance requirements that you, as an owner, must adhere to.
Safety Reference • Owner’s Manual • All Model 2011 Firearms • Additional sources on firearms safety and instruction can be obtained by writing to national organizations, such as the United States Practical Shooting Association (USPSA - 903-A Metcalf Street, Sedro Woolley, WA 98284, or the National Rifle Association (NRA - 11250 Waples Mill Road, Washington, DC 22030, (703) 267-1430). SAFE OWNERSHIP - GENERAL PRECAUTIONS • Be prepared - Firearm safety depends on proper preparation.
Safety Reference • Owner’s Manual • All Model 2011 Firearms • Be responsible - Firearm safety depends on you. A responsible owner respects the right and privilege of gun ownership. A responsible firearms owner learns and obeys all firearm safety practices, and always considers every firearm to be loaded. Stay aware of the fact that you have a responsibility for your own safety and the safety of others around the firearm. SAFE OWNERSHIP - CHILDREN AND FIREARMS WARNING! Keep firearms away from children.
Safety Reference • Owner’s Manual • All Model 2011 Firearms 2. Never point your firearm at anything you do not intend to shoot. Always keep the muzzle pointed away from other people, and in a safe direction. 3. Always check the barrel for obstructions. Use only ammunition of the proper type for the firearm you are using. 4. Do not shoot unless you are absolutely sure of your target and what exists beyond it. 5. Never shoot at a hard surface or the surface of the water.
Safety Reference • Owner’s Manual • All Model 2011 Firearms the trigger. All STI model handguns will continue this reloading operation until all ammunition rounds have been emptied from the magazine and there is no remaining supply from which to chamber a new round. The slide will remain open after the last round has been fired from the handgun. Components for safety… STI handguns have a mechanical Grip Safety and a Thumb Safety device to assist you in the safe handling of the firearm.
Safety Reference • Owner’s Manual • All Model 2011 Firearms YOUR NEW STI HANDGUN - BASIC COMPONENTS Basic Components (STI TruBore Competitor Shown) 1 – Hammer 2 – Rear Sight (not present in this sample) 3 – Safety (Left Side) 4 – Beavertail 5 – Frame (Magazine Port Area) 6 – Slide (Ejection Port on opposite side) 7 – Slide Stop 8 – Magazine Release 9 – Trigger 10 – Trigger Guard 11 – Front Sight (not present in this example) 12 – Compensator (optional) & Barrel (Muzzle End) 2 6 11 3 12 7 9 1 4 10
Safety Reference • Owner’s Manual • All Model 2011 Firearms YOUR NEW STI HANDGUN - BASIC COMPONENTS STI International produces a number of different models of semi-automatic handguns in various calibers. To identify an STI handgun model, look at the engraving on the left side of the firearm. It includes the model’s name and, sometimes, a number, which represents the barrel length. The caliber and type of ammunition to be used with an STI handgun is engraved on the barrel.
Safety Reference • Owner’s Manual • All Model 2011 Firearms YOUR NEW STI HANDGUN - AMMUNITION WARNING! Always keep firearms and ammunition out of the sight of and beyond the reach of children. Do not load this or any other firearm with live ammunition while learning the firearm’s operation. Before Loading Any Firearm With Ammunition… • Check your ammunition to be certain that the caliber matches the caliber of your firearm.
Safety Reference • Owner’s Manual • All Model 2011 Firearms PREPARING TO FIRE - GUN HANDLING & PREPARATION WARNING! Do not rely on your firearm’s safety mechanism. Treat every firearm as if it were loaded, and ready to fire, at all times. When Reaching for any Firearm… • Do not reach for any firearm by the muzzle end. • Never accept anyone’s word that a firearm is unloaded when receiving it from them - always check for an empty chamber. • Always check for an empty chamber by opening a firearm’s action.
Safety Reference • Owner’s Manual • All Model 2011 Firearms PREPARING TO FIRE - LOADING THE MAGAZINE Preparing the handgun for firing is composed of three basic steps: Loading the magazine, Inserting the magazine, and Loading the Handgun Chamber. WARNING! Load magazines carefully. Avoid dropping the magazine or the ammunition, as damage or an accidental discharge can occur.
Safety Reference • Owner’s Manual • All Model 2011 Firearms PREPARING TO FIRE - INSERTING THE MAGAZINE WARNING! Keep the muzzle pointed away from yourself and in a safe direction. Do not use magazines that show signs of damage, cracking or excessive wear. Consult a qualified gunsmith if the magazine binds, fails to seat fully and securely, fails to release smoothly, or loads ammunition into the chamber of the handgun erratically. 1.
Safety Reference • Owner’s Manual • All Model 2011 Firearms PREPARING TO FIRE - LOADING THE CHAMBER WARNING! Keep the muzzle of the handgun pointed away from anyone and in a safe direction. For this operation, the Thumb Safety must be in the READY or FIRE position and the handgun will be capable of firing a round. Your finger must be off the Trigger and outside of the Trigger Guard unless directed to do otherwise by these instructions. 1.
Safety Reference • Owner’s Manual • All Model 2011 Firearms Before firing your STI handgun for the first time… To assure safe, trouble-free performance beginning with the first time you fire your STI handgun, follow the cleaning and lubricating instructions on page 32 of this manual. To assure safe firing conditions… • Always handle a loaded firearm responsibly. • Follow all safety precautions and customs of firearm safety at all times.
Safety Reference • Owner’s Manual • All Model 2011 Firearms person qualified in the safe use of semi-automatic handguns. • STI International assumes no responsibility for malfunctions which occur from user abuse, neglect, or failure to follow the warnings and instructions in this manual. • Never attempt to remove an ammunition round or casing from the chamber or ejection port with your finger.
Safety Reference • Owner’s Manual • All Model 2011 Firearms CLEARING THE HANDGUN REMOVING THE MAGAZINE Clearing the handgun is composed of two basic steps: Removing the magazine and Unloading the chamber. WARNING! Until you pull the slide back and check for a remaining round in the chamber, the handgun is still LOADED and capable of firing a round. Keep the muzzle pointed away from yourself and in a safe direction. Your finger must be off the trigger and outside the trigger guard. 1.
Safety Reference • Owner’s Manual • All Model 2011 Firearms 2. 3. 4. 5. 6. and move the slide stop UP to keep the chamber open. If there was a round in the chamber it should eject with the opening of the slide. Inspect the chamber. If there is a round in the chamber, carefully remove it and place it in a appropriate storage container. Release the slide stop and slowly close the slide only after confirming the ammunition magazine is removed and the chamber is empty.
Safety Reference • Owner’s Manual • All Model 2011 Firearms • Always carry firearms in a case or holster specifically made for the type of firearm you are using until you are ready to fire. • Never carry any firearm with your finger on the trigger or inside the trigger guard. • Never carry any firearm by the muzzle end. • Always keep any firearm’s muzzle pointing in a safe direction when carrying it or preparing to shoot. Remain alert at all times.
Safety Reference • Owner’s Manual • All Model 2011 Firearms • Check firearm storage frequently, to be certain the location remains secure and has not been violated in any way. WARNING! Store firearms and ammunition separately, under lock and out of the sight of and beyond reach of children, minors, and adolescents. HANDGUN MAINTENANCE - DISASSEMBLY WARNING! Always remove the magazine and any ammunition in the firearm’s chamber before disassembly.
Safety Reference • Owner’s Manual • All Model 2011 Firearms HANDGUN MAINTENANCE - DISASSEMBLY Two Piece Guide Rod Removal 1. Insert 5/32” Hex wrench into the hex head of Outer Guide Rod below the muzzle. Loosen the Guide Rod by turning counterclockwise. 2. Remove Outer Guide Rod from the handgun by pulling the Rod out of the handgun towards the muzzle end. Note: Most STI models have a one piece guide rod assemble. When holding the slide to the rear, place a pin in the small hole in the guide rod.
Safety Reference • Owner’s Manual • All Model 2011 Firearms HANDGUN MAINTENANCE - DISASSEMBLY Slide stop removal 1. Holding the handgun by the grip with one hand, firmly grasp the handgun’s slide at the rear and pull the slide back. Be careful not to release pressure on the slide or allow the handgun to slip from your grasp. Pull the slide back until the disassembly notch on the slide (the second notch from the muzzle end) aligns with the rear of the slide stop on the left-hand side of the handgun. 2.
Safety Reference • Owner’s Manual • All Model 2011 Firearms HANDGUN MAINTENANCE - DISASSEMBLY (continued) Slide Assembly Removal CAUTION: Wear eye protection! The next two steps require the removal of a spring under compression. 1. Remove the slide assembly from the handgun frame while maintaining a firm grip on the handgun. 2. Restrain the recoil spring with the fingers of the hand holding the slide to prevent the spring form leaving the slide assembly.
Safety Reference • Owner’s Manual • All Model 2011 Firearms Captive Reverse Plug Removal from Slide Assembly 1. Push the captive reverse plug from the muzzle end of the slide assembly far enough back to be able to grasp the reverse plug and remove it from the slide assembly. TIP: The reverse plug may sometimes be seated firmly, requiring assistance from a light hammer and punch tool to release it from the slide assembly. Tap lightly with the hammer and punch from the muzzle end of the slide.
Safety Reference • Owner’s Manual • All Model 2011 Firearms Firing Pin Removal CAUTION: Wear eye protection! This step requires the removal of a spring under compression. Before removing the firing pin and stop, position the slide with the firing pin pointing in a safe direction. The firing pin can eject from the slide unexpectedly and cause injury. 1. Firmly grasp the rear end of the slide and depress the end of the firing pin with a 1/8” punch tool.
Safety Reference • Owner’s Manual • All Model 2011 Firearms 4. Remove the firing pin spring from the firing pin by turning the firing pin clockwise and pulling off the spring. Extractor Removal 1. Firmly grasp the back of the slide with the muzzle end towards you and the underside of the slide facing up. Press firmly against the front of the extractor using a 1/8” punch tool.
Safety Reference • Owner’s Manual • All Model 2011 Firearms HANDGUN MAINTENANCE - GENERAL CARE The STI semi-automatic model handguns must be clean and properly lubricated to function reliably and maintain optimum performance and accuracy. Proper maintenance can provide smooth operation, minimize the wear of parts, and prevent malfunctions. Periodic maintenance of this family of STI handguns involve cleaning and lubrication whenever any of the following conditions exist: 1.
Safety Reference • Owner’s Manual • All Model 2011 Firearms HANDGUN MAINTENANCE - CLEANING Properly cleaning and lubricating firearms requires a basic set of tools and supplies. Your STI handgun is a precision assembly. Only highquality tools and supplies should be used when working on it.
Safety Reference • Owner’s Manual • All Model 2011 Firearms 2. Clean frame with a nylon brush and cleaning solvent; scrub away any powder residue, particularly on the frame rails. Wipe frame clean with a lint-free cotton cloth. Inspect the frame for damage or signs of unusual wear. 3. Saturate a cotton pad with cleaning solvent and attach it to the bore cleaning rod; make several passes through the bore with the pad to saturate and loosen metallic and powder residues.
Safety Reference • Owner’s Manual • All Model 2011 Firearms HANDGUN MAINTENANCE FACTORY SERVICE WARNING! Always unload any firearm before packaging the firearm for repairs or service. Note: STI model handguns must be checked by first removing the ammunition magazine from the firearm to prevent a round from entering the chamber. Never ship ammunition with any firearm.
Safety Reference • Owner’s Manual • All Model 2011 Firearms Notice of NO Written Warranty Due to the complexities of complying with federal warranty law, STI International offers no expressed or written warranty on its products. We continually strive to stand behind out products and satisfy our customers, but we cannot make guarantees or warranties of any kind. Please contact us immediately should you experience a problem with any of our products.
Safety Reference • Owner’s Manual • All Model 2011 Firearms 1 2 3 4 5 6 7 8 9 10 11 12 13 14 15 16 17 18 19 20 21 22 23 24 25 26 27 28 29 30 31 Rear Sight (STI Adjustable shown) Slide Sear Hammer Hammer Strut Strut Pin Beaver Tail Disconnector Slide Stop Plunger Tube Pin Plunger Tube Spring Safety Plunger Tube Pin Plunger Tube Assembly Hammer Pin Sear Pin Mainspring Cap Pin Mainspring Housing Pin Mainspring Housing Mainspring Cap Mainspring Mainspring Housing Pin Retainer Frame Unit (with Trigger, Trigger
STI International 114 Halmar Cove, Georgetown, TX 78628 • USA Telephone (512) 819-0656 Fax (512) 819-0465 Website: stiguns.com Email: sales@stiguns.