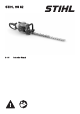
STIHL HS 82 2 - 21 Instruction Manual
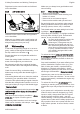
English 1 2 Dear Customer, Thank you for choosing a quality engineered STIHL product. It has been built using modern production techni‐ ques and comprehensive quality assurance. Every effort has been made to ensure your satis‐ faction and trouble-free use of the product. Please contact your dealer or our sales company if you have any queries concerning this product. Your Dr. Nikolas Stihl 1 1.
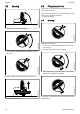
2 Safety Precautions and Working Techniques Children, animals and bystanders must not be allowed near the machine. When not using the machine, it must be laid down in such a way that it does not endanger anyone. Ensure that the machine cannot be used without authorization. The user is responsible for accidents or risks involving third parties or their property. Do not lend or rent your power tool without the User Manual. Be sure that anyone using it under‐ stands the information contained in this manual.
English 2.3 2 Safety Precautions and Working Techniques Refueling Gasoline is an extremely flammable fuel. Keep clear of naked flames. Do not spill any fuel – do not smoke. Always shut off the engine before refueling. Do not fuel a hot engine – fuel may spill and cause a fire.
2 Safety Precautions and Working Techniques English Right hand on the control handle and left hand on the handlebar. Make sure you always have good balance and secure footing. 2.6.2 2.7.
English Do not operate your power tool in the starting throttle position – engine speed cannot be con‐ trolled in this position. Inspect the hedge and work area to avoid dam‐ aging the cutting blades: – Remove stones, rocks, pieces of metal and other solid objects – Ensure that no sand or small stones get between the cutting blades, e.g. when working close to the ground.
3 Using the Unit repairs or cleaning the machine. – Exception: Carburetor and idle speed adjustments. English 3.2 HS 82 T Do not turn the engine over on the starter with the spark plug boot or spark plug removed since there is otherwise a risk of fire from uncontained sparking. To reduce the risk of fire, do not service or store your machine near open flames. Check the fuel filler cap for leaks at regular inter‐ vals.
English 3.6 3.6.1 4 Fuel Working Technique 3.6.2 Horizontal Cut Vertical Cut Swing the cutting blade from the bottom upwards in an arc – lower the nose of the blade, move along the hedge and then swing the blade up again in an arc. Any working position above head height is tiring. To minimize the risk of accidents, work in such positions for short periods only. Hold the cutter bar at an angle of 0° to 10° as you swing the hedge trimmer horizontally.
5 Fueling 4.2 English Mixing Fuel NOTICE Unsuitable fuels or lubricants or mix ratios other than those specified may result in serious dam‐ age to the engine. Poor quality gasoline or engine oil may damage the engine, sealing rings, hoses and the fuel tank. 4.2.1 STIHL MotoMix may be stored for up to 2 years without any problems. ► Thoroughly shake the mixture in the canister before fueling your machine.
English 5.2 5 Fueling 5.3 Opening Filling Up with Fuel Take care not to spill fuel while fueling and do not overfill the tank. 001BA236 KN STIHL recommends you use the STIHL filler noz‐ zle for fuel (special accessory). ► Fill the fuel tank. 5.4 Closing 001BA232 KN 001BA234 KN ► Raise grip to vertical position. Grip must be vertical: ► Fit the cap – marks on tank cap and fuel tank must line up. ► Press the cap down as far as stop.
English 001BA235 KN 001BA239 KN 6 Rear Handle ► Place the cap on the opening and rotate it counterclockwise until it engages the filler neck. ► Continue rotating the cap counterclockwise (about a quarter turn) – this causes the bottom of the cap to be turned to the correct position. ► Turn the cap clockwise and lock it in position – see section on "Closing". 6 Rear Handle 2 Tank cap is locked. 5.
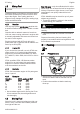
English 7 Starting / Stopping the Engine Also use this setting if the engine has been run‐ ning but is still cold. 1 Cranking 0000-GXX-1796-A0 7.1 0000-GXX-1806-A0 The stop switch (1) is in the normal run position I. ► Press the manual fuel pump bulb at least five times – even if the bulb is filled with fuel. ► Place the machine on the ground. ► Remove the blade scabbard. Check that the cutting blades are not touching the ground or any other obstacles.
8 Cleaning the Air Filter English ► Press down the throttle trigger lockout and open the throttle – the choke knob moves to the run position e. After a cold start, warm up the engine by opening the throttle several times. WARNING Make sure the carburetor is correctly adjusted. The cutting attachment must not run when the engine is idling. 8 Cleaning the Air Filter The machine is equipped with either a felt or paper filter element. If There is a Noticeable Loss of Engine Power 0000-GXX-1808-A0 8.1.
9 Adjusting the Carburetor ► Depress the outer ring of the choke knob and fit the filter cover. ► Insert the screw and tighten it down firmly. ► Position filter cover against the left side of the filter housing and swing it to the right – the two lugs (arrows) must engage the filter cover openings. ► Depress the outer ring of the choke knob and close the filter cover. ► Insert the screw and tighten it down firmly. Paper filter 1 3 9 0000-GXX-6031-A0 8.1.
10 Spark Arresting Screen in Muffler English Cutting blades run when engine is idling ► Turn the idle speed screw (LA) counterclock‐ wise until the cutting blades stop moving and then turn the screw about another 1/2 to 3/4 turn in the same direction. 0000-GXX-6547-A0 2 WARNING If the cutting blades continue moving when the engine is idling, have your power tool checked and repaired by your servicing dealer. 10 ► Remove the exhaust pipe (2).
English 12 Lubricating the Gearbox ► Unscrew the spark plug. Checking the Spark Plug 000BA039 KN 11.2 Use STIHL gear lubricant for hedge trimmers (special accessory) for lubricating the blade drive gear. A ► Clean dirty spark plug. ► Check electrode gap (A) and readjust if neces‐ sary – see "Specifications". ► Rectify the problems which have caused foul‐ ing of the spark plug. Possible causes are: – Too much oil in fuel mix. – Dirty air filter. – Unfavorable running conditions.
14 Sharpening Instructions English ► Store the machine in a dry, high or locked location. Out of the reach of children and other unauthorized persons. Sharpening Instructions It is best to have the cutting blades resharpened by a dealer on a workshop sharpener. STIHL recommends a STIHL servicing dealer. It is also possible to use a flat crosscut sharpen‐ ing file. Hold the sharpening file at the prescribed angle (see "Specifications").
Intake port for cooling air Visual inspection Clean Spark arresting screen in Check if installed muffler Check or replace1) All accessible screws, nuts and bolts (not adjusting screws) Anti-vibration elements As required If damaged If faulty Annually Monthly Weekly Whenever tank is refilled The following intervals apply for normal operating conditions.
17 Main Parts English STIHL recommends that you have servicing and repair work carried out exclusively by an author‐ ized STIHL servicing dealer. STIHL dealers are regularly given the opportunity to attend training courses and are supplied with the necessary technical information. 7 Manual Fuel Pump If these maintenance operations are not carried out as specified, the user assumes responsibility for any damage that may occur.
English 19 Maintenance and Repairs 18.4.3 18.6.4 HS 82 RC 600 mm blade: 750 mm blade: 18.5 5.3 kg 5.7 kg Cutting blades Sharpening angle to horizontal: 18.6 45° Noise and Vibration Data Vibration measurement ahv,eq to ISO 22867 (with tip guard) HS 82 T 500 mm blade: 600 mm blade: 750 mm blade: Noise and vibration data are measured at idling and maximum rated speed in a ratio of 1:4. HS 82 R For further details on compliance with Vibration Directive 2002/44/EC visit www.stihl.com/vib.
20 Disposal English STIHL recommends that you have servicing and repair work carried out exclusively by an author‐ ized STIHL servicing dealer. STIHL dealers are regularly given the opportunity to attend training courses and are supplied with the necessary technical information. When repairing the machine, only use replace‐ ment parts which have been approved by STIHL for this power tool or are technically identical.
English 22 21 EC Declaration of Conformity 0458-448-8321-C
21 EC Declaration of Conformity 0458-448-8321-C English 23
0458-448-8321-C *04584488321C* www.stihl.