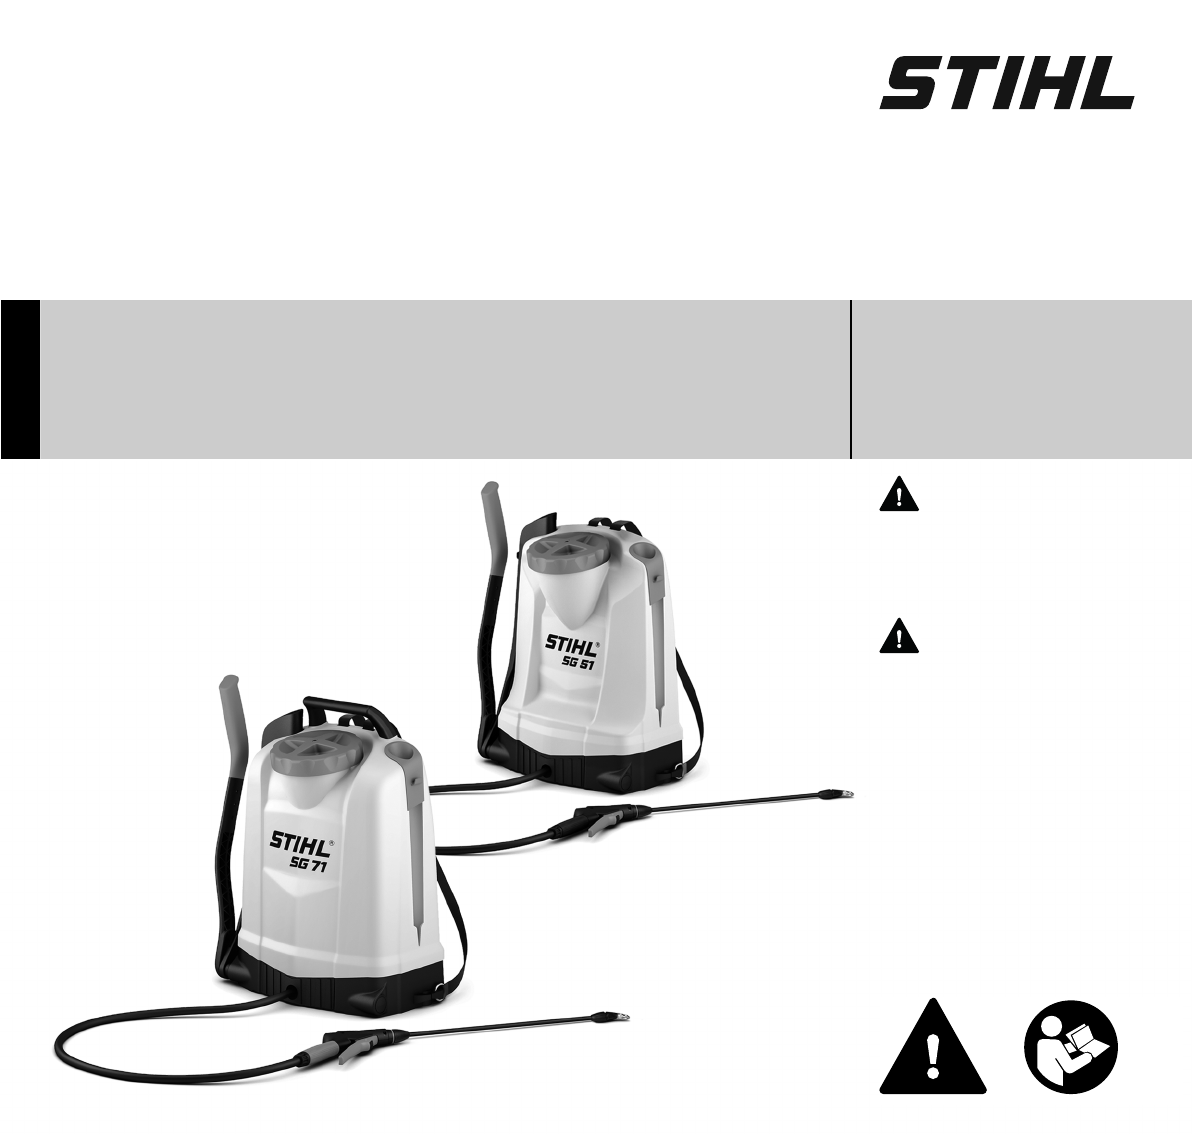
STIHL SG 51, 71 Instruction Manual Manual de instrucciones WARNING Read Instruction Manual thoroughly before use and follow all safety precautions – improper use can cause serious or fatal injury. ADVERTENCIA Antes de usar la máquina lea y siga todas las precauciones de seguridad dadas en el manual de instrucciones – el uso incorrecto puede causar lesiones graves o mortales.
Instruction Manual 1 - 20 Manual de instrucciones 21 - 41
English Guide to Using this Manual Safety Precautions and Working Techniques Assembling the Unit Harness Controls Filling the Container Spraying After Spraying Storing the Machine Inspection and Maintenance by User Maintenance and Care Main Parts Specifications Maintenance and Repairs Troubleshooting Disposal Trademarks Addresses © ANDREAS STIHL AG & Co. KG, 2020 0458-597-8621-A. VA1.B20. 0000006673_013_GB Printed on chlorine-free paper Printing inks contain vegetable oils, paper can be recycled.
English Guide to Using this Manual Pictograms All the pictograms attached to or embossed on the machine are shown and explained in this manual. Symbols in Text WARNING Indicates a hazardous situation that, if not avoided, could result in death or serious injury. NOTICE Indicates a risk of property damage, including damage to the machine or its individual components. Engineering Improvements Many operating and safety instructions are supported by illustrations.
English All operating and servicing personnel should be trained and familiarized with the proper handling procedures for the chemical products being used, as well as with first aid/emergency care, and liquid chemical disposal regulations. WARNING Do not lend or rent your sprayer without the instruction manual. Be sure that anyone using it understands the information contained in this manual. WARNING The chemicals sprayed with your backpack sprayer may contain toxic and/or caustic substances.
English WARNING To reduce the risk of eye injury, always wear goggles or close-fitting protective glasses with adequate side protection that are impact-rated and marked as complying with ANSI Z87 "+". Wearers of prescription (Rx) eyewear should wear eye protection that meets these requirements and that incorporates the prescription in its design or that can be worn over prescription lenses without disrupting either the prescription eyewear or the protective eyewear.
English very poisonous or irritating. They should be used with extreme care. Finally, pesticides labeled "Danger – Poison" are for restricted use only and generally must be used under the supervision of a certified applicator. Similarly, the EPA rates herbicides with the signal words "Caution", "Warning" and "Danger." Each category will have unique handling characteristics. Familiarize yourself with the characteristics for the category you are using. WARNING Mix only compatible pesticides and/or herbicides.
English maximum mark, the tank contains approximately up to 18 l (4.76 gal.). See the Specifications for the exact amount. During Operation Holding and Controlling the Backpack Sprayer 8014BA040 ST WARNING Check for leakage while refilling and during operation. A leak from the container or a loose fitting could soak your clothing and come into contact with your skin. In an emergency, you may slip out of the harness and throw off the backpack sprayer quickly.
English WARNING Operating instructions Inhalation of certain chemicals can cause susceptible persons to have an allergic or asthmatic reaction. Substantial or repeated inhalation of certain chemicals may cause respiratory disease, cancer, birth defects, or other reproductive harm. Control the chemical spray at the source where possible. Use good work practices, such as operating the unit so that the wind or operating process does not blow the spray back on the operator.
English The small hardware required for assembly is in the tank. 3 Connecting Hose to Unit 2 Strictly follow the maintenance and repair instructions in the appropriate section of your instruction manual. Please refer to the maintenance chart in this manual. Always first release pressure in the pump and the pressure chamber prior to cleaning or servicing the sprayer. Do not attempt any maintenance or repair work not described in your instruction manual.
English Mounting the Lever Harness A B C 2 2 0000-GXX-2200-A0 C AB 4 The length of the handle (1) can be adjusted (A, B, C) to suit the operator. N 5 Push the handle (1) into the lever (2). 0000-GXX-2203-A0 1 3 2 The lever can be mounted on the left or right of the unit. Push the lever (2) into the shaft (3). 2 N Swing the lever (2) upwards. N Lay the unit on its side. SG 51, SG 71 Set the distance (A, B or C) as required.
English B 2 2 1 Lift the tabs of the adjusters to loosen the straps. Controls Make yourself familiar with how the controls function before using your sprayer for the first time. 1 Lever N Use a screwdriver to pry the pin (1) out of the backplate. N Remove the pin (1) and pull out the ends of the harness straps (2). N Fit the ends of the harness straps (2) in the lower position. N Insert pin (1) and engage it in the backplate.
English Cap Spray Gun Unlocking / locking spray gun 2 1 There are three measuring cups in the cap. They can be used to prepare the plant protection solution. 5 ml (0.2 fl.oz) 2 10 ml (0.3 fl.oz) 3 25 ml (0.8 fl.oz) 2 N SG 51, SG 71 2 6159BA024 KN 1 1 6159BA011 KN 1 8014BA019 AS 3 Push locking lever (1) upwards – the trigger (2) is unlocked and can be operated. N Push the locking lever (1) downwards – the trigger (2) is locked to reduce the risk of accidental operation.
English Spraying Before filling the tank with chemicals, carry out a test with fresh water and check all parts of the sprayer for leaks. ma x N Stand the sprayer on a level surface. N Remove the cap from the tank. N N Carry the unit on your back with both harness straps – do not hang it over one shoulder. N Operate the pump lever slowly and steadily with the gun closed – several strokes are required to build up pressure.
English After Spraying Storing the Machine Inspection and Maintenance by User Empty the container in a well ventilated location. N Secure the unit against unauthorized use. Lubricating Piston Cup Seal N Rinse the container with clean water. N Removing N Fill the container with clean water. Dry the unit and store it in a place protected from direct sunlight and frost. N Fit the cap on the container and tighten it down firmly.
English Installing Lubricating the Pump Lever Cleaning the Nozzle 3 Screw the pump barrel into the tank until the lug (arrow) engages the teeth. Lubricating the Piston Rod N Lubricate the pump lever with grease. 8014BA034 AS N 8014BA042 KK 8014BA044 KK 2 1 N Unscrew the nozzle (1) and nozzle body (2) from the spray wand (3). N Rinse the parts under running water. Cleaning the Filter Apply a few drops of resin-free, food safe oil to the pump rod.
English Complete unit Visual inspection (condition, leaks) Solution container, hose system, wand Nozzle Visual inspection (condition, leaks) after 50 refills as required if damaged if problem every 12 months monthly X Clean O-ring in container's cap weekly before starting work The following intervals apply to normal operating conditions only. If your daily working times are longer, shorten the specified intervals accordingly.
English Main Parts 4 6 5 1 2 3 4 5 6 7 8 9 10 11 12 13 14 15 16 # 7 3 1 2 8 9 Definitions 10 15 11 16 16 13 # 12 8014BA036 AS 14 Backplate Harness Hose Filter Spray Gun Spray Wand Adjustable brass nozzle Cap Gasket Strainer Container Hand Lever Grip Pump barrel Piston cup seal Retaining pin Serial number 1. Backplate. Helps to protect the user’s back. 2. Harness. For carrying the sprayer. 3. Hose. Feeds the liquid from the container to the spray gun. 4. Filter in Spray Gun.
English 6. Spray Wand. Feeds spray solution to the nozzle. 7. Adjustable brass nozzle. Adjustable from conical to full jet spray pattern. Specifications 8. Cap. Closes the spray solution container. SG 51 9. Gasket. Seals the container. 10. Strainer. Helps prevent impurities entering the container. 11. Container. Contains the spray solution. 12. Hand Lever. Pump lever for producing spray pressure. 13. Grip. Operates the hand lever. 14. Pump barrel. Houses pressure pump for generating pressure. 15.
English Troubleshooting Before starting any service work, operate the sprayer until it is no longer under pressure – if pressure is not released, chemical may escape unexpectedly when working on the sprayer. After servicing, carry out test run with clean water.
English Disposal Trademarks Observe all country-specific waste disposal rules and regulations. STIHL Registered Trademarks STIHL® { 000BA073 KN K The color combination orange-grey (U.S. Registrations #2,821,860; #3,010,057, #3,010,058, #3,400,477; and #3,400,476) STIHL products must not be thrown in the garbage can. Take the product, accessories and packaging to an approved disposal site for environmentfriendly recycling.
English STIHL OUTFITTERS ™ STIHL PICCO ™ STIHL PolyCut ™ STIHL PowerSweep ™ STIHL Precision Series ™ STIHL RAPID ™ Addresses STIHL Inc. 536 Viking Drive P.O. Box 2015 Virginia Beach, VA 23452-2015 STIHL SuperCut ™ TapAction ™ TrimCut ™ This listing of trademarks is subject to change. Any unauthorized use of these trademarks without the express written consent of ANDREAS STIHL AG & Co. KG, Waiblingen is strictly prohibited.
español / EE.UU Acerca de este manual de instrucciones Medidas de seguridad y técnicas de manejo Armado de la máquina Arnés Elementos funcionales Llenado del recipiente Pulverización Después de pulverizar Almacenamiento de la máquina Inspección y mantenimiento por el usuario Información para mantenimiento Componentes importantes Especificaciones Información de reparación Localización de averías Desecho Marcas comerciales Direcciones © ANDREAS STIHL AG & Co. KG, 2020 0458-597-8621-A. VA1.B20.
español / EE.UU Acerca de este manual de instrucciones Pictogramas Todos los pictogramas que se encuentran fijados o grabados en la máquina se muestran y explican en este manual. Símbolos en el texto Muchas de las instrucciones de uso y seguridad vienen acompañadas de ilustraciones. Los pasos individuales o procedimientos descritos en el manual pueden estar señalados en diferentes maneras: N Se usa un punto para denotar un paso o procedimiento.
español / EE.UU en su memoria. El uso descuidado o inadecuado puede causar lesiones graves o incluso la muerte. Pida a su concesionario STIHL que le enseñe el manejo del pulverizador. Respete todas las disposiciones, reglamentos y normas de seguridad federales, estatales y locales del caso.
español / EE.UU todas las instrucciones del fabricante del producto químico referentes a la protección adecuada de los ojos, la piel, la nariz y la boca. Pueden ser diferentes y más estrictas que las siguientes precauciones. ADVERTENCIA Para reducir el riesgo de lesionarse los ojos, siempre utilice gafas o anteojos protectores bien ajustados con protección lateral resistentes a impactos y que porten designaciones que indiquen que satisfacen la norma ANSI Z87 "+".
español / EE.UU EL PULVERIZADOR DE MOCHILA Para las ilustraciones y definiciones de los componentes del pulverizador de mochila, vea el capítulo "Piezas principales y controles". ADVERTENCIA Nunca modifique, de ninguna manera, este pulverizador de mochila. Utilice únicamente los accesorios y repuestos suministrados por STIHL o expresamente autorizados por STIHL para usarse con el modelo específico de STIHL.
español / EE.UU hacer, consulte con un centro de información sobre envenenamiento o un médico inmediatamente. Tenga a mano la etiqueta del producto para leer o mostrar a las personas de consulta. Limpie inmediatamente todos los derrames de productos químicos. Deseche los residuos de acuerdo con las leyes y los reglamentos estatales o federales.
español / EE.UU ADVERTENCIA Condiciones de trabajo ADVERTENCIA Su pulverizador de mochila es una máquina que debe ser manejada por solamente una persona. No deje que otras personas estén en el lugar de trabajo. Ajuste el arnés de transporte de modo correspondiente a su estatura antes de empezar a trabajar.
español / EE.UU del producto y/o la hoja de datos de seguridad del material para la sustancia y/o consulte con el fabricante/proveedor del material. También puede consultar con su empleador, los organismos gubernamentales, tales como EPA, OSHA y NIOSH, y otras fuentes de conocimientos acerca de materiales peligrosos. El estado de California y algunas otras autoridades han publicado varias listas de sustancias carcinógenas, de toxicidad reproductora, etc. Instrucciones de manejo (REI).
español / EE.UU Conexión de la manguera a la unidad 2 2 1 3 SG 51, SG 71 3 N Coloque la tuerca de unión (1) sobre la manguera (2). N Coloque la manguera (2) detrás del eje y sobre el codo de llenado (3). N Deslice la tuerca de unión (1) sobre el conector acodado (3) y apriétela bien firme con la mano. 0000-GXX-2199-A0 No intente hacer ningún trabajo de mantenimiento o reparación que no esté descrito en su manual de instrucciones.
español / EE.UU Montaje de la palanca Arnés 2 N Coloque la máquina apoyada sobre su lado. Empuje el mango (1) sobre la palanca (2). 2 3 4 N 5 La palanca puede montarse en el lado izquierdo o derecho de la unidad. N A B C 2 0000-GXX-2201-A0 N Gire la palanca (2) hacia arriba. 8014BA029 KN La longitud del mango (1) puede ajustarse (a, B, C) según la preferencia del operador. N Empuje la palanca (2) en el eje (3).
español / EE.UU Ajuste de las correas del arnés A 1 B Familiarícese con el funcionamiento de los controles antes de usar el pulverizador por primera vez. 8014BA045 ST 1 Elementos funcionales A 8014BA008 AS B N Utilice un destornillador para sacar el pasador (1) de la placa trasera. N Extraiga el pasador (1) y tire de los extremos de las tiras (2) del arnés hacia fuera. N Coloque los extremos de las tiras (2) del arnés en la posición inferior.
español / EE.UU Tapa Pistola rociadora Desbloqueo / bloqueo de pistola rociadora 2 1 La tapa tiene tres tazas de medición. Pueden emplearse para preparar la solución protectora de plantas. 5 ml (0.2 oz fl) 2 10 ml (0.3 oz fl) 3 25 ml (0.8 oz fl) 2 6159BA024 KN 1 2 1 6159BA011 KN 1 8014BA019 AS 3 N 32 N Empuje la palanca de bloqueo (1) hacia abajo – el gatillo (2) se bloquea para reducir el riesgo del accionamiento por accidente.
español / EE.UU Pulverización Antes de usar la tanque con productos químicos, efectúe una prueba con agua limpia y revise todos los componentes del pulverizador para detectar fugas. ma x N Apoye el pulverizador en una superficie nivelada. N Quite la tapa de la tanque. N N Lleve la máquina sobre su espalda con las dos tiras del arnés – no la cuelgue de un solo hombro.
español / EE.UU N Vacíe el recipiente en una zona bien ventilada. N Enjuague el recipiente con agua limpia. N Llene el recipiente con agua limpia. N Coloque la tapa en el recipiente y apriétela firmemente. N Presurice el recipiente y continúe pulverizando hasta vaciar el recipiente y que el mismo ya no se encuentre bajo presión. Almacenamiento de la máquina N Adopte las medidas necesarias para proteger la máquina contra el uso no autorizado.
español / EE.UU Instalación Lubricación de palanca de bombeo Limpieza de la boquilla 3 Enrosque el cuerpo de la bomba en el depósito hasta que el vástago (flecha) se enganche con los dientes. N Lubrique la palanca de bombeo con grasa. 1 N Desatornille la boquilla (1) y el cuerpo (2) de la varilla rociadora (3). N Enjuague las piezas con agua corriente. Limpieza del filtro Lubricación de vástago del émbolo N Desenrosque la palanca (1) de la pistola rociadora y retire el filtro (2).
español / EE.UU Máquina completa Inspección visual (condición general, fugas) Inspección visual (condición general, fugas) después de llenarlo 50 veces según se requiera si presenta daños si hay problemas cada 12 meses mensualmente semanalmente X Limpiar Anillo tórico en tapa del recipiente después de completar el trabajo o diariamente Los intervalos que se indican a continuación corresponden únicamente a condiciones normales de funcionamiento.
español / EE.UU Componentes importantes 4 6 5 1 2 3 4 5 6 7 8 9 10 11 12 13 14 15 16 # 7 3 1 2 8 9 Definiciones 10 15 11 16 SG 51, SG 71 13 1. Placa para la espalda. Ayuda a proteger la espalda del usuario. 2. Arnés. Para portar el pulverizador. 3. Manguera. Alimenta el líquido del recipiente a la pistola rociadora. 4. Filtro en la pistola rociadora. Ayuda a evitar que las impurezas entren a la boquilla y bloqueen la misma.
español / EE.UU 5. Pistola rociadora. Abre y cierra la válvula. Inicia y para el chorro. 6. Varilla rociadora. Alimenta la solución a la boquilla. 7. Boquilla de latón ajustable. Patrón de rociado ajustable de cónico a chorro. 8. Tapa. Cierra el recipiente de solución. 9. Empaquetadura. Sella el recipiente. 10. Colador. Ayuda a evitar la entrada de contaminantes en el recipiente. 11. Recipiente. Contiene la solución. 12. Palanca de mano. Bombee la palanca para producir la presión de pulverización.
español / EE.UU Localización de averías Antes de iniciar trabajos de mantenimiento, ponga el pulverizador en marcha hasta que no se encuentre bajo presión – si no se libera la presión, el producto químico podría escapar inesperadamente cuando se interviene en el pulverizador. Después del mantenimiento, efectúe un ensayo con agua limpia. Condición Causa La acción de bombeo no genera pre Avería en cuerpo de bomba sión. La palanca puede moverse con Avería de discos de válvula poca resistencia.
español / EE.UU Desecho Marcas comerciales Respete todas las leyes y los reglamentos sobre eliminación de desechos que correspondan a su país. Marcas registradas de STIHL STIHL® { 000BA073 KN K La combinación de colores anaranjadogris (Números de registro EE.UU.
español / EE.UU STIHL OUTFITTERS ™ STIHL PICCO ™ STIHL PolyCut ™ STIHL PowerSweep ™ STIHL Precision Series ™ STIHL RAPID ™ Direcciones STIHL Inc. 536 Viking Drive P.O. Box 2015 Virginia Beach, VA 23452-2015 STIHL SuperCut ™ TapAction ™ TrimCut ™ Esta lista de marcas comerciales está sujeta a cambios. Queda terminantemente prohibido todo uso de estas marcas comerciales sin el consentimiento expreso por escrito de ANDREAS STIHL AG & Co. KG, Waiblingen.
WARNING This product contains chemicals known to the State of California to cause cancer, birth defects or other reproductive harm. ADVERTENCIA Este producto contiene sustancias químicas consideradas por el Estado de California como causantes de cáncer, defectos de nacimiento u otra toxicidad reproductora. 0458-597-8621-A englisch englisch // spanisch spanisch USA USA U www.stihl.