
User's Manual


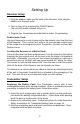


Setting Up
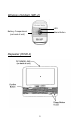
Receiver Setup
1. Plug the adapter cable into the back of the Receiver, then plug the
adapter into the wall outlet.
2. Turn on the unit by pressing the POWER button.
The red LED power indicator will go on.
3.. Program the Receiver as described below under Programming.
Station Index Card:
Use your fingernail or a coin to remove the clear plastic cover from the front
of the Receiver. Then, on the Card, write in the room number and/or name
of the resident to be assigned to each Transmitter, Pendant or Floor Mat.
Replace cover.
Locating the Receiver on a Wall or Desk:
Once the Receiver has been programmed, it can be placed on the wall by
inserting the two keyhole slots on the back onto the studs of a telephone
wall plate. Alternately, you can put two screws (included) or nails into a
convenient spot on the wall, with one screw located 2¾” above the other.
The screws or nails should extend 3/16” from the wall so that the keyhole
slots on the back of the Receiver can be slipped over them.
The Receiver can also be set up on a desk or counter by attaching the back
of the unit to the plastic Pedestal that is included in the packaging of the
unit. This sets the unit at a convenient angle on a flat surface.
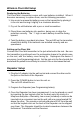
Transmitter Setup
Replacing the Battery Pack: The Transmitter comes with a new,
rechargeable battery pack already installed. When it eventually becomes
necessary to replace the battery pack, follow these steps:
1. Insert the tip of a large paper clip or similar object into the small hole
just above the battery compartment door. Press down while pushing
back the door in the direction of the arrow.
2. Remove the old battery pack. Follow instructions for safe disposal in
Safety Instructions for Transmitter Battery Pack on page 15.
3. Attach a new battery pack and insert into battery compartment. Snap
compartment door back into place.
5