
User Manual

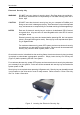

Encrypted DE110 User's Guide - Rev. A01 StorCase Technology, Inc.
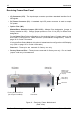
Installation 11
INSTALLATION
WARNING: DO NOT lose your electronic security keys! StorCase does not provide du-
plicate keys, and assumes no responsibility for lost data resulting from lost or
stolen keys.
CAUTION: DO NOT insert the electronic security key into any FireWire port! Doing so can
result in damage to the key! StorCase does not provide duplicate keys, and
assumes no responsibility for lost data resulting from damaged keys.
NOTES: Each set of electronic security keys is unique to its dedicated DE110 carrier/
encrypted drive. Key sets are not interchangeable with other DE110 carrier/
encrypted drives.
A #2 Phillips screwdriver will be required.
Since specifications (specifically, pin assignments) between drive manufac-
turers may vary, please refer to your drive manufacturer's documentation for
exact information regarding Master/Slave and Cable Select configuration.
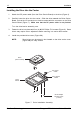
While performing the steps in this section, work on a soft surface to prevent excessive shock
to the drive being installed. Also refer to the manufacturer's documentation provided with the
drive.
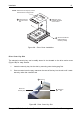
1. Remove the drive from its protective packaging.
2. Master/Slave Drive Selection: There are two ways to set the Master/Slave Drive
designation for the DE110 unit, as described below.
1. Cable Select Method (Recommended Method): In most cases, the drive will
be factory-configured as a Master Drive using a jumper option on the drive itself.
StorCase however, recommends reconfiguring the drive for Cable Selection
instead. This can be done by configuring the jumper option on the drive itself (refer
to the drive manufacturer's documentation for further information).
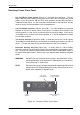
With Cable Selection, the Master/Slave designation is handled by the Master/
Slave Selection Jumper Option (ID0 & ID1) located on the receiving frame mother-
board (Figure 6). If necessary, reconfigure jumper (jumper is factory-installed
on ID0 for Master Drive designation) on receiving frame motherboard to ID1 for
Slave setting. Skip method below and continue with the Installation process.
2. Drive Select Method: In most cases, the drive will be factory-configured as
a Master Drive using a jumper option on the drive itself. Reconfigure the jumper
if necessary (refer to the drive manufacturer's documentation for exact Master/
Slave jumper settings).
If necessary, reconfigure jumper (jumper is factory-installed on ID0 for Master
Drive designation) on receiving frame motherboard to ID1 for Slave setting.