Sheraton Free Standing Stove ModelS: 7016/7017/7027 Instructions for Use, Installation and Servicing For use in Great Britain and Republic of Ireland. This appliance has been certified for use in countries other than those stated. To install this appliance in these countries, it is essential to obtain the translated instructions and in some cases the appliance will require modification. Contact Stovax for further information.
COVERING THE FOLLOWING MODELs: 7016/7017/7027 PAGE Appliance commissioning checklist 3 operating instructions 4 instaLlation Instructions 9 Technical Specifications 9 Site Requirements 10 Pre-Installation 13 Installation 15 Commissioning 17 Servicing Instructions 18 Maintenance & Servicing 18 Basic spare parts list 21 Care of your stove 23 Service Records 24 2
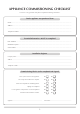
APPLIANCE COMMISSIONING CHECKLIST To assist us in any guarantee claim please complete the following information:- Dealer appliance was purchased from Name:.................................................................................................................................................................. Address:................................................................................................................................................................ . ......................
OPERATING INSTRUCTIONS Before using this appliance, please read these instructions carefully. 1. GENERAL 1.1 This stove is designed for domestic heating and should only be used for this purpose, and in accordance with the manufacturers operating instructions. 1.2 It must be installed by a competent installer, in accordance with all local regulations, including those referring to national and European standards. 1.
OPERATING INSTRUCTIONS 3.3 DOOR HANDLE 1.12 To Open and Close: Use a protective gloved hand to operate. Fuel Consumption 1.13 Rotate RH Knob anti-clockwise to open. Rotate clockwise to close. Kg/hour Wood Kg/hour Briquetted Smokeless fuel Sheraton 7016 2.66 - Sheraton 7017 2.66 1.12 Sheraton 7027 2.66 1.12 Description 3.4 1.14 Warning: Do not force the handle to turn more than 1/4 turn as damage may occur. 1.15 Never open the door with your bare hands. 2.
OPERATING INSTRUCTIONS 4.9 The ideal control settings to suit the particular installation and personal preferences will be established by experience in using the stove. fuel. Allow the new fuel to burn at high output for a few minutes before adjusting the burn rate with the Primary/ Thermostat* air control to the desired setting. It is best to refuel little and often to maintain clean and efficient burning. 4.10 Do not load fuel higher than the log guard.
OPERATING INSTRUCTIONS 9.2 7. ASH REMOVAL (Multi-fuel stoves) 7.1 7.2 7.3 The burning of any fuel will produce ash, which will have to be removed after a period of use. This time will depend on the fuel used. Before removing the ash from the stove it is advisable to let the fire burn down to a low level, or even go out completely. The ashpan can then be removed using gloved hands, after opening the main firedoors.
OPERATING INSTRUCTIONS Windy days - Smoking from the appliance. This could be caused by turbulent airflow around chimney terminal, possibly caused by the position of other buildings or obstacles nearby. This problem is, also, sometimes associated with oversize chimneys, which may even have downdraught problems on calm days.
TECHNICAL SPECIFICATION SHERATON STOVE Sheraton Model Sheraton - 7016 / 7017 / 7027 Wood kW 8.0 Solid Fuel kW 8.0 mm 1.25 inch Wg 0.05 Wood g/s 5.4 Solid Fuel g/s 5.
SITE REQUIREMENTS Before installation of this product please read these instructions fully. When completing the installation and building works you should comply with your responsibilities under the Health and Safety at Work Acts, and any new regulations, which may be introduced during the lifetime of these instructions.
SITE REQUIREMENTS HEARTH DIMENSIONS The appliance must stand on a constructional hearth with the minimum dimensions as shown in the diagram below. Check that the building has a suitable loadbearing capacity for the hearth and stove. If in doubt consult a structural engineer for advice before proceeding.
SITE REQUIREMENTS WALLS NEXT TO A HEARTH Thickness W Solid, non-combustible material e.g.
PRE-INSTALLATION CHECKS It is important that adequate ventilation exists and the flue or chimney system that is to be used is in good working condition. Products of combustion that enter the room could be a serious health risk. Before installation of this product we recommend that the flue or chimney system and ventilation requirements are inspected by a competent person, and passed as suitable for use with the appliance to be fitted. In particular the following should be checked: 1.
Sheraton PRE-INSTALLATION CHECKS Model Sheraton - 7016 / 7017 / 7027 Without liner system round (diameter) Flue/Chimney Size Without liner system (square) minimum dimension With liner or factory made system (diameter) installed in accordance with manufacturers instructions Flue/Chimney minimum height* mm 150 inch 6 mm 135 inch 51/2 mm 150 inch 6 m 4.
INSTALLATION INSTRUCTIONS Because each installation is unique to the property, it is not possible to give full details to suit every setting. However, the installation should comply with the requirements of the Building Regulations and be made using "best practice" construction methods. Remember that many fireplace openings will have a supporting lintel. Do not remove this without making provision to support the remaining structure of the building.
INSTALLATION INSTRUCTIONS 1.9 Connect a straight piece of flue pipe by inserting it into the flue spigot and seal using fire cement and secure with a suitable self tapping screw. 4. FITTING & REMOVAL OF the baffle To chimney connection as detailed in building regulations Elbow with access cover 600mm min 1000mm max unsupported Size Stovax Part No. 6" 4612 4.1 To maintain safe and efficient combustion the stove is fitted with a baffle in the top of the firebox. 4.
COMMISSIONING 1.1 Replace the firebricks, baffle, and log retainer. 1.2 Check the door alignment and catch operation, adjust if required. 1.3 Inspect the door seals for damage and check the operation of the air controls. 1.4 Carry out a final smoke draw test, by first warming the flue with a blowlamp, or similar, for about 10 minutes. Then place a smoke pellet on the centre of the grate, with the air controls open, and close the door.
MAINTENANCE and SERVICING See chart on page 19 for common spare parts refered to in this section. For a complete list of spare parts and accessories contact your Stovax dealer for the Stovax Fireplace, Stove & Hearth Accessories brochure or call 01392 474011 on how to remove the baffles and firebricks. Care should be taken when handling firebricks, as they can become fragile after a period of use. 1. GENERAL CLEANING Before any cleaning is carried out, allow stove to cool thoroughly to avoid risk of burns.
MAINTENANCE and SERVICING This is a list of the maintenance products you may need to use Task Product name Stove glass cleaner 500ml (wipe on) 4111 Stove glass cleaner (spray on) 4103 Protector (15 sachets) 7002 Protector (1kg tub) 7025 Fire Cement (500g tub) 2020 Fire Cement (600g cartridge) 2021 Thermolac Black (400ml aerosol) 2019 Thermolac Black (200ml brush-on) 2057 Cleaning matt black stoves Colloidal black (85ml) 7000 Protecting your hands Heat resistant leather gloves 4008 Gla
MAINTENANCE and SERVICING Seal 14mm Fixing Screw (x10) Glass (x2) Seal 10mm x 2mm Glass Seal (3mm) Fixing Clip (x4) Door (x2) 8.3 Using a screwdriver remove the glass clip fixing screws. The old glass can then be lifted clear of the door. (Note how the 3mm sealing rope is placed between the glass and the door.) Remember to dispose of the old glass safely. 8.4 Clean and re-paint the rear of the door if required.
BASIC SPARE PARTS LIST 21
BASIC SPARE PARTS LIST Part No. Descritpion Casting No. Part No. Descritpion Casting No.
CARE OF YOUR STOVE To help you get the best performance from your Stove and keep it in good condition, inside and out, Stovax offers a wide range of cleaning and maintenance products as well as a host of accessories to help you enjoy the maximum pleasure from your stove.
SERVICE RECORDS 1ST SERVICE 2ND SERVICE Date of Service:........................................................................... Date of Service:........................................................................... Next Service Due:....................................................................... Next Service Due:....................................................................... Signed:........................................................................................
Stovax Ltd, Falcon Road, Sowton Industrial Estate, Exeter, Devon, England EX2 7LF Tel: (01392) 474011 Fax: (01392) 219932 E-mail: info@stovax.com www.stovax.