
Instructions / Assembly

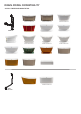
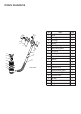


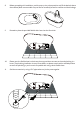
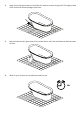
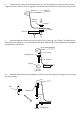
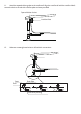
Table Of Contents
- Manual-Tubs-COVER
- Manual-Tubs-1-Warranty
- Manual-Tubs-2-Prior to Installing, Tools Required, & Hardware list
- Manual-Tubs-3-Drain Model Compatibility
- Manual-Tubs-4-Drain Diagrams
- Manual-Tubs-4-Drain Diagrams2
- Manual-Tubs-5-Bathtub Installation
- Manual-Tubs-6-Bathtub Installation
- Manual-Tubs-7-Bathtub Installation
- Manual-Tubs-8-Bathtub Installation
- Manual-Tubs-9-Bathtub Installation drain - Copy
8. Take the strainer, place silicone sealant around it, and then place it into the drain hole ensuring
a tight connection with the drain ell & gasket. Use silicone sealant. DO NOT use plumbers putty to seal.
9. Insert the tailpiece into the trap inlet using the O-ring, coupling nut, & flange. The tailpiece may
need to be cut for proper fit. 1''-2'' of the tail piece shoudl fit inside the trap. Slip the flange over the tailpiece
and slide down to the floor.
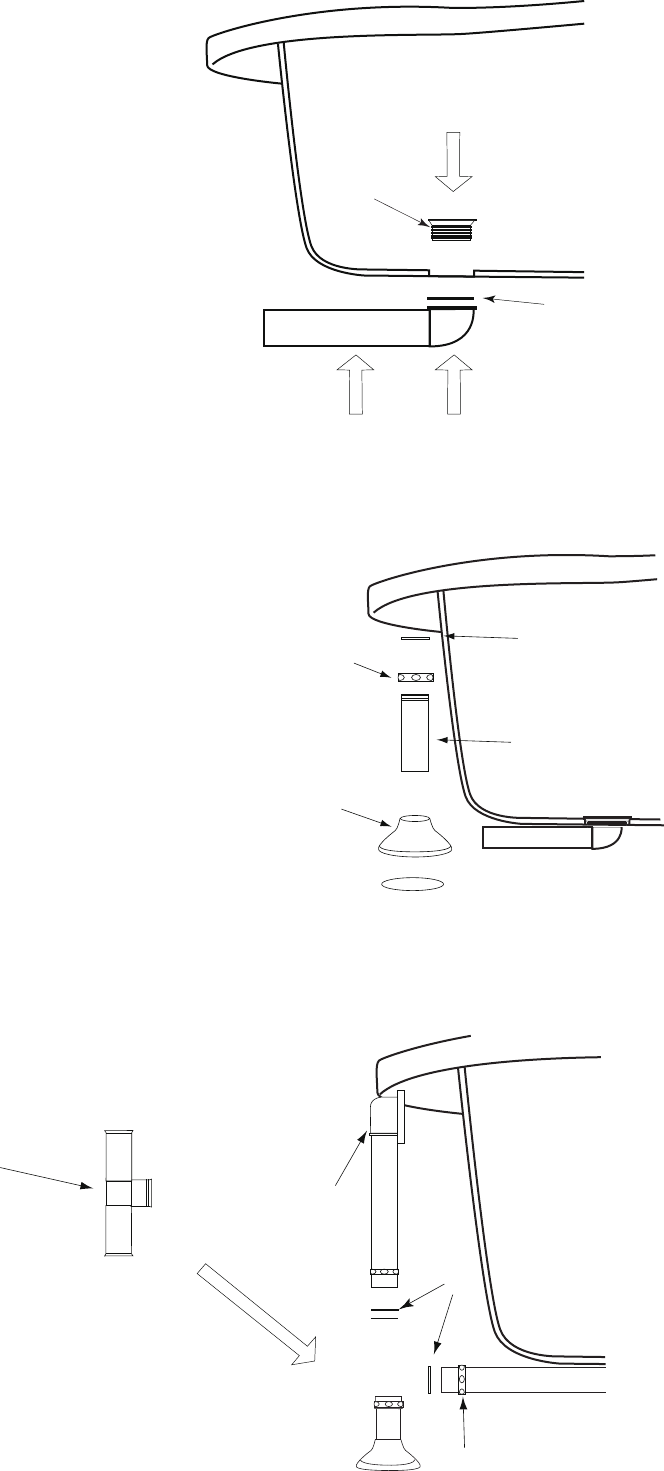
10. Assemble the tee section to the tailpiece, overflow, & drain ell using the coupling nuts and O-rings
that are provided.
Silicone
Sealant
Strainer
O Ring
Coupling Nut
Flange
Trap Inlet
O Ring
Overow Ell
Tee
Coupling Nut
Tailpiece
Gasket
Drain Ell