
Instructions / Assembly

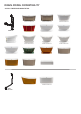
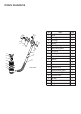


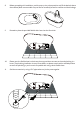
Table Of Contents
- Manual-Tubs-COVER
- Manual-Tubs-1-Warranty
- Manual-Tubs-2-Prior to Installing, Tools Required, & Hardware list
- Manual-Tubs-3-Drain Model Compatibility
- Manual-Tubs-4-Drain Diagrams
- Manual-Tubs-4-Drain Diagrams2
- Manual-Tubs-5-Bathtub Installation
- Manual-Tubs-6-Bathtub Installation
- Manual-Tubs-7-Bathtub Installation
- Manual-Tubs-8-Bathtub Installation
- Manual-Tubs-9-Bathtub Installation drain - Copy
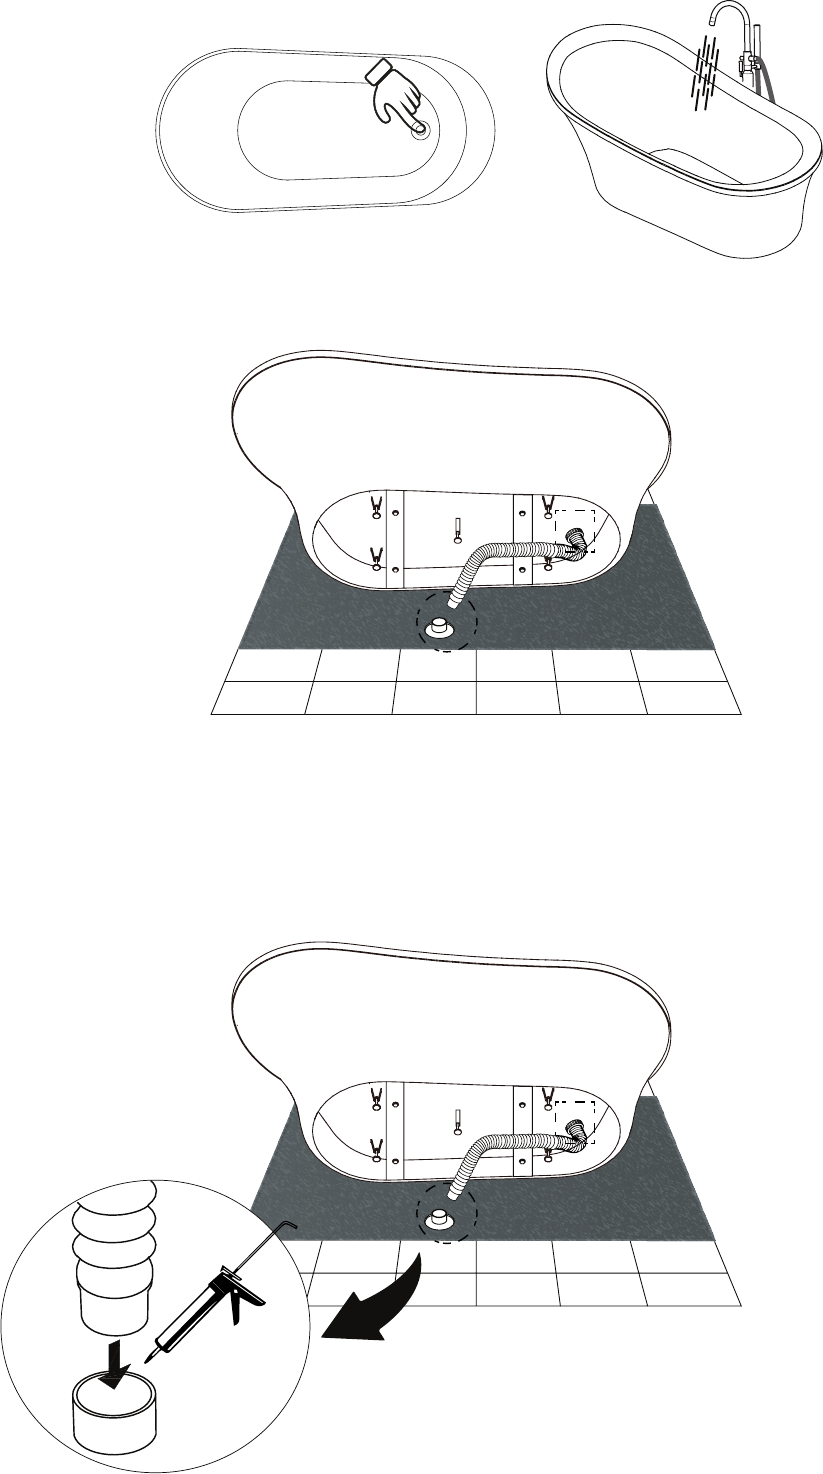
8. Before proceeding with installation, push the pop up into a close position and fill the bathtub above
the overflow [Note: some models may not have an overflow] to test for overflow and drain leakage.
9. Proceed to place the provided flexible drain hose into the floor drain.
10. Please note, the flexible hose is a basic way that we provide to connect to the end plumbing in a
home. The plumbing installation in every home differs, so please consult with a certified plumber
to see if the plumbing in your home is compatible with using a basic flexible hose.
11. Seal the connection by using a PVC pipe sealant to join the parts together.