User Manual Remote control and programming unit RCC-02 and RCC-03 for the Xtender Studer Innotec Rue des Casernes 57 CH - 1950 Sion Tel: +41 (0)27 205 60 80 Fax: +41 (0)27 205 60 88 E-mail: info@studer-innotec.com Web: www.studer-innotec.com V 2.
Studer Innotec Reference This document applies to versions of firmware V1.2.0 or higher of the remote control. Copyright Copyright © Studer Innotec.
RCC Table of contents Foreword...............................................................................................................................................................7 Conventions .....................................................................................................................................................7 Product recycling ..........................................................................................................................................
Studer Innotec Stop Inverter overvoltage ............................................................................................................................25 Stop Overtemperature .................................................................................................................................25 Stop Excessive battery voltage ripple ........................................................................................................
RCC Output voltage {1286}...........................................................................................................................36 Level of battery under-voltage at no load {1108} ............................................................................37 Acoustic alarm of the battery under-voltage {1196} .......................................................................37 Duration of the acoustic alarm {1469}.......................................................................
Studer Innotec général use : Inverter, Charger with grid ...................................................................................................46 Use of a limited power source.....................................................................................................................46 Use to increase the power on an existing installation .............................................................................47 Load shedding of the second priority loads ...........................
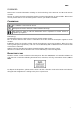
RCC FOREWORD This manual contains information relating to the functioning of the RCC-02 and RCC-03 remote controls. The use of certain functions sometimes requires increased knowledge in various fields. This manual cannot provide this. In case of doubt, please contact your reseller or installer. CONVENTIONS This symbol is used to indicate the presence of a dangerous voltage that is sufficient to constitute a risk of electric shock. This symbol is used to indicate a risk of material damage.
Studer Innotec STUDER INNOTEC CONTACT DETAILS Studer Innotec Rue des Casernes 57 CH – 1950 Sion Tel. +41 (0)27 205 60 80 Fax. +41 (0)27 205 60 88 Customer service: After-sales service: Technical support: info@studer-innotec.com sales@studer-innotec.com support@studer-innotec.com Website: www.studer-innotec.
RCC WARNINGS AND CAUTION WARRANTY Studer Innotec issues on this product, which they have manufactured and offered for sale, a two year warranty against any material defect or manufacturing fault from the date of despatch by an agreed Studer Innotec distributor. Any warranty claim will be refused if it is not sent back to the point of sale, or another place indicated by Studer Innotec, in appropriate packaging and accompanied by a copy of the dated proof of purchase.
Studer Innotec Updating must be done in the full awareness of the cause and is always the responsibility of the customer. Partial updates may cause ruptures in the compatibility or in its stochastic operation.
RCC INTRODUCTION Congratulations! The purchase of an RCC remote control offers you unlimited access to the various functions of the devices in the Xtender series. Numerous configurations that can now be accessed allow you to optimise the operation of the installation. Despite all these options, the Xtender works on a simple basis. Different figure scenarios as well as associated configurations are presented at the end of this manual.
Studer Innotec CONNECTION The RCC-02 remote control must be firmly fastened using 3 screws on a flat support. The remote control RCC-03 is meant to be integrated. It must be mounted by means of 4 screws (not supplied) on a flat place without any mechanical constraints to the front plate. Once the RCC remote control is fastened it can be connected to the inverter using the authorised cable only.
RCC DIMENSIONS RCC-02 RCC-03 13
Studer Innotec QUICK START GUIDE The remote control RCC gives you access to a many settings possibilities. However, in most cases the setting of two parameters is required for the perfect running of your installation. ADJUSTMENT OF THE LANGUAGE To begin, set your remote control RCC for a display of the information in English.
RCC You can now adapt your installation to the source which it is connected to. Max. current of the AC source (power-sharing) {1107}. In case of using the Xtender on a public grid, it is actually the value of the circuit breaker on the source side (fuse or breaker). In a building, this value lies generally between 8 and 16A. In the case of a shorepower or of a camping terminal, it lies between 2 and 6A.
Studer Innotec ACTIVATION OF THE FUNCTION SMART-BOOST If your AC-In source is limited in power, the Xtender can work as a support and add the missing power for your loads.
RCC BASIC DISPLAYS When the remote control is connected to an Xtender, it is possible to access different display menus divided into distinct categories. Real time information displays on the operating mode of the installation The history of events occurring in the installation Adjustment of RCC remote control options Adjustment of configurations on the Xtender(s) Information on the system To go from one display to the other, use the keys UP and DOWN on the RCC remote control.
Studer Innotec ACTIVATING AND DEACTIVATING THE COMBI XTENDER When one of the displays is visible, it is possible to activate or deactivate the Xtender. To do this, simply press the key ESC. The key request on the screen indicates whether you are going to activate or deactivate the unit. Once the key has been pressed, you must confirm your choice using the key YES. If you do not want the action to be carried out, it can be cancelled by pressing the NO key.
RCC ADJUSTMENT OF THE RCC REMOTE CONTROL This screen gives you access to the remote control basic settings. From one of the basic menu items, use the keys UP and DOWN until reaching the item “Adjustment of the remote control”, then confirm using the key SET. When the item to be modified appears on the screen, press the key SET to be able to modify it. This value then displays in inverse video. Now use the keys UP and DOWN to modify it.
Studer Innotec Duration of the back-lighting {5009} This configuration allows you to determine after how much time of inactivity the back-lighting will switch off. Red back-lighting if the Xtender is OFF and if there is a fault {5026} If the Xtender is stopped by a fault (battery undervoltage, overload, etc.) the back-lighting flashes red.
RCC programs. The file is written in a directory called STATS and in a subdirectory which indicates the date of backup. Backup of remote control configurations {5015} This function writes useful configurations for the operation of the remote control on to the SD card. You can use this function to do a backup of the remote control parameters or to visualize on a computer the values that you have selected. The file in CSV format is written in a directory called CSVFILES\« FID »\DATE.
Studer Innotec INFORMATION ON THE OPERATING MODE OF THE INSTALLATION There are two different views for displaying information on the system : A simplified and a configurable display. When one of these two displays is visible, it is possible to activate or deactivate the system. For further information, please refer to the paragraph on activating and deactivating the combi Xtender.
RCC The following information is available: With regard to the grid input • AC In input voltage • AC In input current • AC In input power • Input frequency • Energy from AC-In of the previous day • Energy from AC-In of the current day With regard to the grid output • Output voltage • Output current • Output power • Output frequency • Consumers energy of the previous day • Consumers energy of the of the current day With regard to the battery • Battery voltage • Actual charge current of the batteries • Progra
Studer Innotec EVENT HISTORY This screen allows you to view the various events that have occurred in the installation. The events that occur in your installation are displayed on the remote control screen. The events are classified within two categories: • The events that may have serious consequences are displayed up to the moment where the user confirms that he has taken note of them by pressing on an RCC remote control key.
RCC ERROR INCORRECT INPUT FREQUENCY The voltage at AC IN does not have a frequency included in the admissible range for the Xtender. Solution: When operating on a generator, check its speed. If you are not equiped to measure the generator frequency, measure its voltage with no load. Indeed, if the voltage is correct, the frequency is generally correct as well.
Studer Innotec The voltage ripple on the batteries may be caused by their ageing. In this case, lower the charge current. MESSAGE POWER SHARING EXCEEDED; TRANSFER PROHIBITED The power output of the consumers exceeds the one specified for the source, and the transfer relay cannot be activated. The Xtender operates in inverter mode. Solution: Check that the configuration of the maximum current for the source corresponds to the maximum current of the source connected at AC In.
RCC ADJUSTMENT OF THE COMBI XTENDER GENERAL The Xtender inverter/charger has been designed to ensure that all basic functions of an energy management system work completely independently. In its original version, no adjustment is usually required. Nevertheless, in certain installation conditions, it may be necessary to adjust some operating configurations. This is why the RCC remote control gives access to the adjustment of many configurations and within a range largely exceeding the usual values.
Studer Innotec According to the user level selected, it is possible to access several hundred configurations. For this reason, each configuration has a unique ID displayed top right. In the event of questions on the subject of a configuration, ensure that you have this number at hand. When you modify a configuration, a star is displayed to the left of the value if it corresponds to the factory-set value. The various configurations can be adjusted within a large range.
RCC Note, that if the smart boost function is activated, it is possible to discharge the battery even if the inverter function is locked. Authorised charger {1125} The battery charger function is either activated or not. If this function is not authorised, it is necessary to charge the batteries using a source of energy not connected to the Xtender. Smart boost authorised {1126} The function Smart-Boost is deactivated by default.
Studer Innotec Number of critical battery under-voltages before final stop {1305} and Leadtime to counting the critical battery under-voltages allowed before final stop {1405} The critical battery under-voltages can also be automatically acknowledged in case of undervoltage disappearance. Like for the under-voltages (see previous paragraph) you can adjust the number of restarts of the inverter and Smart-boost functions once the fault disappears.
RCC The bulk charge and floating phases cannot be deactivated. If the conditions for starting a new battery charge cycle have come together, the bulk charge phase starts immediately. The battery cycle fits a large number of batteries by default, irrespective of whether they are gel batteries or not.
Studer Innotec 32
RCC Charge current {1138} Use this value in order to adapt the charge current to the battery. With this configuration, the maximum current to be used for charging your battery is adjusted. The current appropriate for the battery can be found in its technical data. The value set by this configuration is used during the whole bulk charge phase. Use this setting to adapt the charge current only with regard to the battery.
Studer Innotec Absorption phase {1451} During this phase, the battery accumulates the final percentages of the energy it is storing. This phase is carried out with a constant voltage. Authorised absorption {1155} This configuration determines whether or not the absorption phase is used. If this phase is deactivated, the charger goes directly to the authorised phase that follows it. Absorption voltage {1156} Use this configuration to adjust the voltage that is used for the absorption phase.
RCC Equalization before absorption phase {1291} This configuration determines in the charge cycle, in which equalization will be activated, if the equalization is carried out after or before the absorption phase. The equalization phase is carried out before the absorption phase by default. A. Equalization B. Absorption C. Floating Equalization current {1290} The equalization phase can be carried out with a limited current, which can be adjusted using this configuration.
Studer Innotec End of equalization activated by the current {1168} The equalization phase can be interrupted if the charge current of the battery goes under a certain threshold. This can be used to limit the operating period of a genset while keeping an acceptable battery charge. During the equalization phase, the charge current decreases progressively in a natural way.
RCC Level of battery under-voltage at no load {1108} Allows adjustment of the battery’s low voltage level at which the inverter and smart boost functions are deactivated. This adjustment is applied in the case of a zero charge and is automatically adapted with regard to the power required from the batteries. This configuration is a factory setting for lead-acid batteries. Poor adjustment of this value leads to early ageing of the batteries due to deep discharges. A. Battery voltage B.
Studer Innotec Delay before passing to inverter {1198} When the input voltage is below the transfer voltage to the inverter, the transfer relay does not open immediately. With this configuration, the period during which the transfer remains drawn can be specified. After this duration, the transfer relay is opened and the inverter function is activated (if the function has not been blocked or deactivated).
RCC The auxiliary contacts respond to various signal types presented graphically below. The following types of basic events may activate the contacts: • Simple event • Scheduled event • Level In the following description, each parameter has two reference numbers. The reference on the left relates to auxiliary contact 1 and the reference on the right to auxiliary contact 2 ({reference of the auxiliary contact 1} {reference of the auxiliary contact2}).
Studer Innotec Limit the time of activation {1512} {1513} Maximum duration of activation {1514} {1515} When the conditions are met, either one or two relays are activated permanently. If you wish that the activation duration is limited in time, even if the conditions are met, you can activate this function. Once the relay is activated, a countdown runs according to the duration you have selected. Once this countdown is completed the relay is released, even if the conditions are still there.
RCC Inverter or smart boost overload {1228} {1336} Activates the contact in the event of an error due to excessive power in the inverter or the Smart Boost function. In the event that the inverter disconnects due to excess power and it is attempting to restart, the contact is not activated until the end of the attempts. Overtemperature {1229} {1337} Activates the contact in the event of overtemperature in the electronics or the transformer.
Studer Innotec The auxiliary contact will only be activated after the battery exceeds again a certain voltage value and also after a duration, both independently of the activation parameters. This voltage and this duration are programmable too.
RCC o Time of end of activation {1273} {1382} • Program 2 {1274} {1383} o Days of the week {1275} {1384} o Time of start of activation {1276} {1385} o Time of end of activation {1277} {1386} • Program 3 {1278} {1387} o Days of the week {1279} {1388} o Time of start of activation {1280} {1389} o Time of end of activation {1281} {1390} Extended functions {1489} Generator startup {1490} The two contacts may be combined in order to automatically start up a generator equiped with an electric starter.
Studer Innotec INFORMATION ON THE SYSTEM The system information allows you to check the versions of the various elements of your installation. REMOTE CONTROLS You will receive information on the hardware and software versions for each remote control. Furthermore, you have access to its unique ID number. This unique number is marked FID followed by its ID.
RCC UPDATES The RCC remote control program as well as the code in the inverters/chargers of the Xtender series can be updated in order to integrate new features. For the RCC remote control it is also possible to implement new display languages (up to a maximum of 4 on each RCC remote control). You may obtain information about the availability of updates or additional languages from your installer or consult the website: www.studerinnotec.com.
Studer Innotec APPLICATION EXAMPLES The examples below illustrate some implementation options for current installations. Useful configurations for these situations are also given. These are common and non-obligatory configurations. For more details on each configuration shown, please refer to the complete description given above in this manual. GÉNÉRAL USE : INVERTER, CHARGER WITH GRID Description: In this configuration, the Xtender is connected to a grid with high power output.
RCC USE TO INCREASE THE POWER ON AN EXISTING INSTALLATION Description: The availability of an inverter or a inverter/charger allows its power to be extended with an Xtender connected in cascade. The maximum power of the first inverter is limited by the maximum current from the transfer relay of the Xtender. Associated current configurations: • Maximum current of the AC source {1107} Adjust this configuration in relation to the maximum current that can supply the old inverter.
Studer Innotec ANNEXES ANNEXE 1 : LIST OF CONFIGURATION INTERDEPENDENCIES N° Configuration N° Minimum limit by N° Maximum limit by 1108 Undervoltage of the empty battery 1109 Undervoltage of the charged battery 1110 Reactivation voltage after battery undervoltage 1109 Undervoltage of the charged battery 1108 Undervoltage of the empty battery 1110 Reactivation voltage after battery undervoltage 1108 Undervoltage of the empty battery 1113 Activation temperature for buzzer 1114 Deactiv
RCC 1308 Temperature at which the charge current begins to reduce 1115 Maximum operating temperature 1140 Battery maintenance voltage (floating) 1156 Battery absorption voltage 1152 Startup voltage of the timer before alarm 1156 Battery absorption voltage 1156 Battery absorption voltage 1140 Battery maintenance voltage (floating) 1164 Battery equalization voltage 1156 Battery absorption voltage 1172 Reduced maintenance voltage 1140 “Battery maintenance voltage (floating)” 1174 Perio
Studer Innotec NOTES 50
RCC